When it comes to closet organization, belts often get overlooked.
They are often tucked into drawers, left on random hooks, or squeezed into whatever small space is available. I used to do the same thing until I decided to properly organize my closet. After trying a few different methods, I found several simple ways to keep belts neat, accessible, and protected.
Here are practical tips and storage ideas to help you organize belts in your closet while keeping them in excellent condition.
Understanding Your Belt Collection
Before organizing your belts, take a moment to understand what you have.
Look through your collection and consider how many belts you own, what materials they are made from, and how often you wear each one. You may have leather belts, canvas belts, casual styles, formal options, or special-occasion pieces.
For example, canvas belts are flexible and easy to store. They can be rolled, hung, or folded without much risk of damage.
More expensive or special-occasion belts may need additional protection. A belt storage box can help keep them safe, especially if they have delicate buckles or are made from sensitive materials.
Knowing the size and variety of your collection makes it much easier to choose a storage method that works for your closet.
Organize Belts in Closet: 8 Best Methods
1. Drawer Dividers: A Good Option for Small Collections
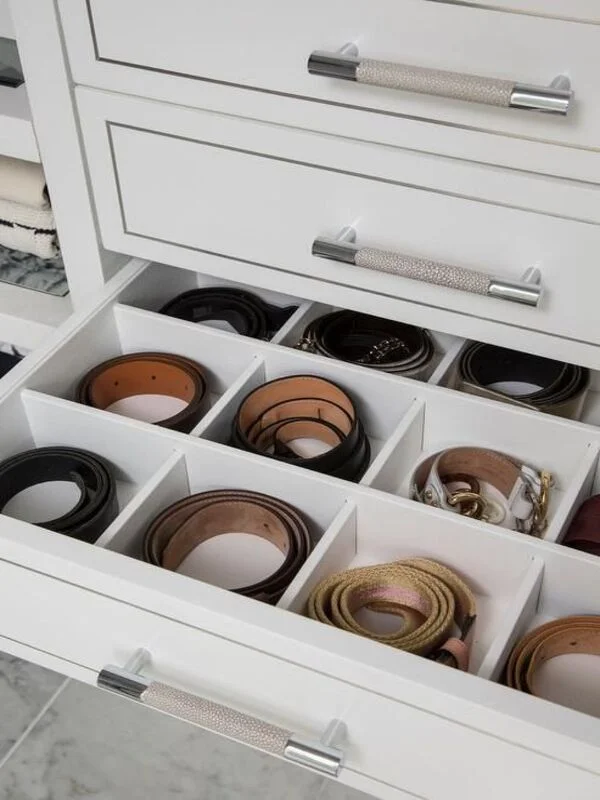
If you only have a few belts, drawer dividers can be an excellent way to keep them organized.
A drawer with individual sections allows you to separate each belt, making them easier to find and preventing them from becoming tangled.
If you like the Marie Kondo approach, try rolling your belts before placing them inside the drawer. This can save space and make it easier to see your options.
2. Belt Hangers and Organizers
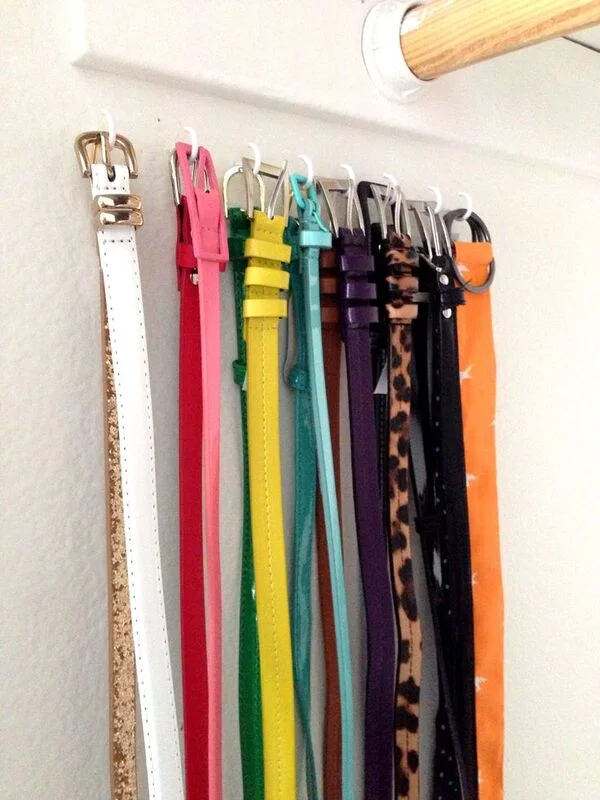
If you want your belts to stay visible and easy to reach, belt hangers are a great choice.
You can hang belts from a closet rod or use hooks on the back of a closet door. Belt ring hangers and sliding belt racks are also useful if you have a larger collection.
Keeping belts visible makes it easier to choose the right one when putting together an outfit.
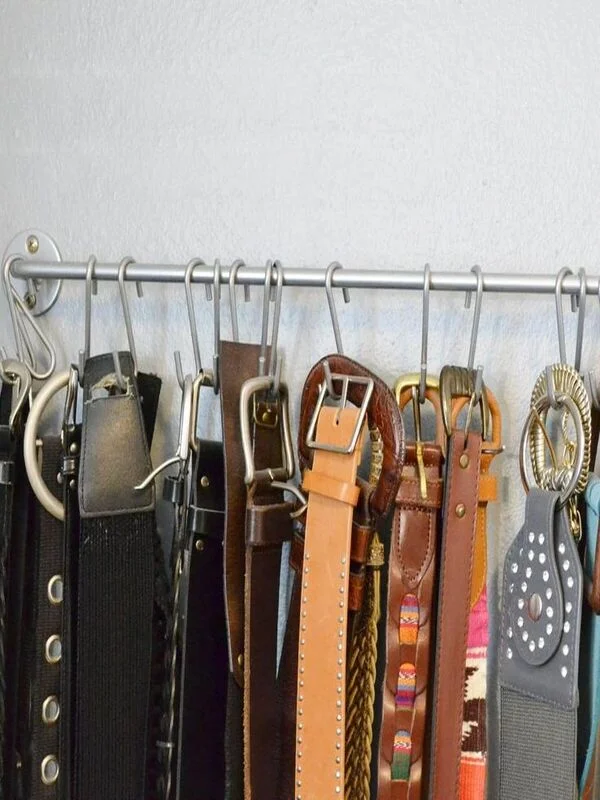
3. Closet Wall for Maximizing Storage Space
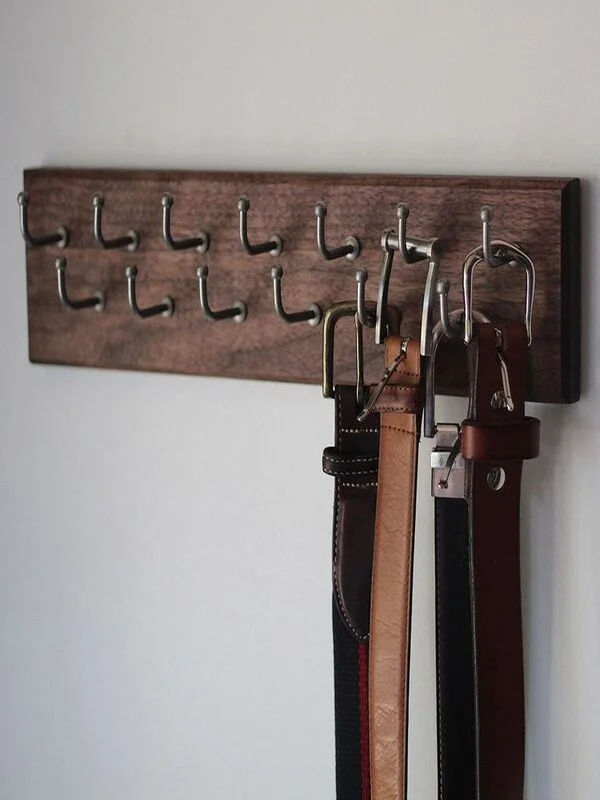
An unused closet wall can become valuable storage space for your belts.
Consider installing a small piece of wood with hooks or a metal bar designed for hanging accessories. This gives your belts a dedicated place while making use of an area that might otherwise remain empty.
This option works especially well if you have a large belt collection and enough wall space inside your closet.
4. Pull-Out Belt Racks or Drawers
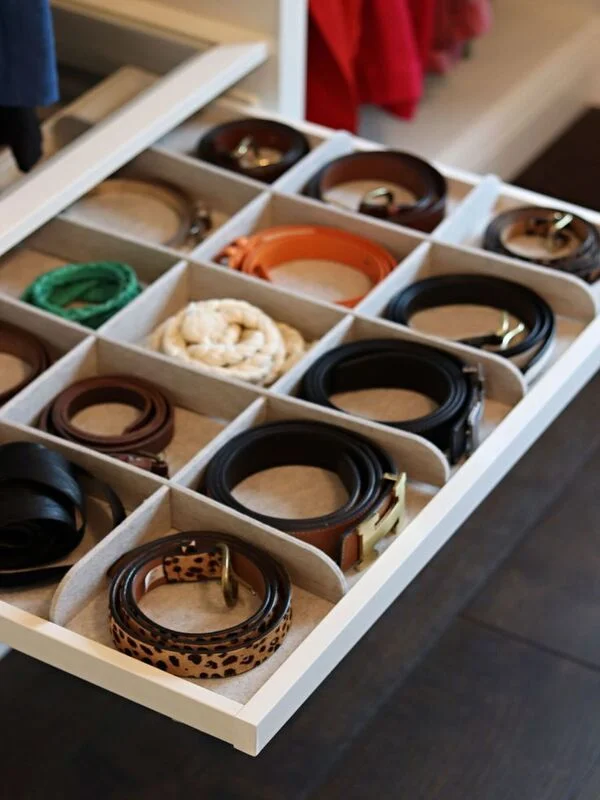
For a more built-in and polished closet setup, consider pull-out belt racks or drawers.
These storage options provide excellent visibility and make it easy to access your entire collection. They can be especially useful in larger closets where you want every accessory to have a dedicated location.
Pull-out racks can also help keep belts separated instead of stacking them on top of one another.
5. Shower Curtain Rings and DIY Solutions
For an affordable and creative option, use shower curtain rings with a hanger.
Simply attach the rings to a sturdy hanger and use them to hold lightweight belts. This DIY method takes up very little room and can also work for scarves and other small accessories.
It is a useful choice if you enjoy simple storage projects and want to make use of items you already have at home.
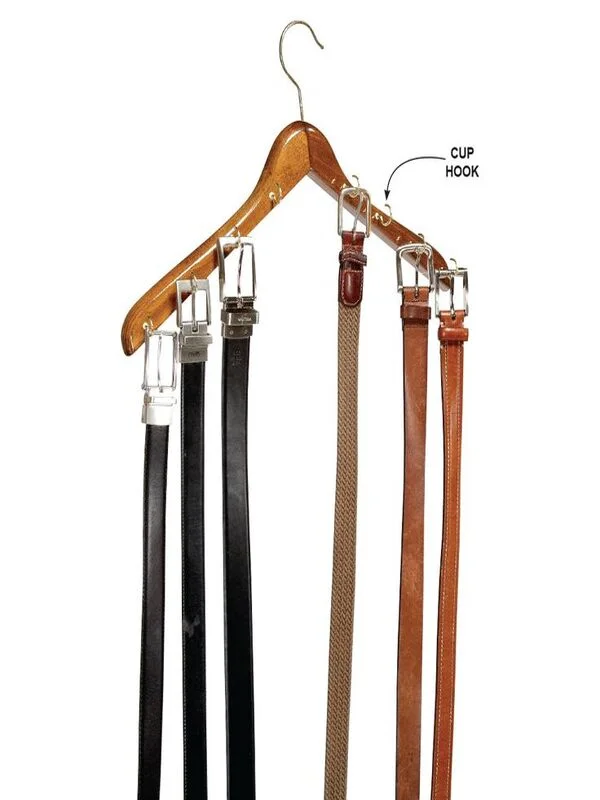
6. Hanger Cup Hooks
In a small closet, every inch of storage space matters.
You can use shallow shelves, the back of a closet door, or a small hanging organizer to create additional storage. Another simple option is attaching cup hooks to a hanger and using them to hold your belts.
This method requires very little space and can be especially helpful when you do not have room for a full-size belt rack.
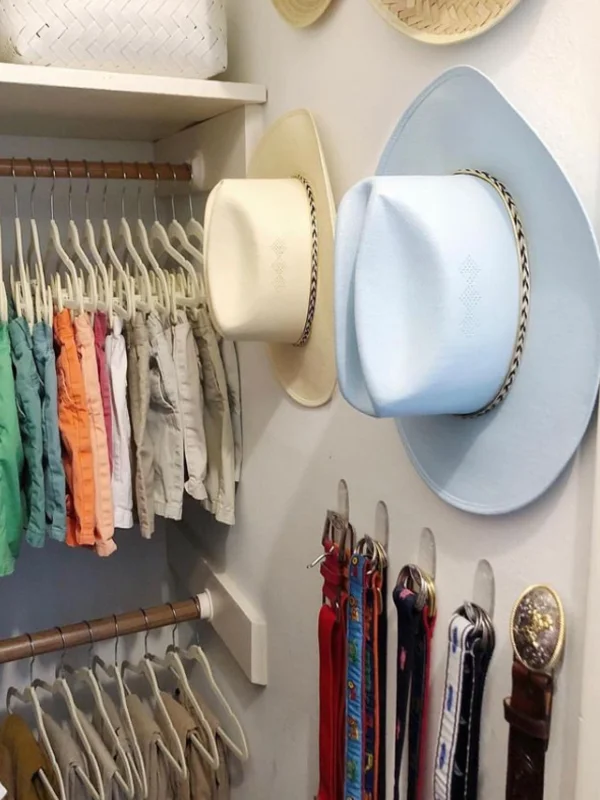
7. Command Hooks for a Temporary Solution
If you do not want to drill holes into your closet, command hooks can be a convenient alternative.
They are useful for temporary storage and allow you to test a particular arrangement before choosing a permanent solution.
You can place them on a closet wall or door and adjust your setup as your storage needs change.
8. Meat Hooks for Extra Space-Saving
Meat hooks may not sound like the most stylish closet accessory, but they can work surprisingly well for belt storage.
Attach the hooks to your closet rod and use them to hang individual belts. One advantage of this method is that you can use as many hooks as you need.
This approach is also useful for storing scarves, handbags, and other accessories.
Best Tips for Belt Organization
Consider how frequently you wear each belt when deciding where to store it. Keep your favorite and frequently used belts somewhere easy to reach, while occasional-use belts can go in less accessible areas.
Avoid direct sunlight, especially when storing leather belts. Prolonged exposure can cause leather to fade and become dry over time.
Maintain the shape of your belts by rolling them carefully for long-term storage. This can help prevent unnecessary creases and folds.
Label your storage areas if you have a large collection. Simple labels can make it easier to find specific types of belts quickly.
Use different storage methods for different types of belts. For example, casual canvas belts can go in drawer organizers, while formal leather belts may be better suited to dedicated hangers.
Get creative with storage solutions. A simple wooden board with hooks can become both practical and attractive, while shower curtain rings or other household items can provide inexpensive storage.
The Importance of Regular Maintenance
Regular maintenance is important for keeping your belts looking their best.
Clean and condition leather belts when appropriate, and periodically check whether your current storage method still works for your collection. As you buy new belts or change your wardrobe, you may need to adjust your organization system.
Pay particular attention to belt buckles. Large or decorative buckles can become scratched or damaged if they are stored incorrectly.
For expensive or special-occasion belts, consider keeping them flat or placing them inside a belt storage box. This can provide additional protection and reduce unnecessary strain on the belt and buckle.
How Should You Organize Belts in Closet
Whether you own just a few belts or have an extensive collection, there are plenty of ways to keep them organized, accessible, and protected.
Drawer dividers, belt hangers, closet-wall hooks, pull-out racks, and simple DIY solutions can all work depending on your available space and personal preferences.
The best storage method is the one that fits your closet, keeps your belts in good condition, and makes them easy to find when you need them.
With a little organization, belt storage can become a simple part of your closet routine rather than another messy task.
Nothing says effortless style quite like a classic black blazer. Whether you’re a fashion lover or simply looking to refresh your wardrobe, a black blazer is one of the most versatile pieces you can own.
It can instantly bring an outfit together and work for everything from morning meetings to evening plans. You can wear it with a silk skirt, classic jeans, cargo pants, or even comfortable sweats. The possibilities are almost endless.
So, grab your favorite blazer and explore these simple ways to make this timeless piece work for your personal style.
Casual Elegance in Jeans
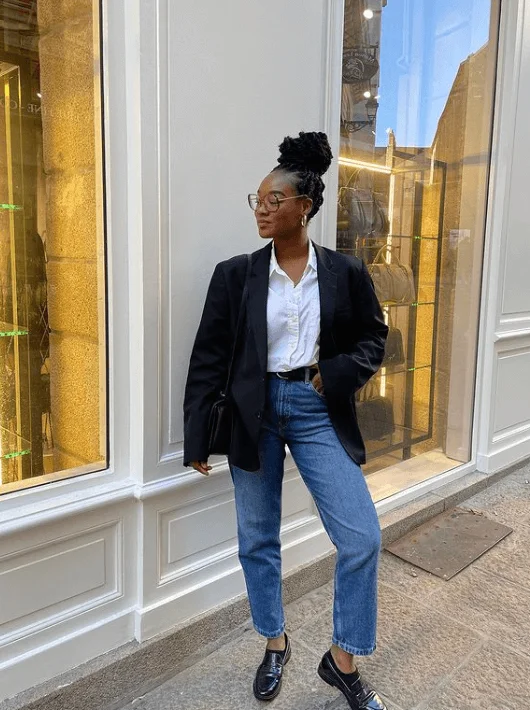
This chic combination is a true closet staple. Pairing a black blazer with a simple white shirt creates an easy outfit that feels polished without looking too formal.
I love how the structured blazer balances the relaxed feel of jeans. For a business casual look, add black loafers, or switch to heels when you’re heading out for a date night.
Dainty jewelry, such as small gold hoops, can add a subtle touch of sophistication without making the outfit feel overdone.
The Black Blazer Reimagined
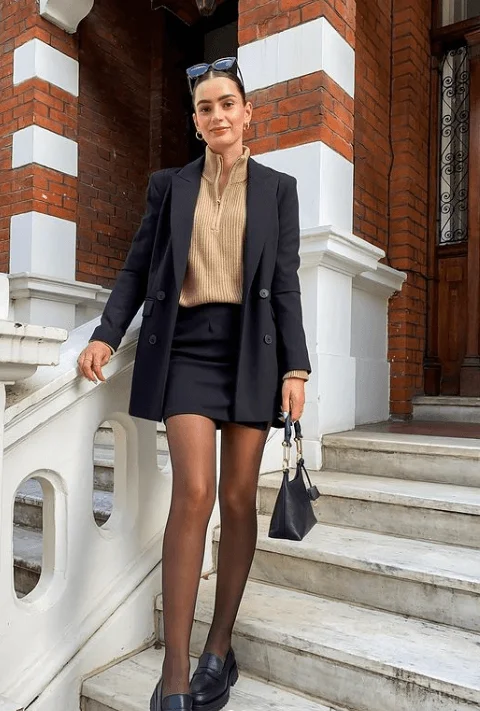
This outfit gives the classic black blazer a fresh and youthful feel. Pairing the blazer with a black mini skirt creates a polished look while still keeping it fun and modern.
A beige turtleneck adds warmth and a soft contrast to the darker pieces. It’s a great choice for a casual coffee outing or a relaxed day in the city.
Finish the outfit with loafers for an easy look that feels comfortable, stylish, and effortless.
A Black Blazer with a Silky Touch
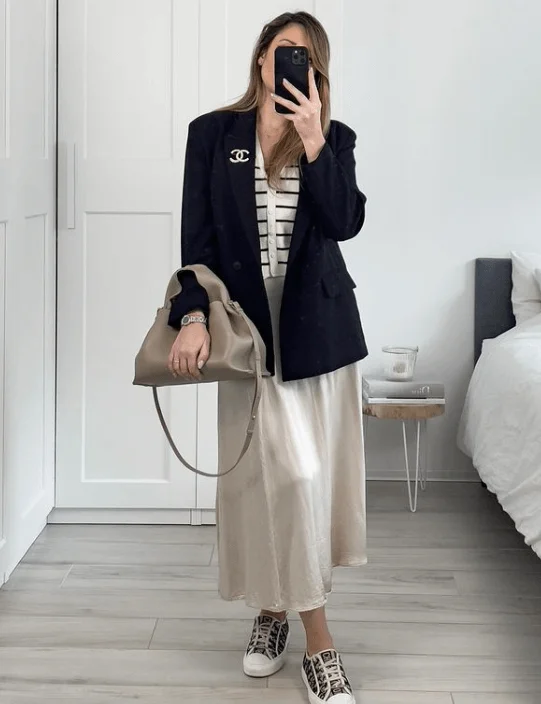
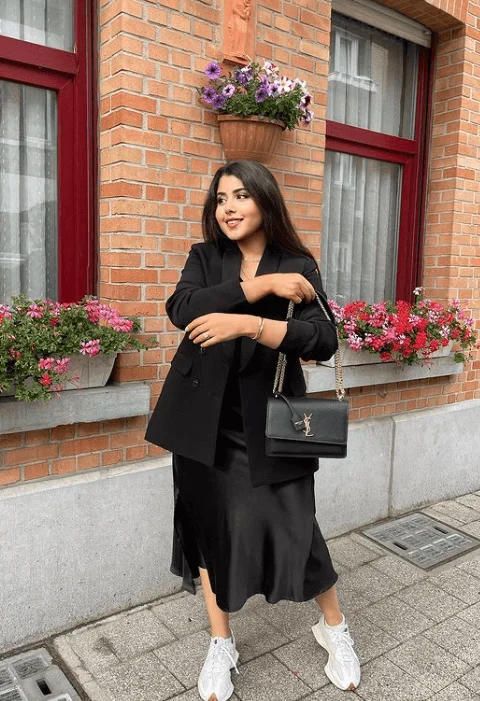
Add a softer and more elegant element to your black blazer outfit with a silky midi skirt. The combination creates a refined look without feeling too formal.
A striped tee underneath keeps the outfit relaxed and gives it a casual feel that works well for a day out or a creative workspace.
For a sporty finish, pair the silk skirt and black blazer with sneakers. This combination shows how easily a blazer can turn simple wardrobe pieces into a stylish outfit.
Blazer Meets Shorts for Sporty Chic
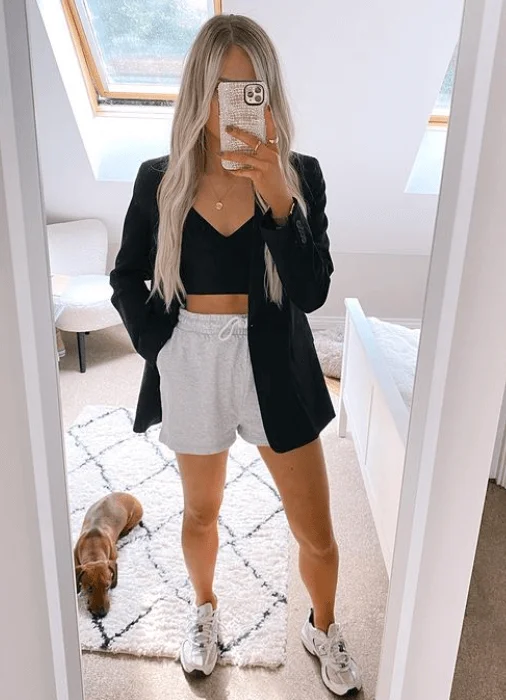
A black blazer can also work beautifully with casual shorts. The structured blazer adds a sophisticated touch to a relaxed combination of grey shorts and a crop top.
This outfit is perfect for a sunny day, casual meet-up, or relaxed outing when you want to look stylish while staying comfortable.
Add trendy sneakers to keep the outfit casual and sporty. It’s another great example of how a black blazer can adapt to different moods and occasions.
Monochrome Magic
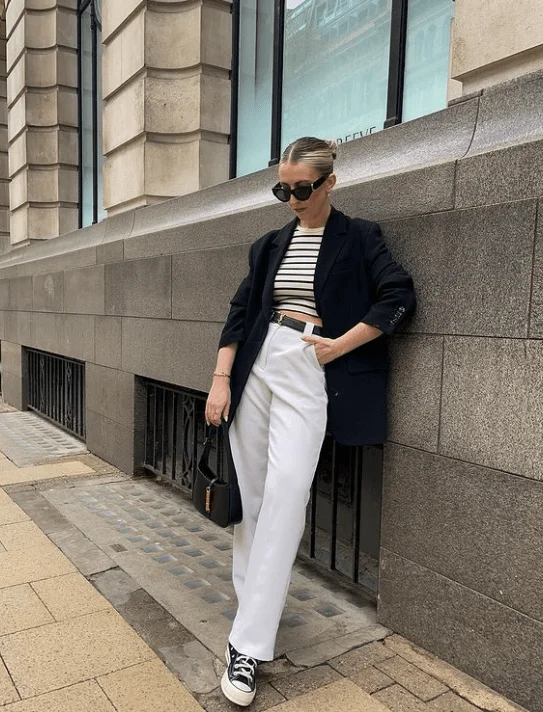
Create a stylish balance between classic and modern by pairing a black blazer with a striped tee and white pants.
The clean contrast gives the outfit a fresh and polished appearance, while the striped top adds visual interest. It’s an easy option for office hours, shopping trips, or walking around the city.
Converse sneakers can bring a relaxed touch to the outfit, making it comfortable enough for a busy day while still looking put together.
Overall, this combination proves that a simple white tee and black blazer can create plenty of styling possibilities.
All-Black for Day-to-Night Style
An all-black outfit can look incredibly sleek and sophisticated. Pair a black blazer with a flowing midi skirt and a simple black top to create a cohesive appearance.
The blazer adds structure to the softer lines of the skirt, while white sneakers give the outfit a modern and relaxed finish.
This look can easily work during the day and transition into an evening outfit. Add a sleek handbag and a few simple accessories to complete the style.
Urban Edge in a Black Blazer
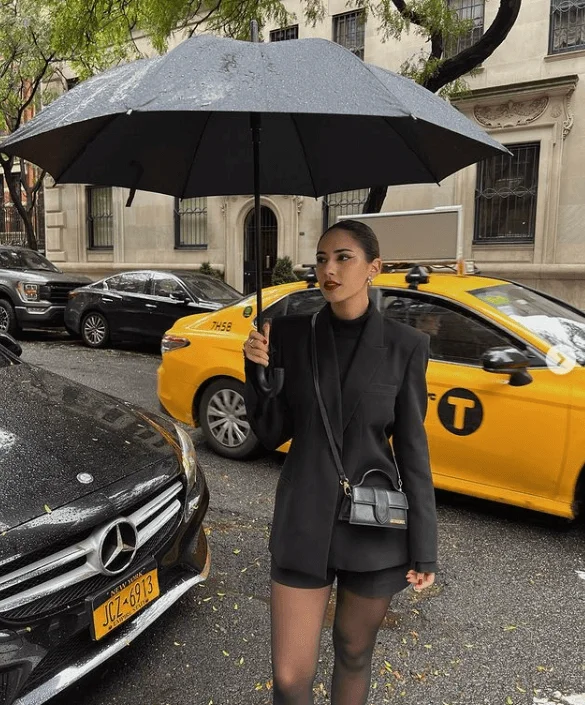
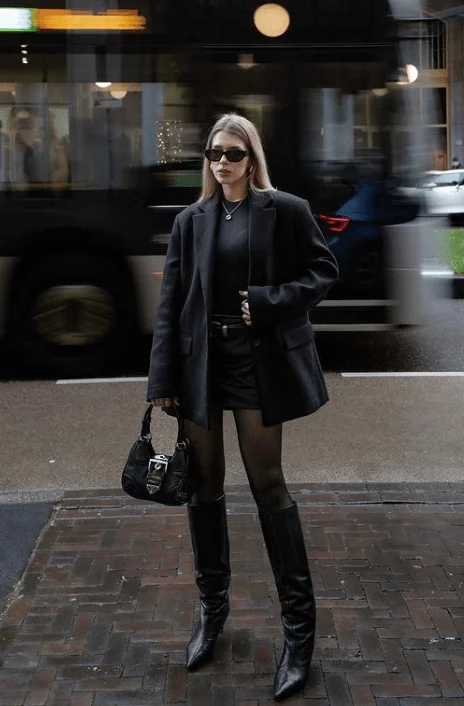
For a more urban take on the classic black blazer, try pairing it with black shorts. The shorts keep the outfit feminine, while the sharp blazer creates a strong and polished silhouette.
A black turtleneck works well underneath when the weather is cooler. Adding black tights and a small handbag can give the outfit an elegant finish that works for both daytime and evening plans.
This combination is another reminder that a black blazer can be styled in countless ways while remaining timeless.
Relaxed Black Blazer Vibes
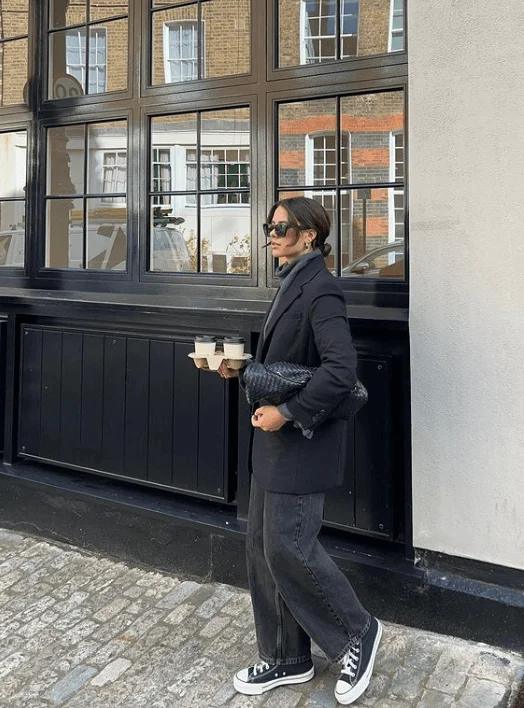
Even casual coffee runs can look more polished with a relaxed black blazer. Pair it with comfortable black jeans for an outfit that feels effortless but still pulled together.
A simple turtleneck provides a warm base and works especially well on cooler mornings. Complete the look with classic black Converse for a comfortable and casual finish.
This is an easy outfit to reach for when you want something simple, practical, and stylish.
The Blazer and Joggers Combo
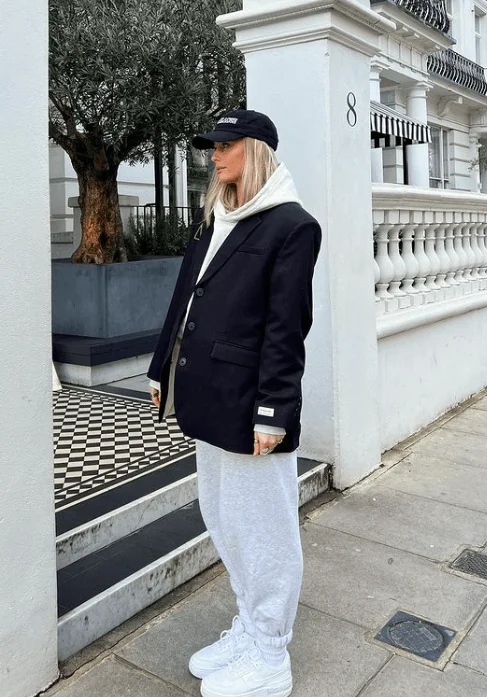
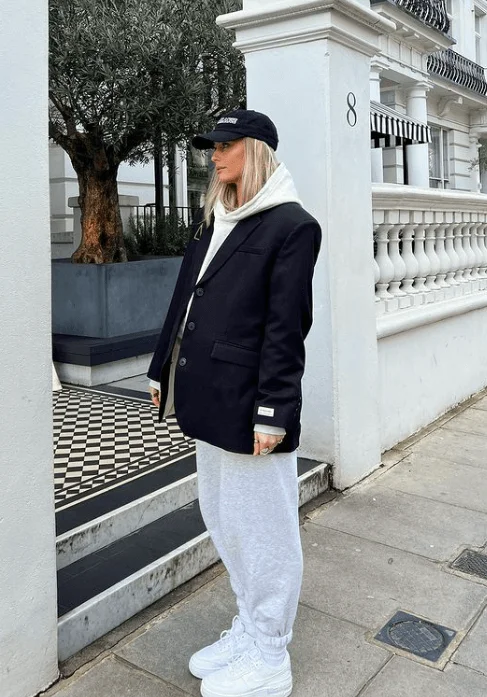
Comfort and style can work together, and this combination proves it. Pair a black blazer with a hoodie and soft grey joggers to create a modern streetwear-inspired outfit.
The tailored blazer contrasts nicely with the relaxed joggers, giving the outfit a fashionable edge without sacrificing comfort.
A baseball cap and white sneakers complete the look. It’s an ideal choice for a laid-back weekend or casual day when you want to feel comfortable while still looking stylish.
Sleek Black on Black
For a sophisticated city-inspired outfit, pair a black blazer with a chic mini skirt. The monochrome combination creates an edgy yet elegant appearance.
Opaque tights and knee-high boots add a stylish finish, while a turtleneck sweater provides warmth and keeps the outfit looking polished.
This is a great option for cooler days, evening plans, or whenever you want a black blazer outfit that feels confident and fashion-forward.
If you always know what to wear to the airport, whether you’re taking a short flight or spending half a day traveling, you deserve some credit. I used to struggle with finding the right balance. Sometimes I looked far too dressed up, and other times I looked like I had just rolled out of bed.
Over time, I learned that the best airport outfits combine comfort, practicality, and effortless style. You want pieces that are easy to move in, comfortable for sitting, and still polished enough to make you feel good when you arrive.
From the security line to the boarding gate, the right outfit can make your entire travel experience feel easier. These airport outfit ideas are designed to help you stay comfortable while still looking chic throughout your journey.
Airport Outfit Essentials
The best airport wardrobe starts with pieces that are comfortable, versatile, and easy to layer. A breathable basic top works well as a foundation, while a cardigan, sweater, or lightweight jacket can be added when the temperature drops.
For bottoms, stretchy leggings, relaxed jeans, wide-leg pants, and soft joggers are excellent choices for long periods of sitting. They give you enough room to move while still looking put together.
Comfortable footwear is another must-have. Sneakers and easy slip-on shoes are especially useful when you have to walk long distances through the terminal or remove your shoes during security.
A lightweight jacket can add polish while also keeping you warm on the plane. A spacious tote or backpack is useful for carrying travel essentials such as your tablet, book, snacks, water bottle, and other small items.
Accessories can make a simple airport outfit feel more complete. Sunglasses, a scarf, pashmina, cap, or hat can add personality while also serving a practical purpose. Don’t forget comfortable socks, especially when you expect to spend several hours on a plane.
Monochrome Airport Outfit
This airport look is a great example of how simple colors can create a stylish outfit. White pants paired with a classic black jacket create a clean contrast that feels modern without being overly complicated.
Comfortable sneakers make the outfit practical for walking around the airport, while a spacious black tote provides plenty of room for travel essentials.
The monochrome color combination gives the entire look a polished feel. It is an excellent choice when you want to look stylish without feeling like you tried too hard.
Laid-Back and Breezy
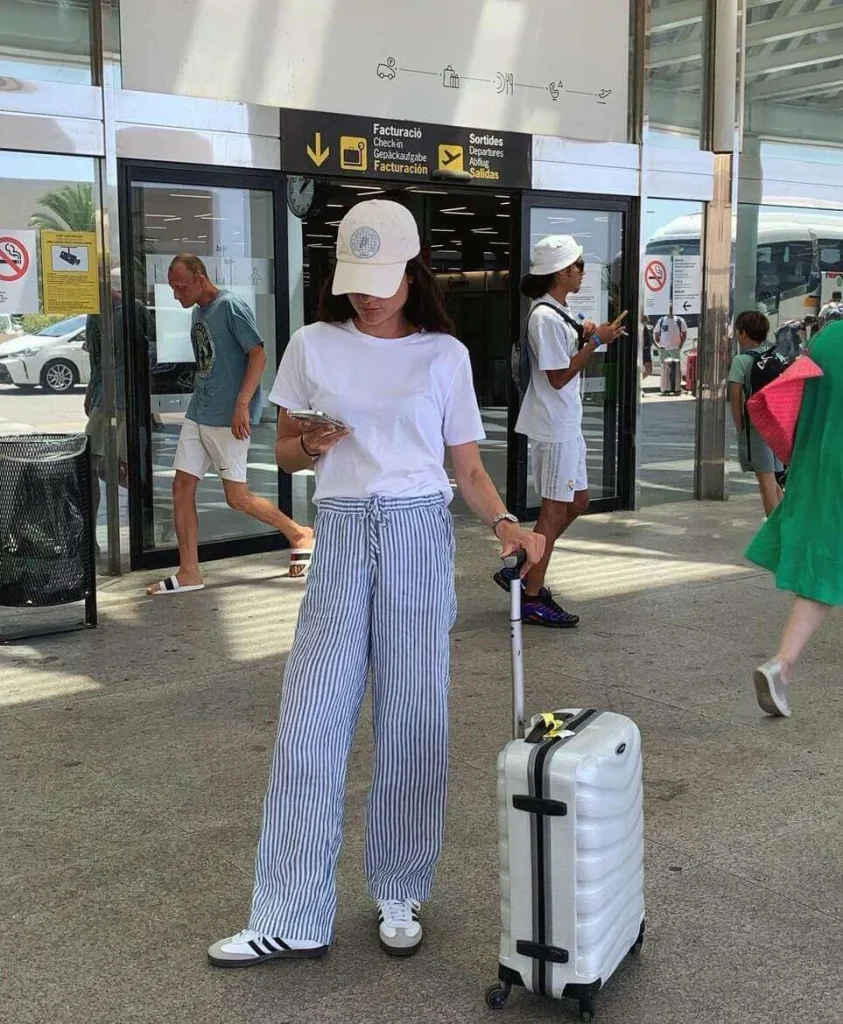
A relaxed white tee and striped pants create an easygoing travel outfit that feels fresh and comfortable. The striped pants add visual interest while keeping the overall look casual.
Classic sneakers make the outfit practical for a busy travel day, while a cap and sunglasses add a cool finishing touch.
This is the kind of outfit that looks effortless while still feeling thoughtfully put together. It works especially well for warm-weather travel when you want something lightweight and easy to wear.
Classic Comfort
A leather jacket can instantly give a simple airport outfit a little more personality. Pairing it with black jeans and a basic tee creates a classic foundation that is easy to wear for almost any trip.
A colorful pair of sneakers can bring some energy to the outfit while keeping your feet comfortable during long walks through the terminal.
A practical travel bag and suitcase complete the look, creating a combination that feels stylish without sacrificing comfort.
Cozy Elegance
A camel coat brings an elegant touch to an otherwise relaxed airport outfit. Pairing it with soft gray joggers creates a comfortable contrast that feels polished rather than overly casual.
A black turtleneck adds a sleek layer, while cozy boots keep your feet warm and comfortable.
A large tote is also ideal for travel because it gives you space for everything you might need during the flight. This outfit has that comfortable, sophisticated feel that works beautifully for longer journeys.
Monochrome Glam
A cropped gray sweater and flowy wide-leg pants create an easy combination that looks chic while allowing plenty of movement.
Comfortable sneakers are a practical choice when you know you will be walking through large terminals. Sunglasses and a structured black shoulder bag add a more polished touch.
The result is an airport outfit that feels relaxed enough for travel but stylish enough to make an impression.
Sophisticated Traveler
Tailored beige pants and a simple top create a refined airport look that feels timeless. Adding a white hat and sunglasses gives the outfit a subtle vintage-inspired feel.
This style is especially suitable for shorter flights when you want to arrive looking ready to explore the city without needing to change clothes.
The overall combination feels elegant, simple, and effortless, making it a great option for travelers who prefer a more polished look.
Casual Meets Class
A lightweight blazer can instantly make a comfortable travel outfit feel more sophisticated. Pairing it with a white shirt and relaxed wide-leg jeans keeps the look casual and easy to wear.
A large tote provides plenty of space for travel necessities, while sneakers make it easier to walk through the airport comfortably.
This combination strikes a great balance between relaxed and refined. It is ideal when you want to feel comfortable during the flight without looking too casual.
Winter Whites and Cozy Flights
Winter travel calls for layers, and this cream-toned outfit makes cozy dressing look stylish. Soft leggings and a matching top create a comfortable base, while a puffy black jacket adds warmth and contrast.
Black sneakers are practical for walking through the airport, while a backpack keeps your hands free and provides convenient storage.
This outfit is perfect for cold-weather travel because it combines warmth, comfort, and a clean, fashionable appearance.
Neutral Tones for Comfort
Neutral colors work beautifully for travel because they are easy to mix and match. A textured top paired with striped pants creates a relaxed look with plenty of personality.
Comfortable sneakers add a sporty element, while oversized sunglasses and a spacious black bag give the outfit a more polished finish.
It is an easy choice for long flights, airport lounging, or busy travel days when comfort needs to come first.
Pop of Pink
A pink tracksuit is a fun way to bring color into your travel wardrobe. The matching pieces create a coordinated look while keeping the outfit soft, comfortable, and easy to move in.
White sneakers provide a clean contrast and are practical for walking between gates.
Matching your luggage to your outfit can make the whole look feel even more playful. This style is perfect for anyone who enjoys bright colors and wants their airport outfit to feel cheerful rather than ordinary.
Stripes and Luxe Luggage
A fitted black playsuit creates a sleek foundation for this travel outfit, while a striped shirt adds structure and personality.
Comfortable sneakers make the look suitable for spending time in the terminal, while a polished travel bag adds a more elevated touch.
The combination feels fashionable without becoming impractical. It is a great example of how simple layers can transform a basic travel outfit into something much more stylish.
Sporty Chic
A white tank top with soft sweatpants creates one of the easiest airport combinations. It is comfortable enough for sitting through a long flight while still looking modern.
A cap and chunky white sneakers add a sporty streetwear feel, while a large tote brings a more sophisticated element to the outfit.
This look is ideal for travelers who prefer casual clothing but still want their airport style to feel intentional.
All-White Everything
An all-white outfit can create a clean and sophisticated airport look. A soft knit top and matching trousers provide comfort while keeping the overall appearance polished.
A lightweight overcoat adds another layer of elegance, while matching sneakers keep the outfit relaxed and practical.
A personalized travel bag can complete the look with a subtle statement. The result is a fresh and simple outfit that proves you do not need bold colors to stand out.
Layered Neutrals
Neutral layering is one of the easiest ways to create a stylish travel outfit. A mocha-toned top paired with wide-leg pants creates a soft and relaxed base.
Adding an unstructured jacket gives the outfit more dimension without making it feel restrictive.
Sunglasses, dark luggage, and white sneakers bring everything together. This is a comfortable choice for travelers who prefer understated colors and effortless styling.
Nautical Stripes
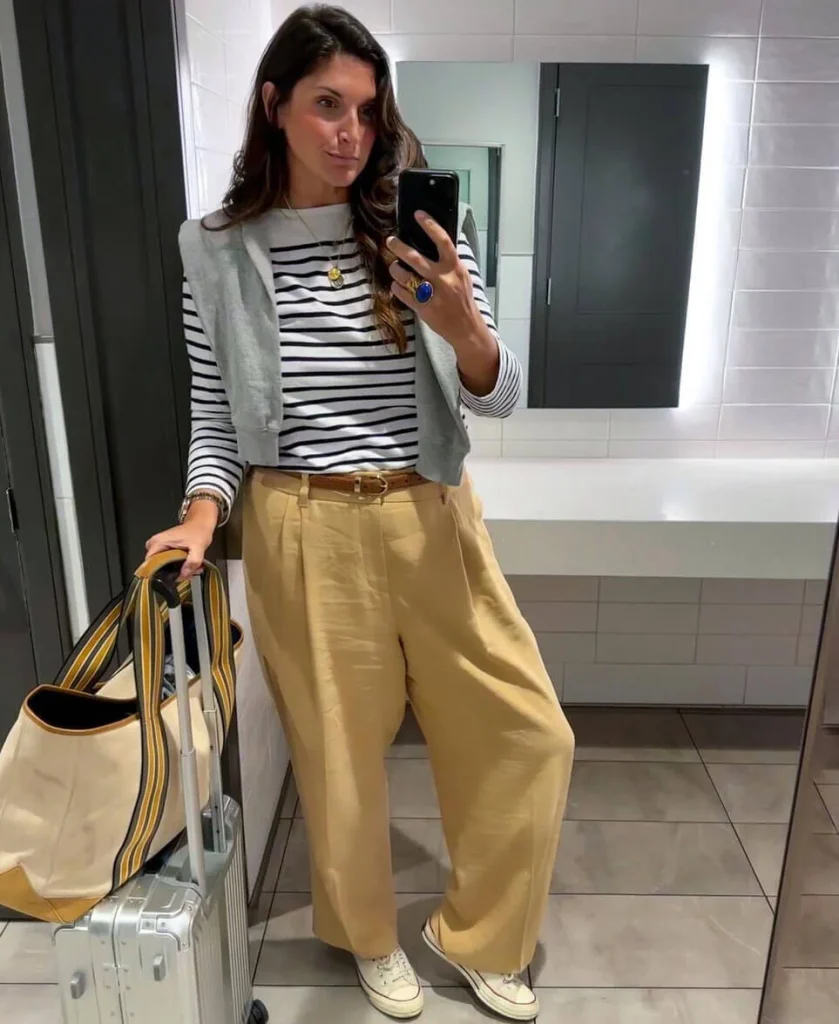
A striped tee is a timeless travel staple, especially when paired with comfortable pants in a warm mustard shade.
A soft gray cardigan adds warmth for chilly airplane cabins and can easily be removed when temperatures rise.
A belt helps define the outfit, while sneakers make long walks through the terminal much easier. A spacious tote finishes the look while keeping your travel essentials close at hand.
Sporty Meets Sophistication
A creamy white coat layered over a relaxed hoodie creates an appealing combination of comfort and polish.
Joggers keep the outfit easy to wear during long travel days, while white sneakers provide both style and practicality.
A cap is another useful accessory because it adds a sporty touch while making it easy to manage your hair during travel.
This outfit is a great option when you want to combine relaxed pieces with a more sophisticated outer layer.
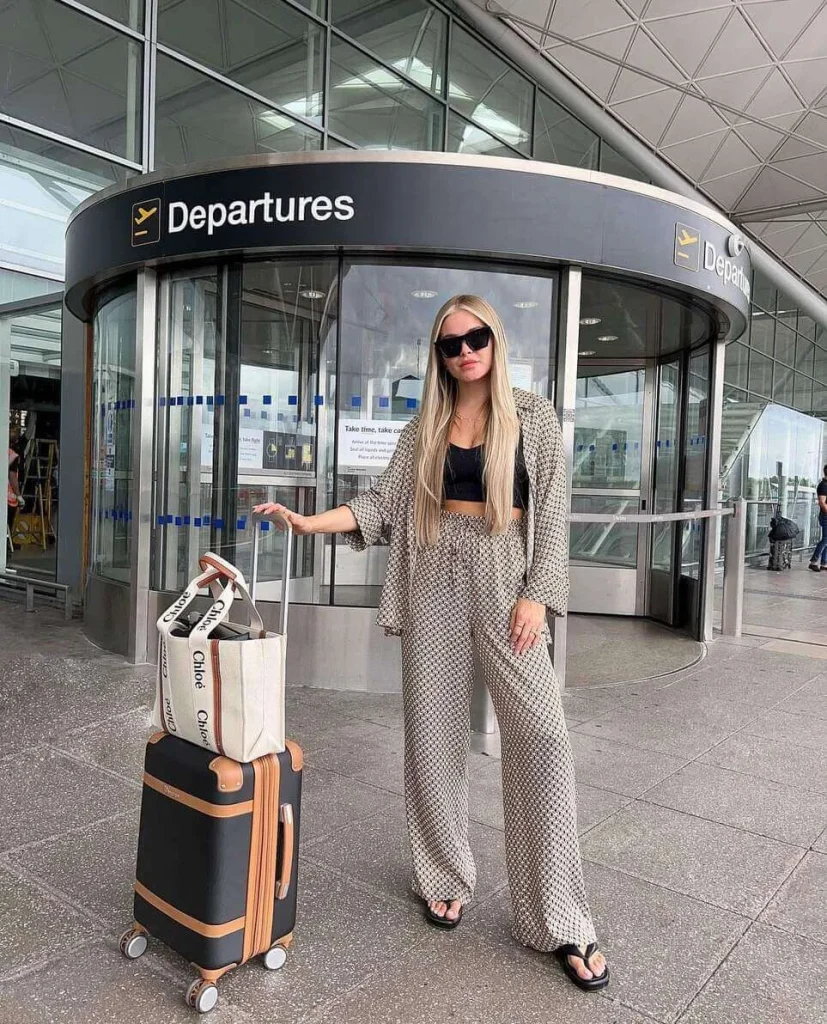
Bold Patterns and Relaxed Tailoring
A patterned matching set can make an airport outfit feel stylish without requiring much effort. The coordinated pieces create a statement while still providing the comfort needed for a travel day.
A simple black top underneath keeps the look balanced, while easy-to-remove footwear makes getting through security more convenient.
This outfit works particularly well for travelers who enjoy bold patterns but still want their clothing to remain practical and comfortable.
Travel in Toasted Tones
Warm neutral shades create a cozy and sophisticated travel aesthetic. A chunky knit provides an extra layer for chilly terminals and cold airplane cabins.
Black leggings create a streamlined base, while comfortable sneakers make the outfit practical for walking.
A spacious tote works well as a carry-on companion, and sunglasses add a stylish finishing touch.
This is an excellent option for travelers who want an outfit that feels comfortable and polished from departure to arrival.
Jet Set in Style
A cream blazer and matching shorts create a stylish travel combination that feels polished without being overly formal.
A simple white tank keeps the outfit comfortable and breathable, while a brown belt adds definition and warmth to the neutral color palette.
White sneakers make the outfit practical for walking through large terminals, while a small crossbody bag keeps important items close.
This look is perfect when you want to step off the plane looking stylish and ready to begin your trip without needing an outfit change.
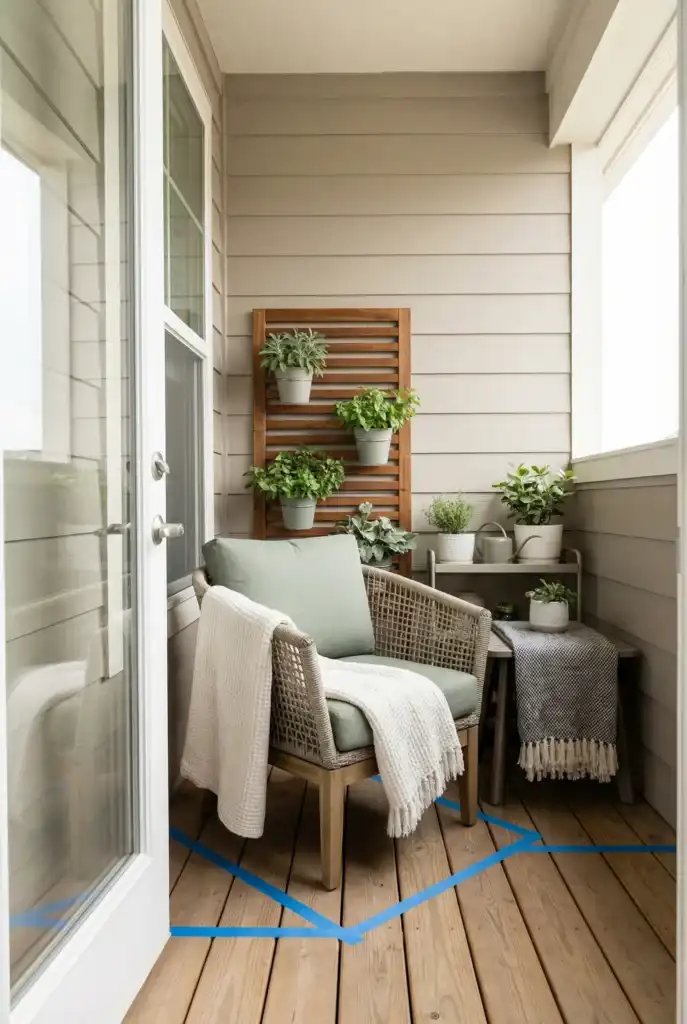
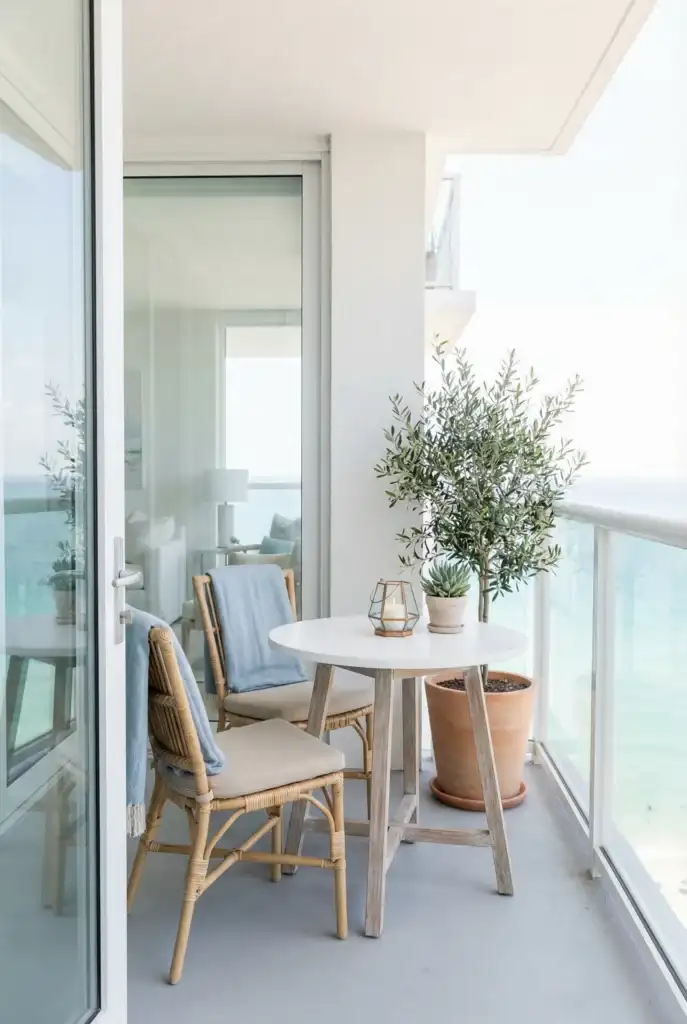
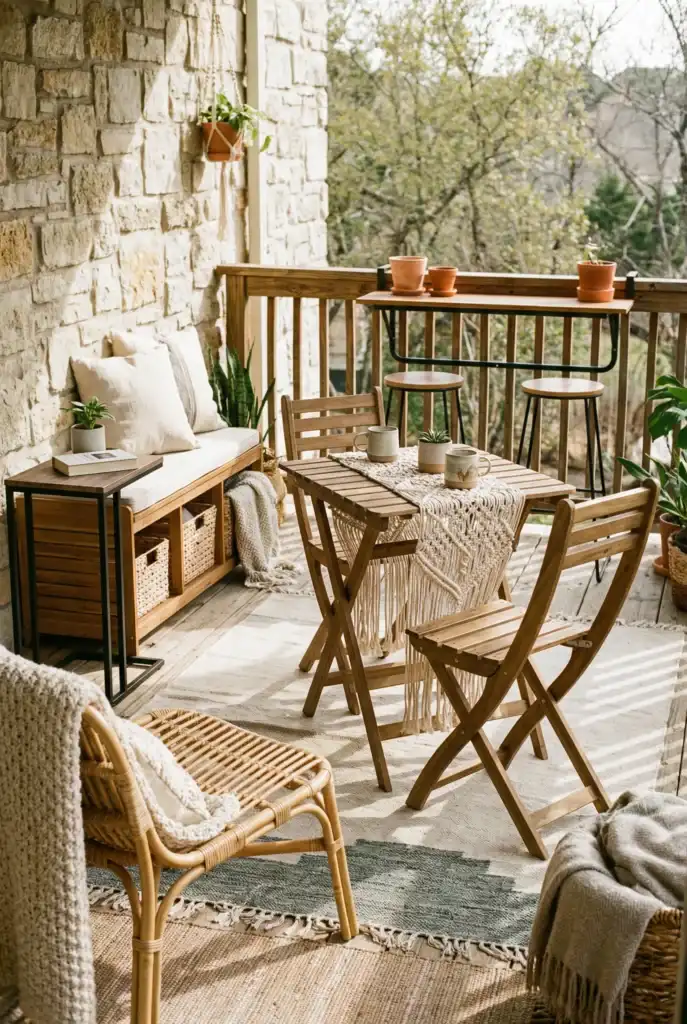
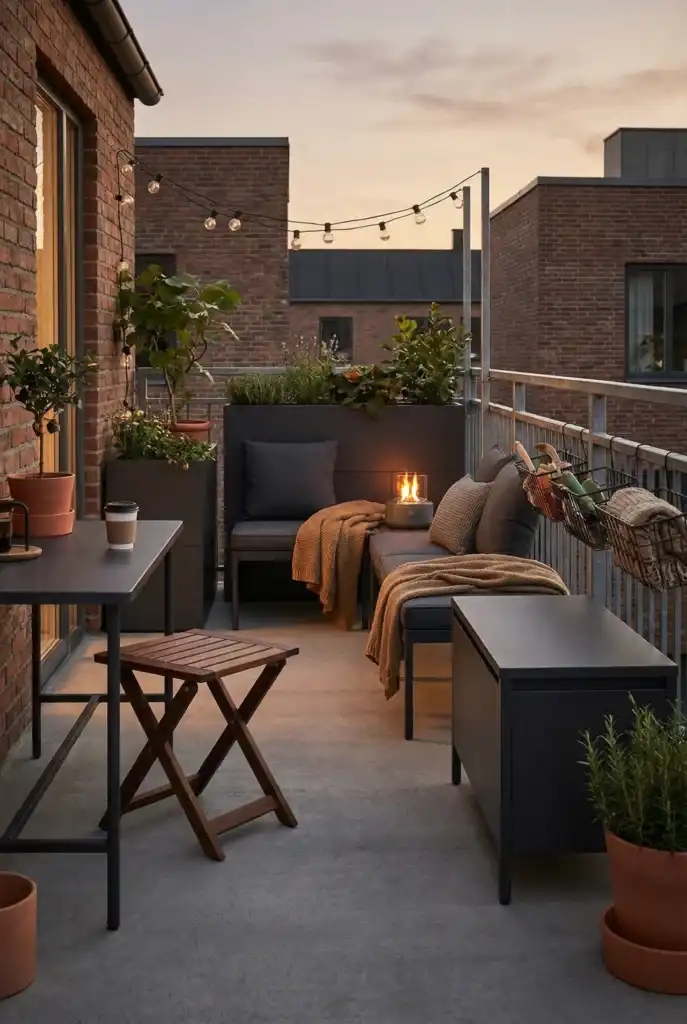
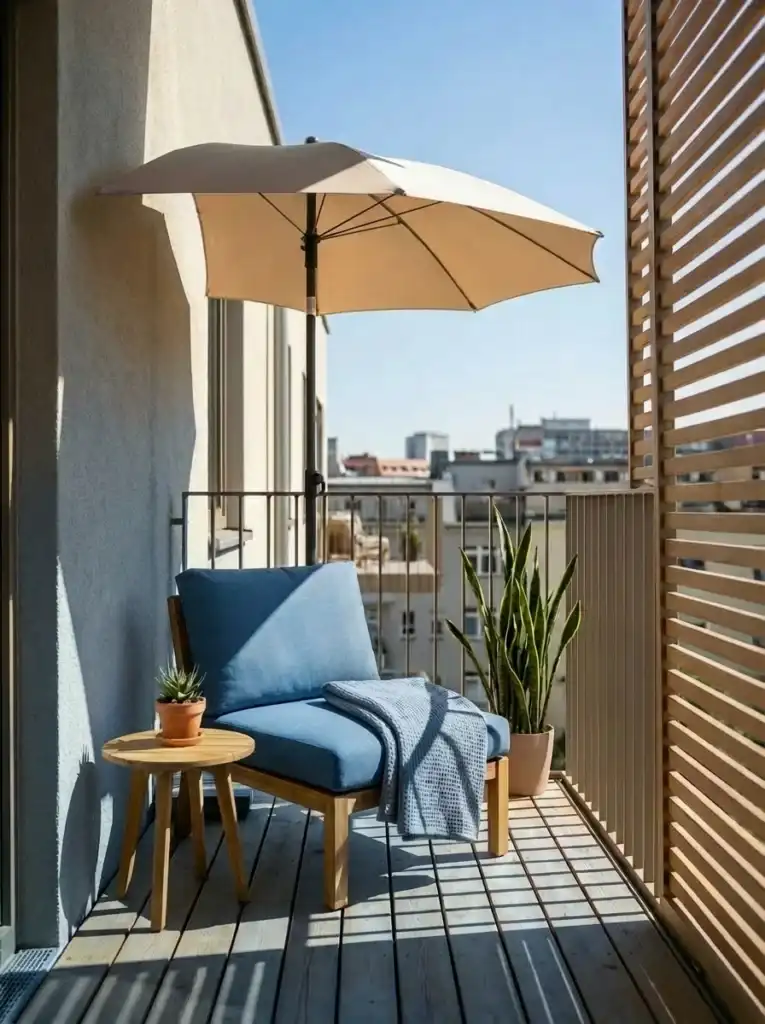
Balcony wall decor can completely change a small outdoor space, especially when you are renting, dealing with strong wind, or simply trying to avoid drilling holes into your walls. The trick is to choose decor that looks good while also handling sunlight, rain, limited space, and everyday outdoor conditions.
A balcony wall is often the most overlooked part of the space. Floors usually get the furniture, plants, and rugs, while the vertical space remains empty. That is a missed opportunity because the walls can provide privacy, storage, greenery, lighting, and personality without taking away valuable floor space.
The best balcony decorating ideas are not about covering every empty spot with decorations. They are about making smart use of vertical space while keeping everything safe, practical, and easy to maintain. Renters also need removable solutions that do not leave permanent damage behind.
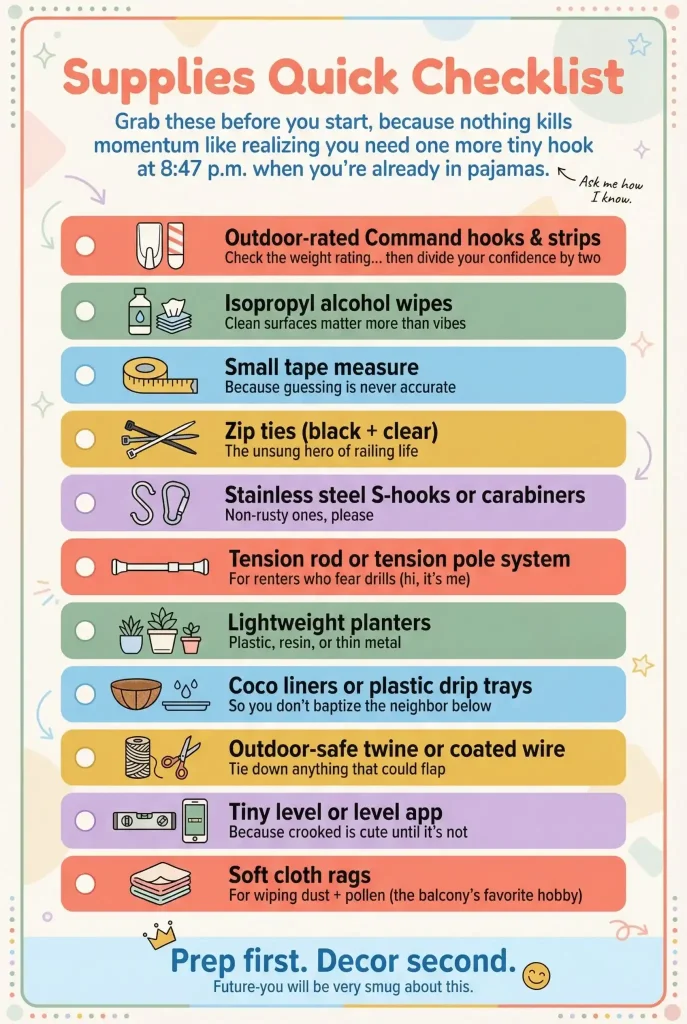
Supplies Quick Checklist
Before starting your balcony wall decor project, gather a few basic supplies. Having the right materials makes installation easier and helps prevent unnecessary damage or accidents.
Outdoor-rated adhesive hooks and strips, always checking their weight limits
Isopropyl alcohol and clean paper towels for preparing smooth surfaces
A small measuring tape
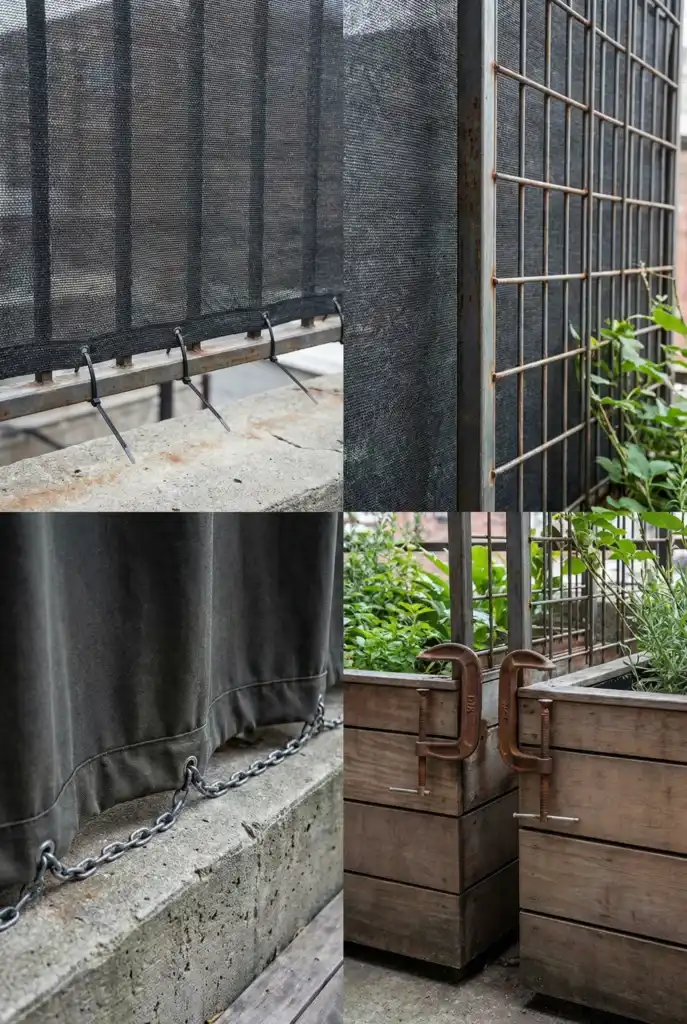
Black or clear outdoor zip ties
Stainless-steel S-hooks or carabiners
A tension rod or tension pole system for drill-free installations
Lightweight resin, plastic, or thin-metal planters
Coco liners or drip trays for controlling excess water
Outdoor-rated twine or coated wire for securing loose items
A small level or phone leveling app
Soft cloths for removing dust, pollen, and outdoor debris
These simple supplies can make many apartment balcony decorating projects easier while keeping the installation relatively renter-friendly.
Read Your Balcony like a Tiny Weather Station
Before hanging anything, spend a few minutes observing the balcony. The conditions outside will determine which materials and installation methods make sense.
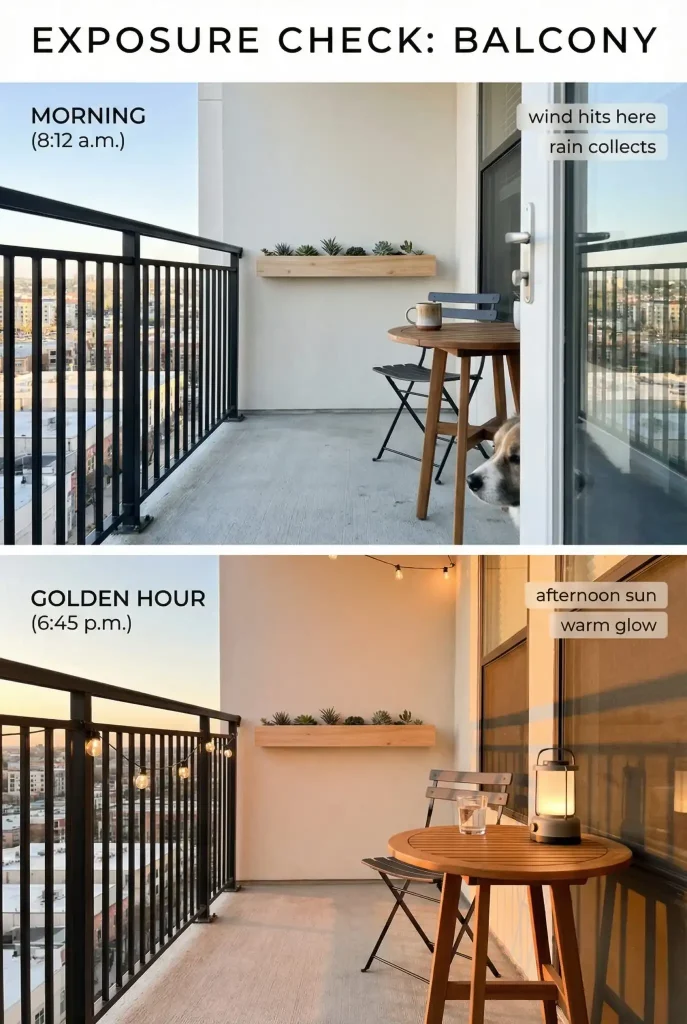
Check which areas receive direct sunlight, where wind tends to hit hardest, and where rainwater collects. These small details can determine whether your decor lasts for months or starts looking worn after only a few weeks.
If you have a small apartment balcony, this planning stage is even more important because every inch has to work efficiently. Take quick photos during different parts of the day so you can see how sunlight, shadows, glare, and privacy change.
A simple balcony check can include:
Wind test: Hang a lightweight towel or cloth on the railing for a short time. If it moves aggressively, choose compact, low-profile decor.
Sun test: Areas exposed to strong sunlight for several hours need UV-resistant materials.
Water test: After rain, observe where water drips and collects. Keep planters from releasing water directly onto lower balconies.
Privacy check: Sit where you normally relax and see which areas need more coverage.
Also check your rental agreement before installing anything. Some properties restrict drilling, railing attachments, or modifications to exterior walls.
A useful first step is to take one morning photo and one evening photo. This gives you a much better idea of how the space actually behaves throughout the day.
Tiny Detour: My Five-minute Hook Spiral
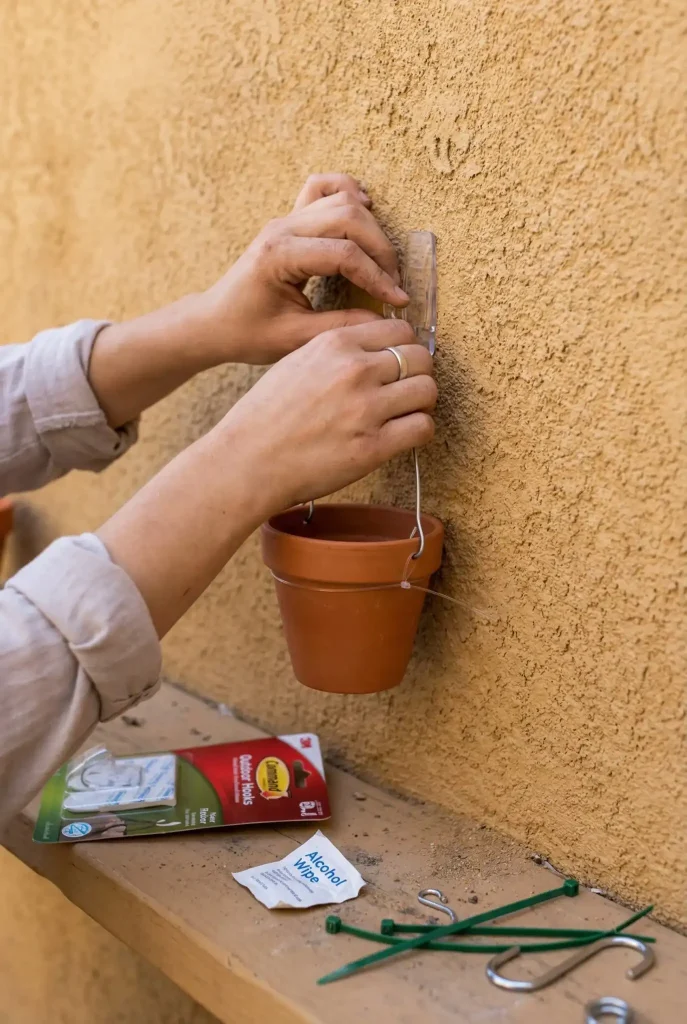
Outdoor adhesive hooks sound like an easy solution, but they deserve more thought than most people give them. A product that works perfectly indoors may not perform the same way outside.
Outdoor-rated adhesive still needs a clean, dry surface. Dusty, rough, or heavily textured walls may not provide enough contact for a dependable bond.
Wind also changes the equation. Decor does not simply add weight; it can catch air and create a pulling force. A lightweight decoration with a large surface area may put more stress on a hook than its weight suggests.
My basic rule is simple: if an item would cause a problem if it fell during the night, do not rely on adhesive alone. Consider a railing attachment, tension system, or secondary safety tie.
Before trusting an installation, give it a careful but firm test. For adhesive products, clean the surface with rubbing alcohol and allow it to dry completely before installation.
Step 1: Hanging Planters that Fix Sightlines and Privacy
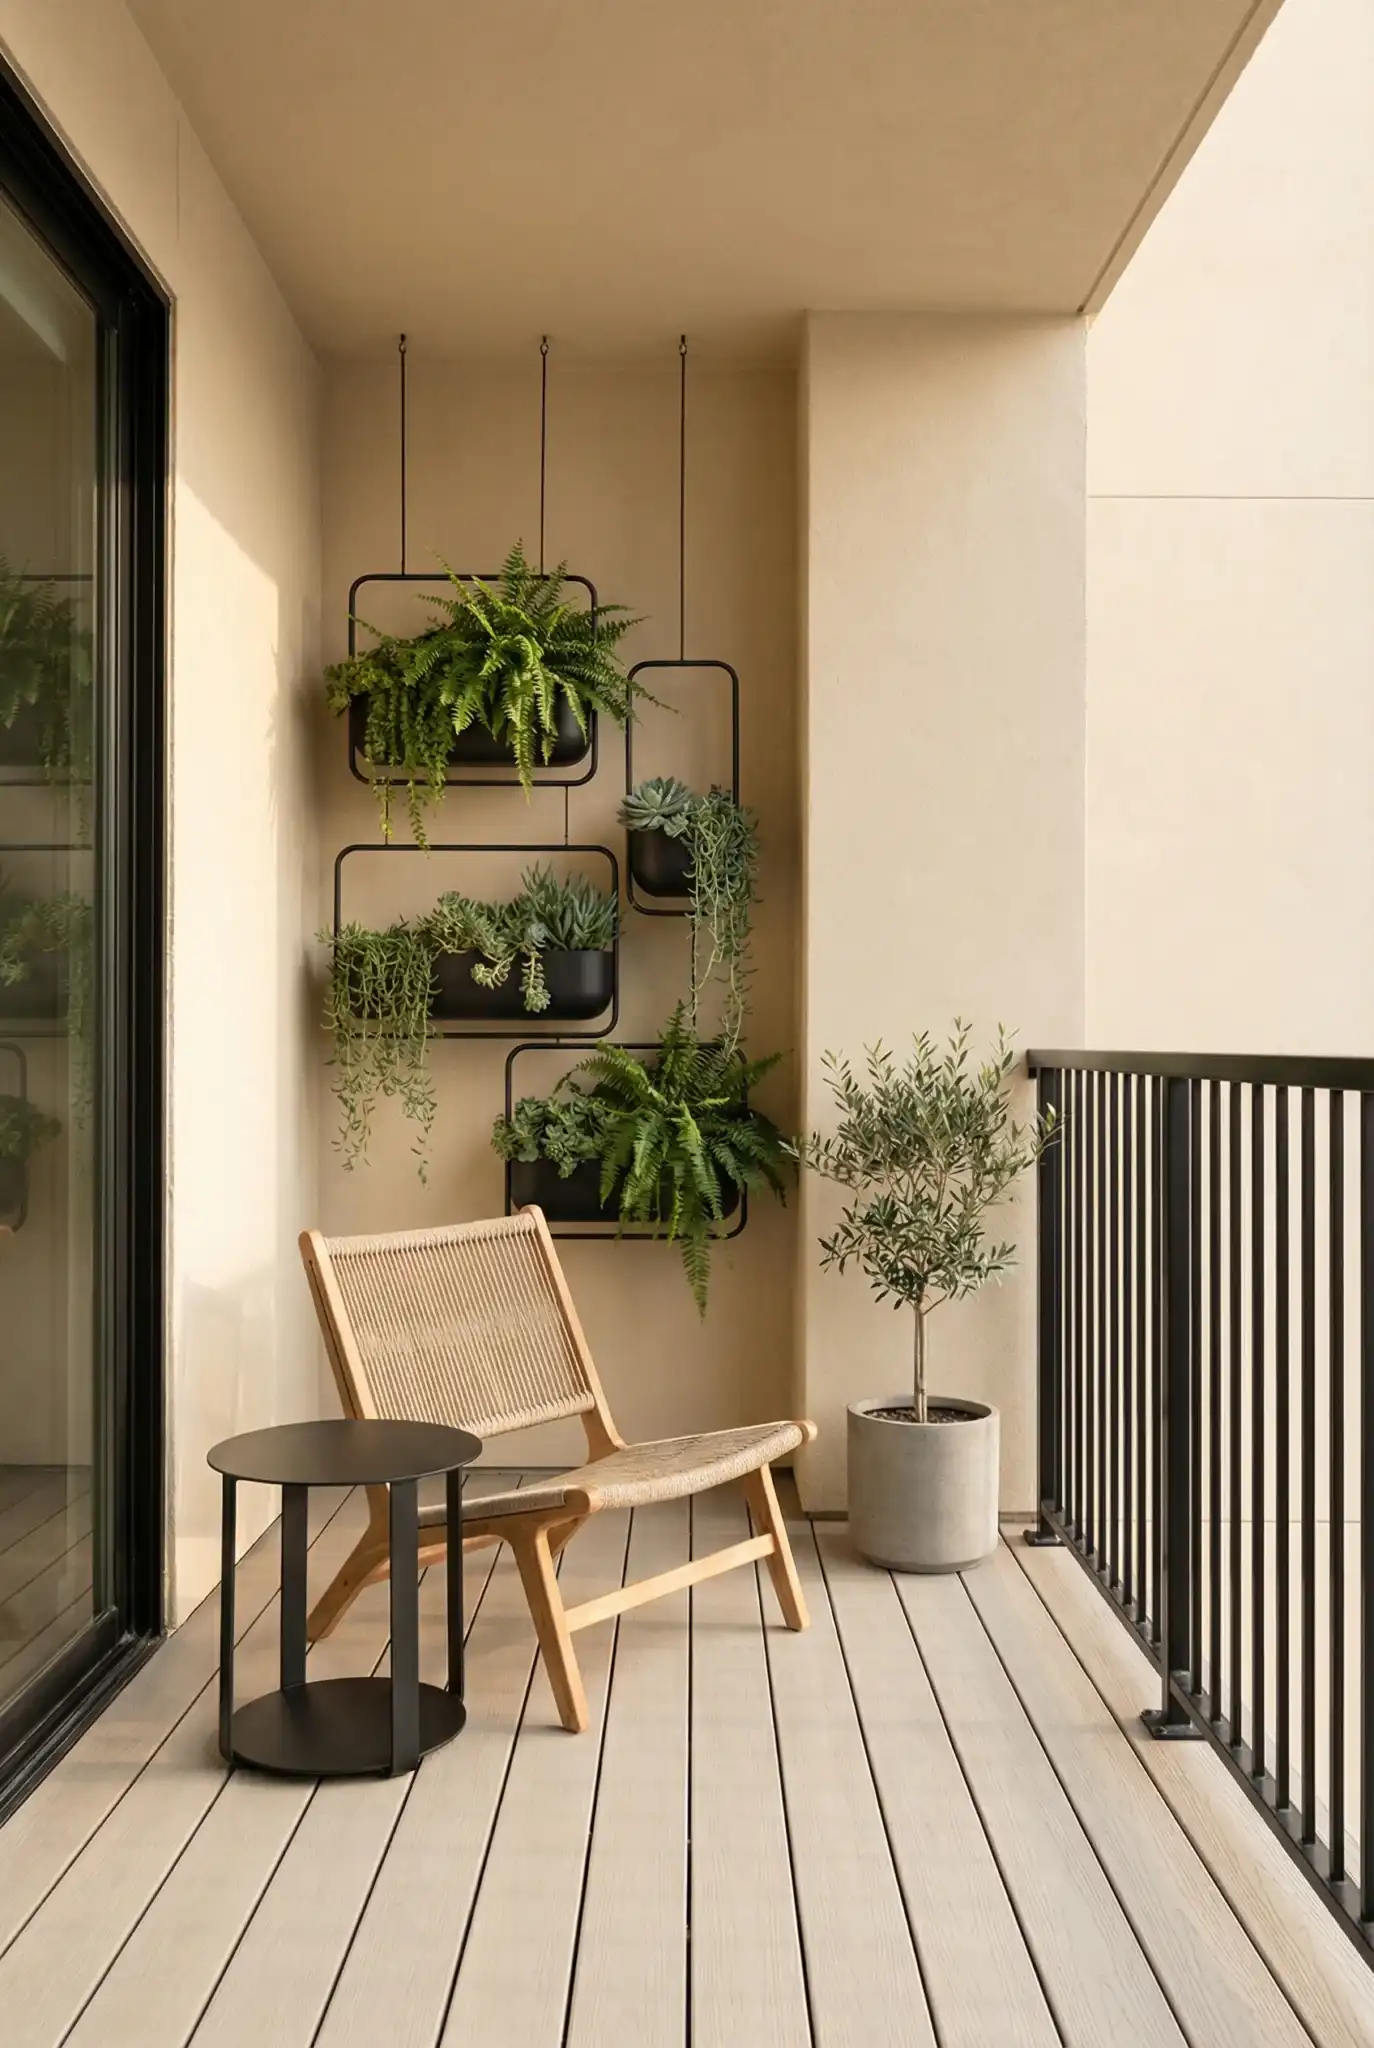
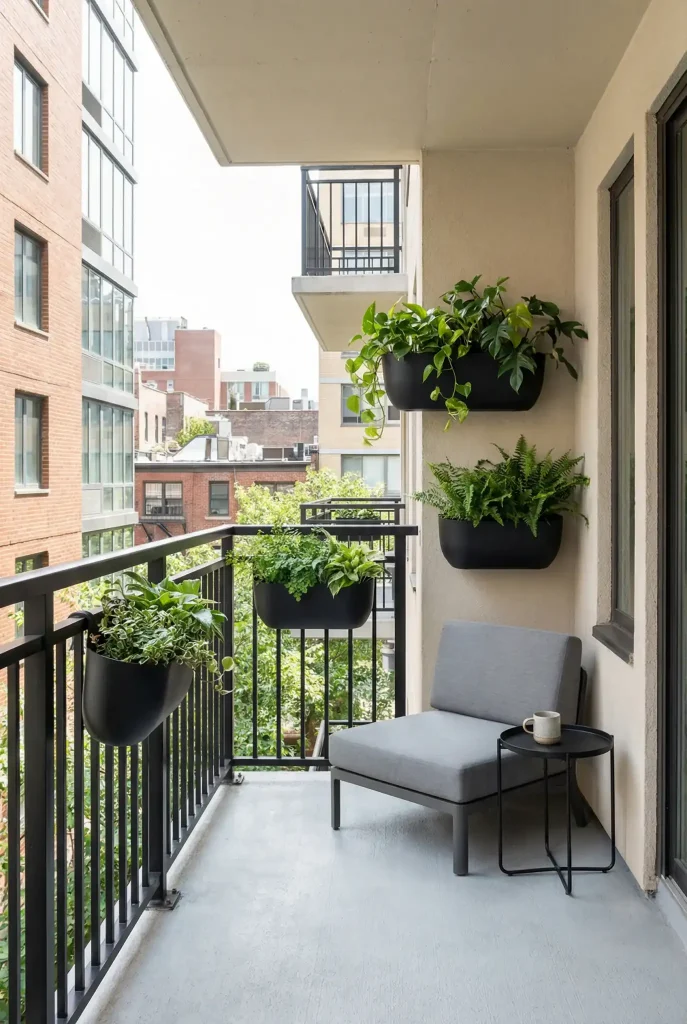
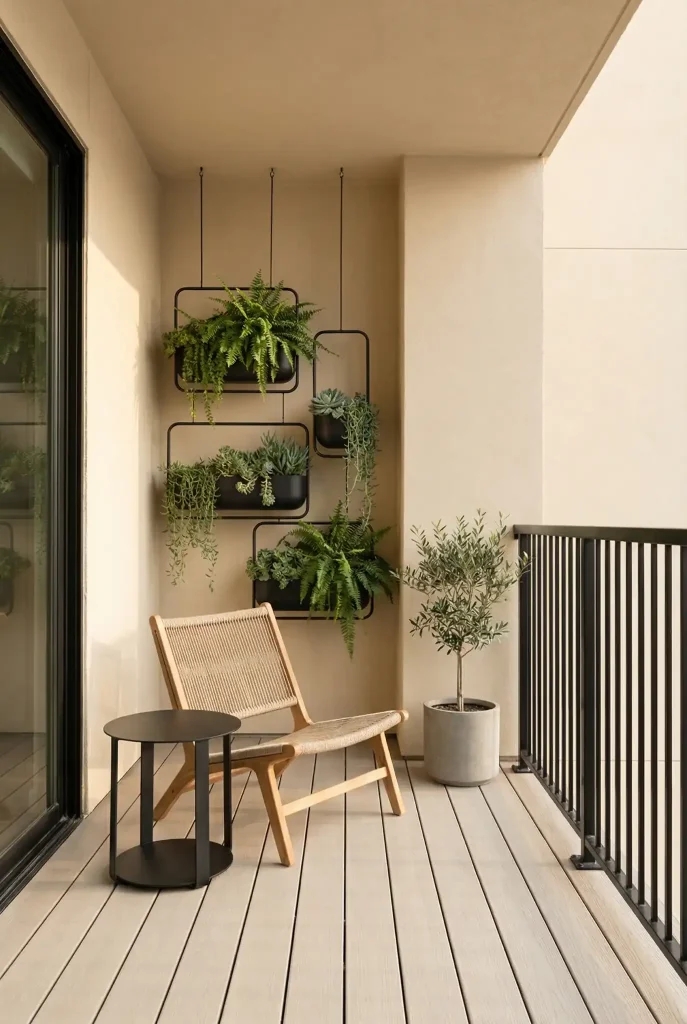
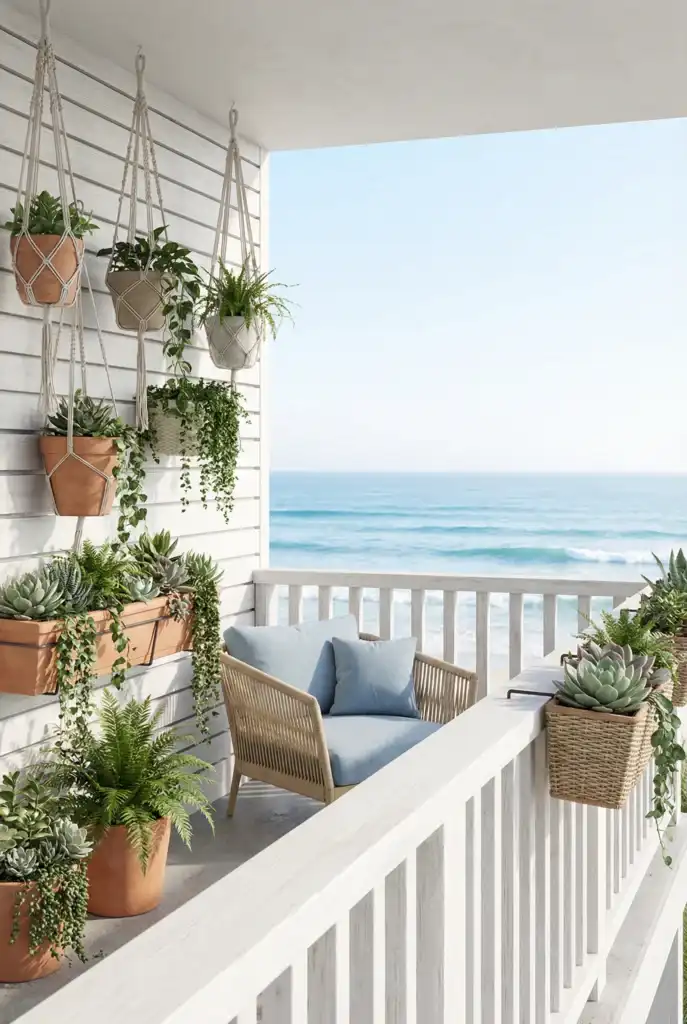
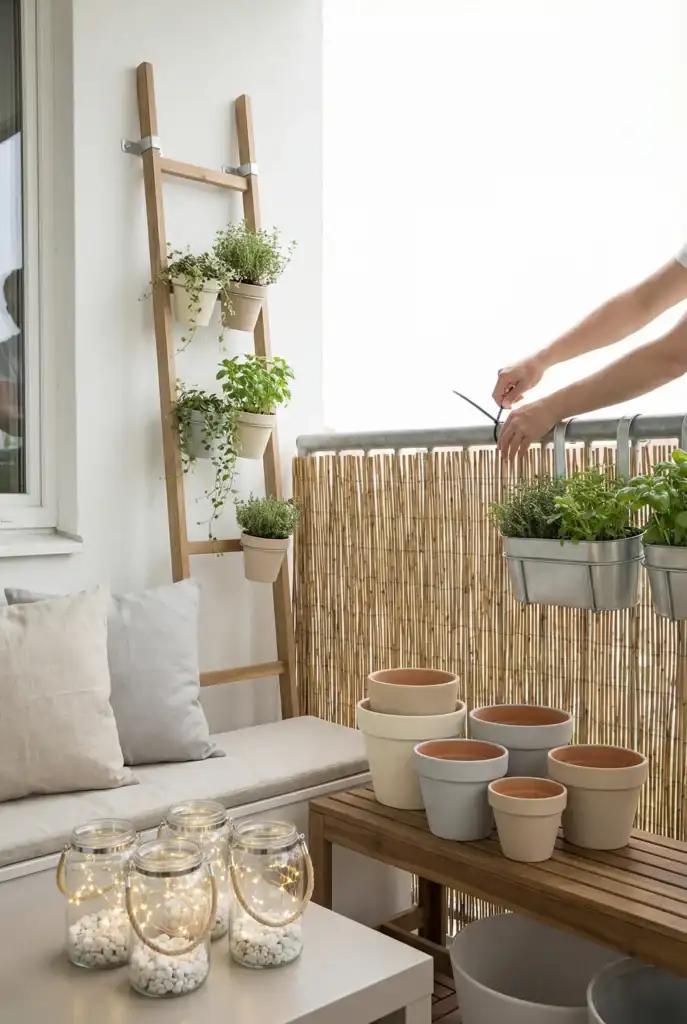
Hanging planters are one of the easiest ways to make a balcony feel greener without sacrificing floor space. They also have a practical advantage: they can improve privacy by placing foliage directly within your natural line of sight.
On a small balcony, vertical greenery can make the space feel more enclosed and comfortable. Instead of filling the floor with large pots, you can use the walls and railing areas to create layers of plants.
Try a staggered arrangement rather than placing everything at exactly the same height. One planter can sit higher, another around the middle, and another closer to your seated eye level. This creates depth while helping soften views of nearby buildings or windows.
The result can feel like a natural privacy screen without using bulky fabric panels.
Where Hanging Planters Work Best
Hanging planters are especially useful on narrow balconies because they keep walking areas open while adding height and greenery.
For a small balcony, use corners, railing edges, and vertical wall space so the main walkway remains clear. For a larger patio, group planters closer to the seating area to create a defined outdoor zone.
The goal is to make the greenery feel intentional rather than turning the balcony into a collection of randomly placed pots.
Materials that survive outside
Outdoor planters need to handle sunlight, moisture, and temperature changes without becoming unnecessarily heavy.
Good options include:
Resin planters
Lightweight plastic pots
Powder-coated metal
Thin metal containers
Sealed wood used carefully in protected areas
For hanging systems, look for coated steel chains, stainless-steel hooks, or outdoor rope designed to resist moisture and deterioration.
If you prefer wood, make sure it is properly sealed and positioned where it will not remain wet after every rainfall.
What to avoid (wind will humble you)
Heavy hanging decor becomes much riskier when exposed to strong wind. Avoid anything that could swing, fall, or become difficult to control.
Heavy ceramic hanging pots
Containers that release water freely over the balcony edge
Loose macramé that can become soaked or catch strong wind
Hanging baskets without a secure secondary attachment
Large lightweight decorations that can act like sails
Outdoor decor should always be selected with the local weather conditions in mind.
Renter-safe ways to install
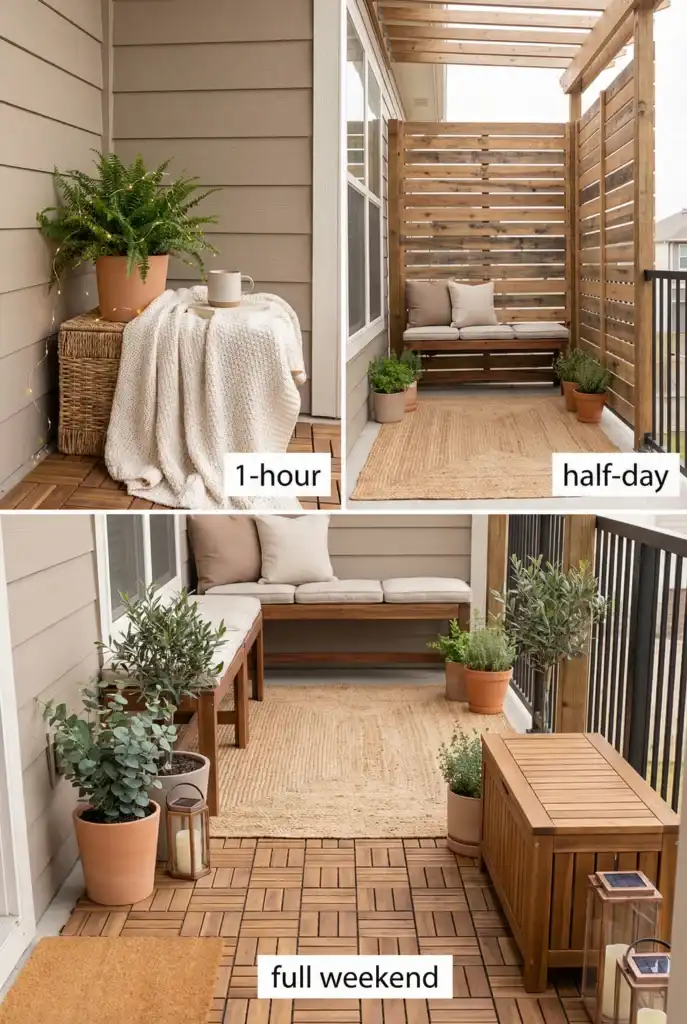
There are several ways to create balcony hanging decor without permanently changing the property.
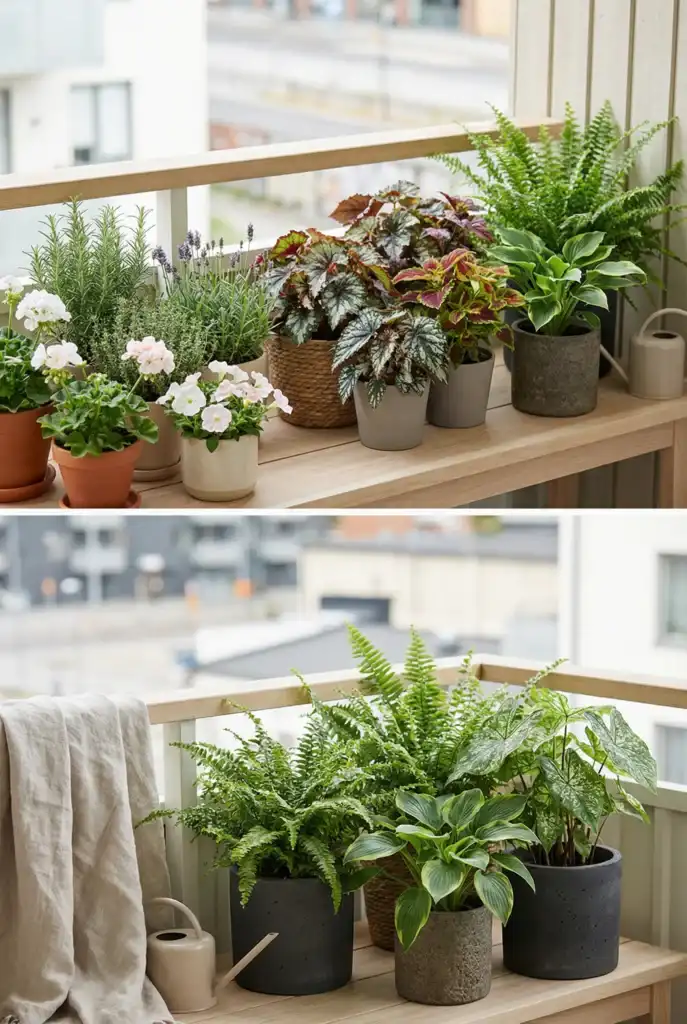
Railing planters: Attach them securely and add zip ties if needed to prevent movement.
Railing clamp hooks: These can provide a removable hanging point without drilling.
Tension systems: Floor-to-ceiling tension poles can create vertical hanging space.
Outdoor adhesive hooks: Use these only for very lightweight items on suitable smooth surfaces, preferably with an additional safety tie.
Always check the manufacturer’s weight recommendations rather than assuming an attachment can support a particular item.
The sightline trick (my favorite part)
If privacy is your main reason for adding plants, place them according to where you actually sit rather than simply filling the highest available wall space.
Mid-height greenery can be particularly effective because it blocks unwanted views while keeping the balcony open and comfortable.
For taller neighboring windows, use higher planters with trailing foliage. If visibility is mainly coming through the lower railing area, fuller plants placed lower can help close those gaps.
Artificial greenery can also work if maintaining live plants is difficult. Choose outdoor-rated options and secure them properly so they do not become loose in the wind.
Step 2: Outdoor Artwork that Won’t Fade, Warp, or Fly Away
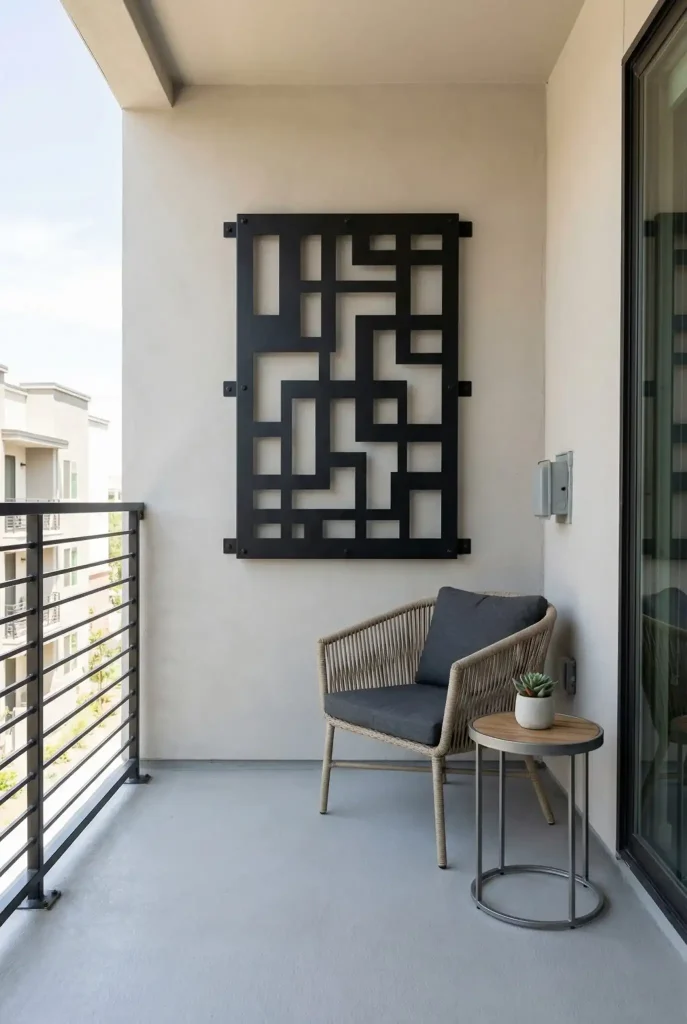
Outdoor wall art can give a balcony an instant focal point, but outdoor artwork needs to be chosen differently from indoor decoration.
Direct sunlight can cause fading, moisture can damage unsuitable materials, and wind can loosen poorly mounted pieces. Look for lightweight artwork made specifically for outdoor conditions.
On a small balcony, one statement piece behind the seating area can be enough. A larger patio can handle two or three coordinated pieces, but keeping the arrangement restrained usually creates a cleaner appearance.
Outdoor artwork is also useful for making rental spaces feel more personal. Plain stucco, basic exterior fixtures, and other features you cannot change can become less noticeable when the wall has an intentional focal point.
Where outdoor art works best
Placement matters as much as the artwork itself.
Small balcony: Put one larger piece behind or near the seating area.
Larger patio: Create a compact grouping of two or three coordinated pieces.
Seating zone: Use art where it can be seen naturally instead of placing it in an awkward or difficult-to-reach location.
The goal is to create a visual anchor without making the wall feel overloaded.
Materials that actually survive outdoors
Choose materials that are lightweight and designed to handle outdoor exposure.
Some practical options include:
Powder-coated metal panels
Outdoor-rated resin artwork
Aluminum composite prints
UV-resistant outdoor fabric panels
If using fabric, secure it at multiple points so it cannot flap excessively in strong wind.
What to avoid (please trust me)
Some indoor decorating materials simply do not belong outside.
Indoor wooden or MDF frames
Framed glass artwork
Indoor canvas stretched over standard bars
Lightweight pieces with large surfaces that can catch wind
Materials that absorb moisture easily
Even attractive pieces can quickly become damaged when exposed to weather they were never designed to handle.
Renter-safe installation options
You can add outdoor wall decor without automatically reaching for a drill.
Railing-mounted grids or trellises: Create a lightweight vertical structure for hanging small pieces.
Tension systems: Use tension rods or poles as temporary hanging frameworks.
Outdoor adhesive strips: Reserve these for very lightweight pieces and suitable smooth surfaces.
Cable ties and hooks: Useful when attaching decor to an existing railing or approved structure.
Always make sure the installation is secure and does not interfere with doors, walkways, drainage, or safety equipment.
The UV and Glare Problem, Solved With Light Placement
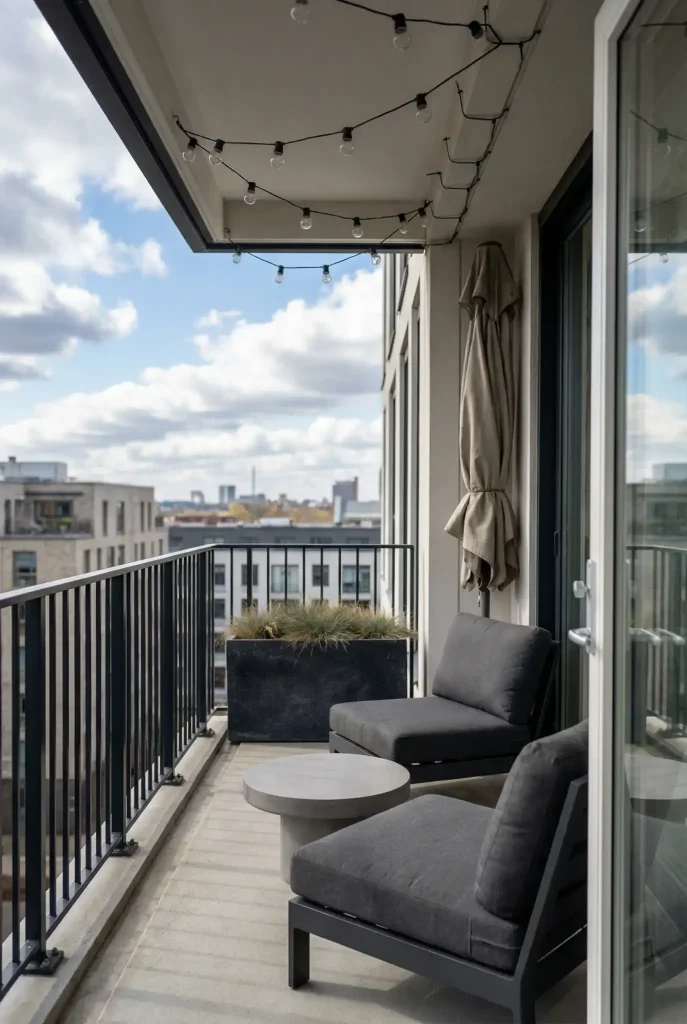
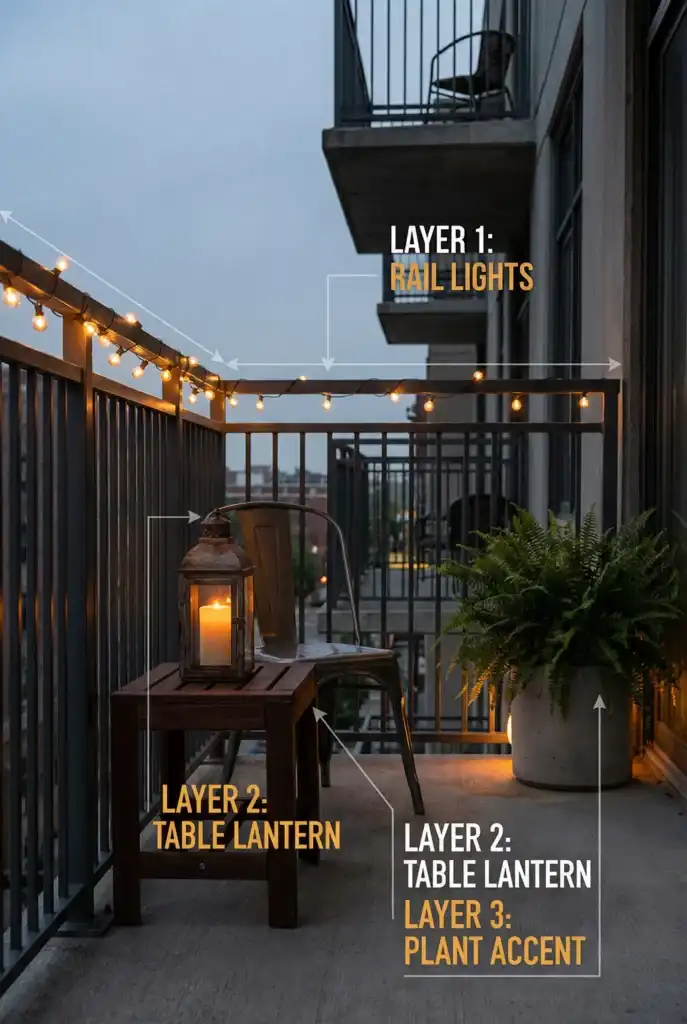
Lighting can make a balcony feel much more inviting after sunset, but placement matters. Solar lanterns and small outdoor lights work best when they create a soft glow instead of shining directly into your eyes.
Mount lanterns around eye level or slightly above and position them so the light spreads across the area rather than creating harsh glare.
For simple balcony lighting ideas without permanent wiring, consider:
Clip-on lantern hooks attached securely to railings
Lightweight adhesive hooks for suitable string lights
Tension rods holding small lanterns at different heights
If a nearby exterior light makes your balcony feel overly bright, combining artwork with softer decorative lighting can help create a more balanced atmosphere.
Step 3: Shelves and Vertical Accents that Make the Wall do Actual Work
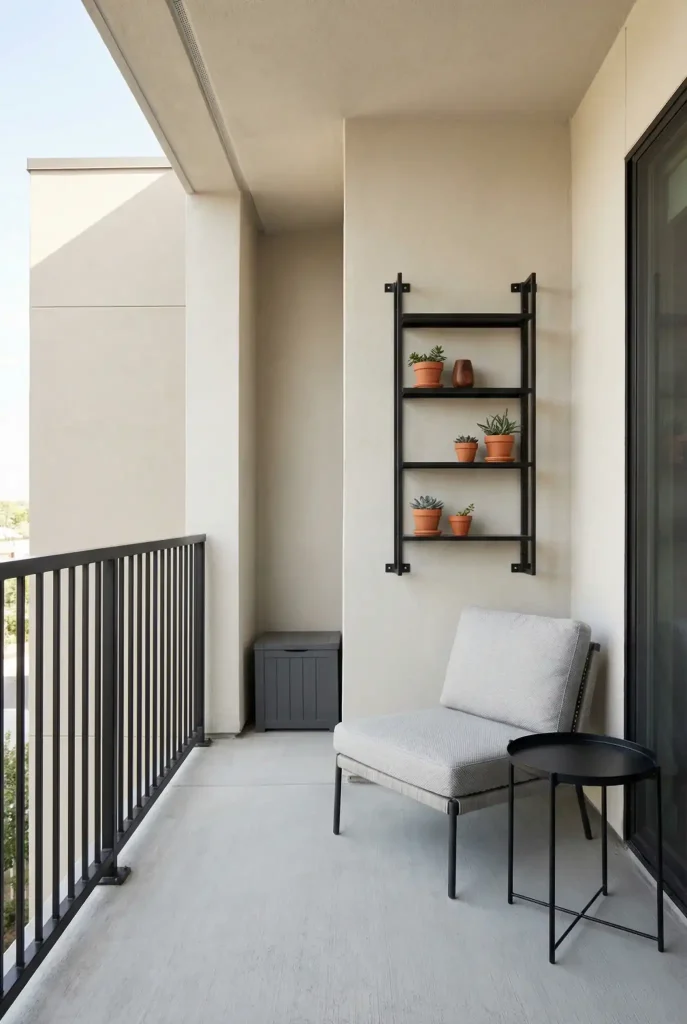
Shelves are useful when you want your balcony wall decor to do more than simply look attractive. They can provide storage, display space, and room for plants while keeping the floor relatively clear.
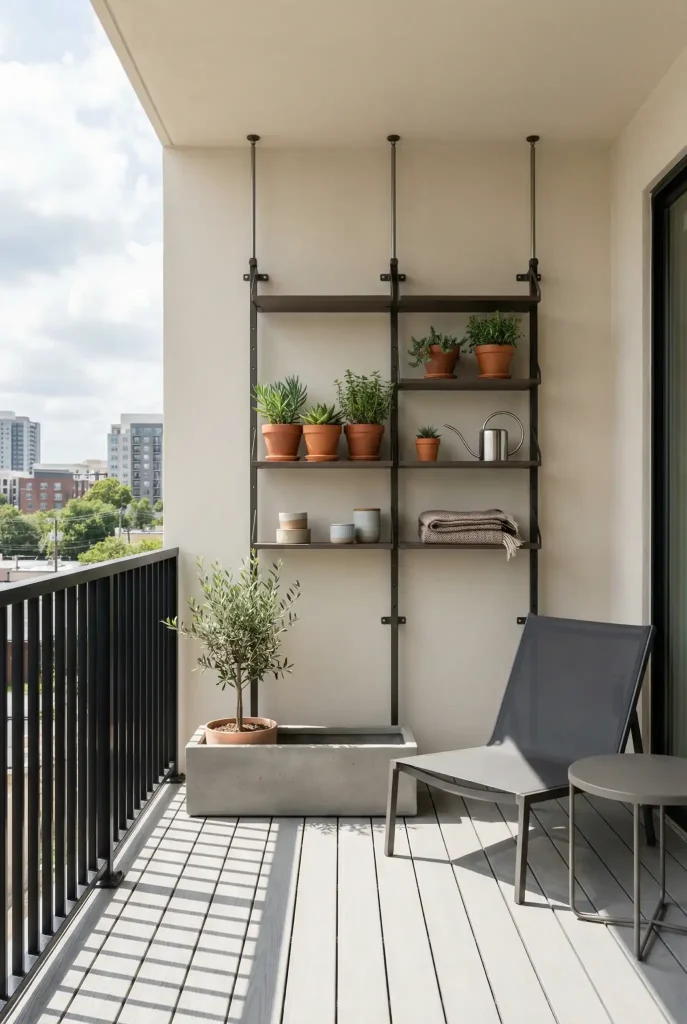
For a tiny balcony, a narrow vertical shelf can hold plants, lanterns, and a few outdoor accessories without taking over the walking area.
On a larger patio, shelves can help define a particular zone, such as a plant display, serving area, or small outdoor entertaining space.
Choose shelving designed for outdoor conditions and avoid systems that are too bulky or unstable. Wind can quickly turn an unsecured shelf into a hazard.
Where shelves work best
Placement should support movement rather than interfere with it.
Small balcony: Use one slim vertical shelf near a corner.
Larger patio: Consider a taller or wider unit that works as a backdrop for a seating area.
Narrow spaces: Prioritize vertical shelving over deep shelves.
A good shelf should add function without making the balcony feel crowded.
Materials that survive outside
For reliable outdoor storage solutions, choose materials that resist moisture, rust, swelling, and peeling.
Good choices include:
Powder-coated steel
Aluminum
Outdoor-grade resin
Properly sealed hardwood
Outdoor composite materials
Even durable materials benefit from occasional cleaning and maintenance, especially in areas with heavy rain or strong sun.
What to avoid (the silent shelf killers)
Avoid materials and arrangements that are likely to deteriorate or become unstable outdoors.
Particleboard or MDF
Untreated wood
Heavy ceramic objects placed high up
Top-heavy arrangements
Shelves that can easily wobble or tip
Remember that wind and moisture can make an already unstable setup considerably more problematic.
Renter-safe ways to add shelving
Renters have several options for adding vertical storage without drilling permanent holes.
Clamp-on railing shelves: Attach directly to suitable railings.
Tension pole shelving: Use adjustable floor-to-ceiling systems.
Freestanding narrow shelf ladders: Position them against a wall and secure them where appropriate.
Wall grids: Attach lightweight metal grids to existing structures and use them as organizers.
Always check whether your building allows attachments to railings or exterior structures before installing anything.
How to style shelves without making a mess
The easiest way to make balcony shelves look intentional is to resist filling every available space.
Try using a few larger objects rather than many tiny decorations. Repeating materials and leaving some empty space can make the entire setup look calmer.
A simple combination could include:
One or two medium-sized plants
A stable lantern or candle holder
A small outdoor tray or basket
One textured weather-resistant accessory
The same principle applies to rugs and other floor decor. Outdoor pieces can complete the look, but secure them properly so wind cannot fold, lift, or move them around.
A quick improvement is to add one narrow shelf and style it with roughly three substantial pieces instead of covering it with small objects.
Step 4: Safety, wind, and not becoming the neighborhood cautionary tale
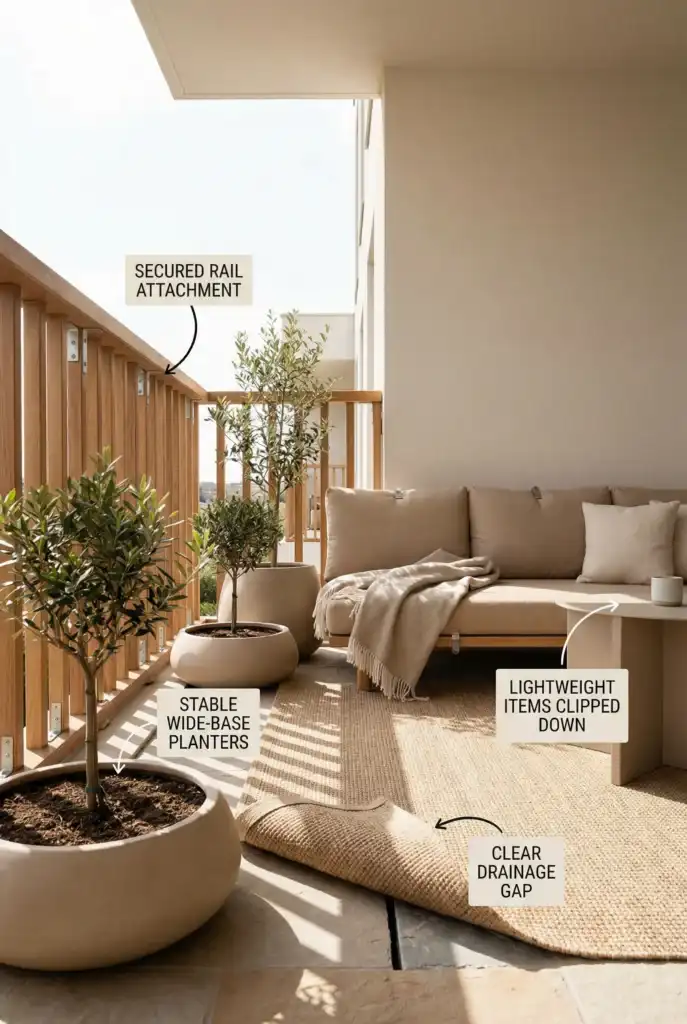
Balcony safety should always come before decoration. Wind, elevated heights, railing limitations, and building rules can turn an attractive decorating idea into a serious problem if the setup is not secure.
If you rent, avoid drilling into exterior walls unless your property specifically permits it. Waterproofing and building structures can be damaged by inappropriate modifications.
Remember that balconies are elevated spaces. Anything that can fall or be lifted by wind needs extra attention. If children or pets use the balcony, keep climbable furniture and unstable decorations away from railings.
The basic rule is straightforward: secure anything that can move, check it after windy weather, and never allow decor to interfere with exits or walkways.
What not to put on your balcony
Avoid decorations that could become unstable or dangerous.
Heavy objects balanced on railings
Tall planters without proper support
Fragile glass decorations
Flammable items near heat sources
Objects blocking doors or walking paths
Lightweight decor that could be carried away by wind
When in doubt, choose the lighter and more secure option.
Quick safety checks I actually do
A few simple checks can prevent many problems:
Give hanging decorations a firm tug to check their attachment.
Review the weight rating and avoid pushing the attachment to its maximum capacity.
Keep climbable objects away from railings.
Make sure planters can drain without sending water onto lower balconies.
Check attachments again after severe weather.
Adding a discreet secondary safety tie to hanging decor can provide an extra layer of protection.
Weather Backup Plan: When the Forecast Gets Rude
Outdoor decorating requires some flexibility because weather conditions change throughout the year.
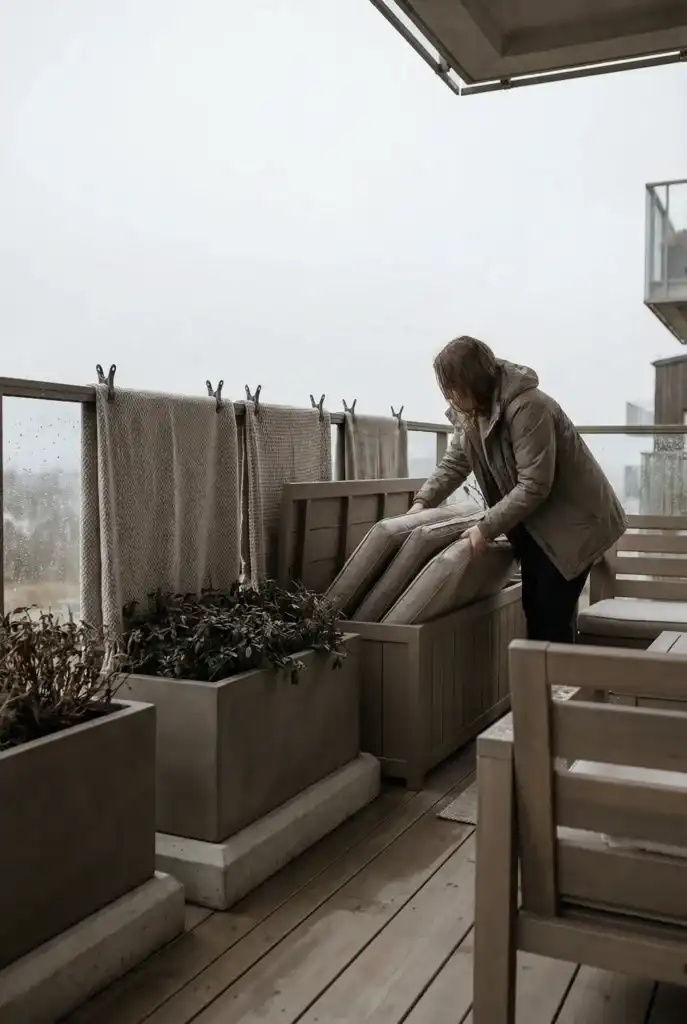
Before a major storm, bring lightweight decorations and moisture-sensitive fabrics indoors. During especially windy periods, replace loose or highly flexible decor with more compact, secure pieces.
Strong summer sunlight can also cause fading. Choosing UV-resistant materials from the beginning can help extend the life of your decorations.
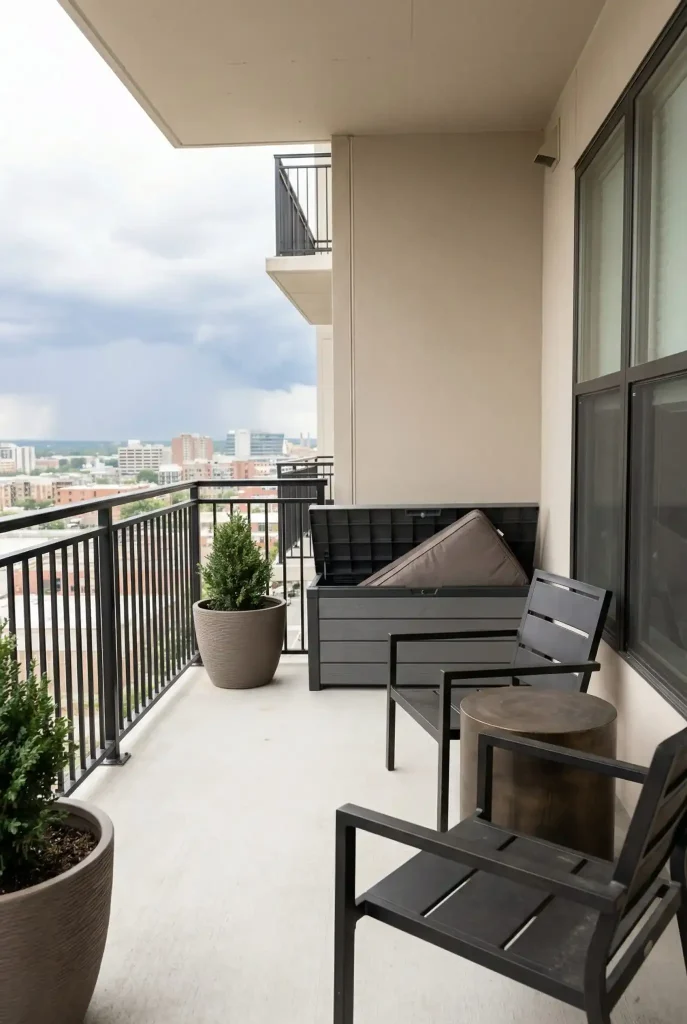
It is also worth creating a small storage area for items that need to come inside quickly. A compact storage bench, weather-resistant box, or designated container can make storm preparation much less stressful.
The goal is not to keep every piece outside all year. The goal is to make your setup easy to protect when the weather changes.
Does This Actually Add Value, or Just Look Like Clutter?
A thoughtfully decorated balcony can make a home feel more usable and visually appealing. Even without increasing the actual square footage, a comfortable outdoor area can feel like an extension of the living space.
The difference often comes down to organization. A cohesive balcony feels intentional, while too many unrelated objects can make it look like storage overflow.
The wall is especially important because vertical elements can pull the whole space together. One well-positioned artwork piece, a narrow shelf, or a layered planter arrangement can create a finished look without filling every inch.
If rental or resale appeal matters, stick with a simple color palette, durable materials, and easy-to-maintain pieces. Hide unnecessary clutter and choose decorations that have a clear purpose.
The goal of balcony wall decor is not to prove how much decoration you can fit into one space. It is to create a small outdoor room that feels comfortable, organized, and genuinely useful.
A simple final trick: remove one item that feels unnecessary. Sometimes creating more space does more for the balcony than adding another decoration.
The Calm Part: Restraint is the Whole Point
The best balcony decor does not need to be complicated. A few carefully selected vertical elements can make a surprisingly big difference.
Start with one purpose. Maybe you need privacy, more greenery, better lighting, or additional storage. Then choose decor that solves that problem while also contributing to the overall style.
For renters especially, removable systems, lightweight materials, and secure installations make it possible to create a beautiful balcony without permanent changes.
Keep the wall balanced, leave some empty space, and choose pieces that can handle the weather. When every item has a reason to be there, your balcony feels less like a collection of decorations and more like a small outdoor room.
That is really the secret to successful balcony wall decor: use the vertical space, respect the weather, prioritize safety, and stop decorating before the space starts asking you for a storage unit.
From moody greens and warm browns to soft creams and sun-washed neutrals, these earthy bedroom ideas are perfect for creating a space that feels peaceful, comfortable, and connected to nature. Natural wood, cozy fabrics, greenery, and muted colors can instantly make a bedroom feel warmer without making it look overly decorated.
I’m especially drawn to bedrooms that have that relaxed, lived-in feeling—the kind of room where you can unwind at the end of a long day and immediately feel more comfortable. Think rumpled linen, chunky blankets, vintage-inspired wood, soft lighting, and a few leafy plants.
The best part about an earthy bedroom is that you don’t need to copy one particular style. You can combine a little from several rooms and create something that feels personal. Try pairing neutral bedding with a green accent wall, adding woven accessories, or bringing in natural branches and plants for an easy nature-inspired touch.
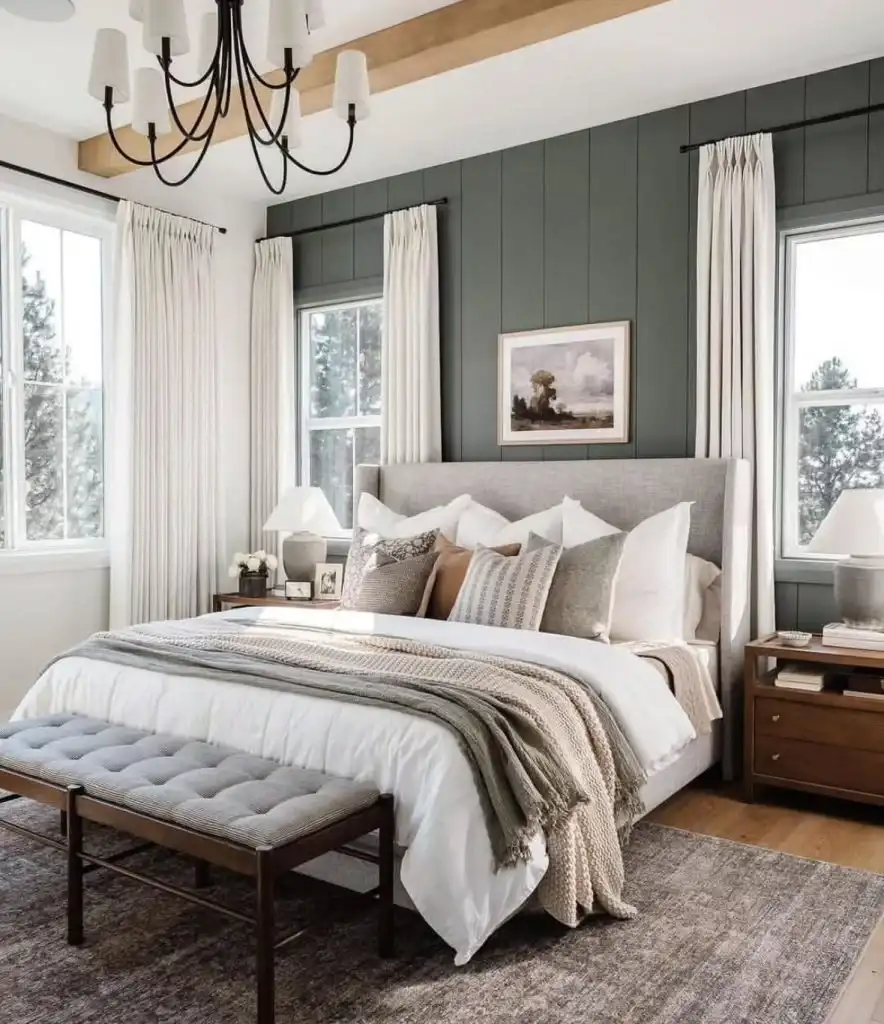
Soft Forest Retreat
This bedroom creates the feeling of a peaceful woodland escape with deep green wall paneling, warm wood details, and layers of creamy bedding. The combination feels cozy without becoming too dark, making it a beautiful example of an earthy master bedroom.
The chunky throws and pillows add plenty of softness, while the exposed wood beams bring in a rustic character. Small black accents from the chandelier and curtain rods provide contrast and give the room a more polished finish.
Moody Botanical Corner
This cozy corner shows how a dark earthy bedroom can feel inviting rather than gloomy. The deep navy wall creates a dramatic backdrop, while the wooden bed and botanical artwork bring warmth and natural character into the space.
A comfortable accent chair, textured rug, and vintage-inspired accessories make the corner feel collected and personal. It would be an ideal spot for reading, relaxing, or enjoying a quiet cup of coffee.
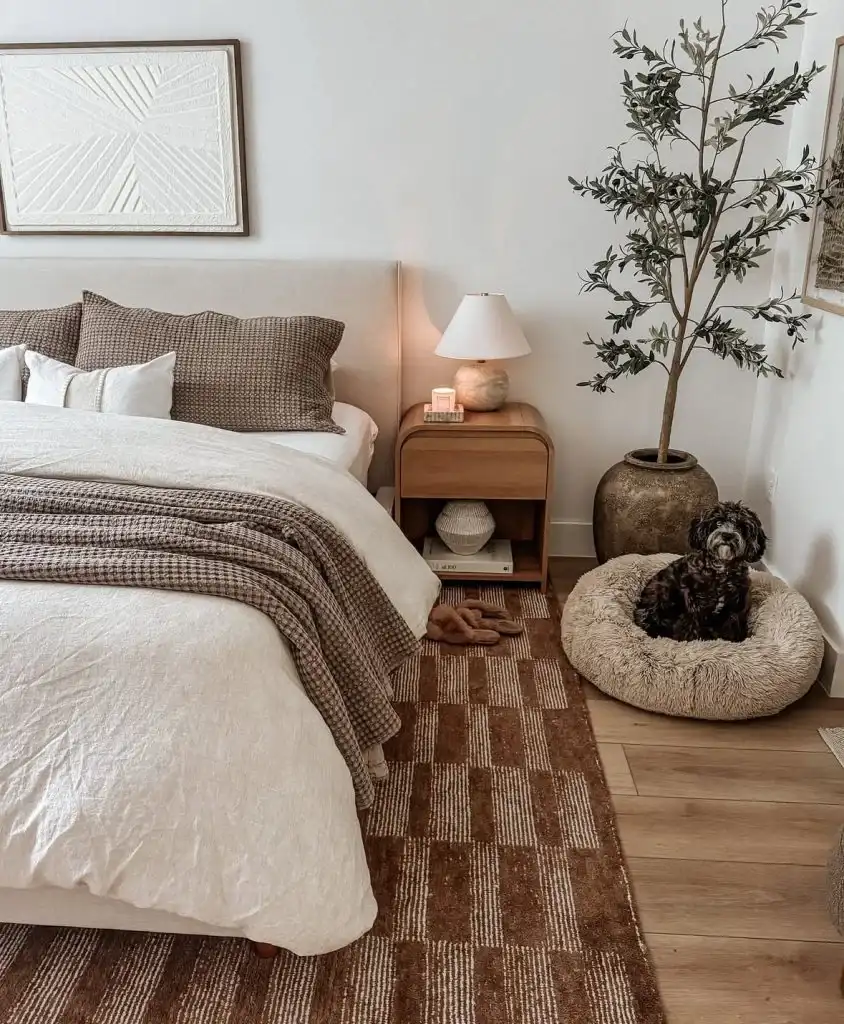
Sun-Baked Textures & Puppy Approved
For anyone looking for a warm earthy bedroom that still feels bright and relaxed, this design is full of inspiration. Sandy linen bedding, rust-colored patterns, chunky knit blankets, and natural textures create the feeling of a warm afternoon.
The tall leafy plant adds height and brings a fresh touch of greenery into the room. Low-profile furniture keeps the overall design relaxed, while the cozy textures make the space feel comfortable and lived in.
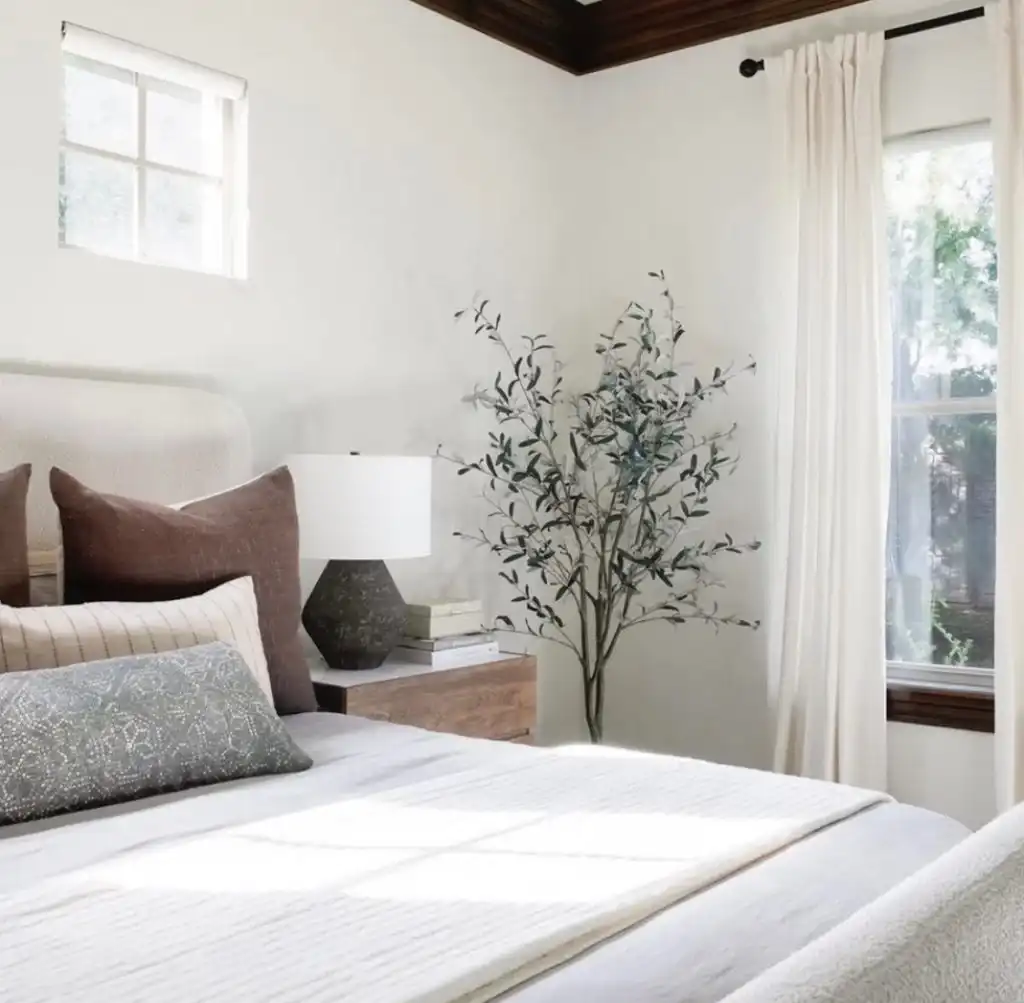
Light-Filled Corner With Olive Tree
Natural light does much of the decorating in this beautiful natural earthy bedroom. Soft white walls provide a clean foundation, while warm wood furniture and muted bedding add subtle warmth.
The olive tree in the corner becomes a natural focal point and gives the room a fresh, organic feel. Simple curtains and understated accessories keep the look airy, making this a great option for anyone who prefers a lighter earthy style.
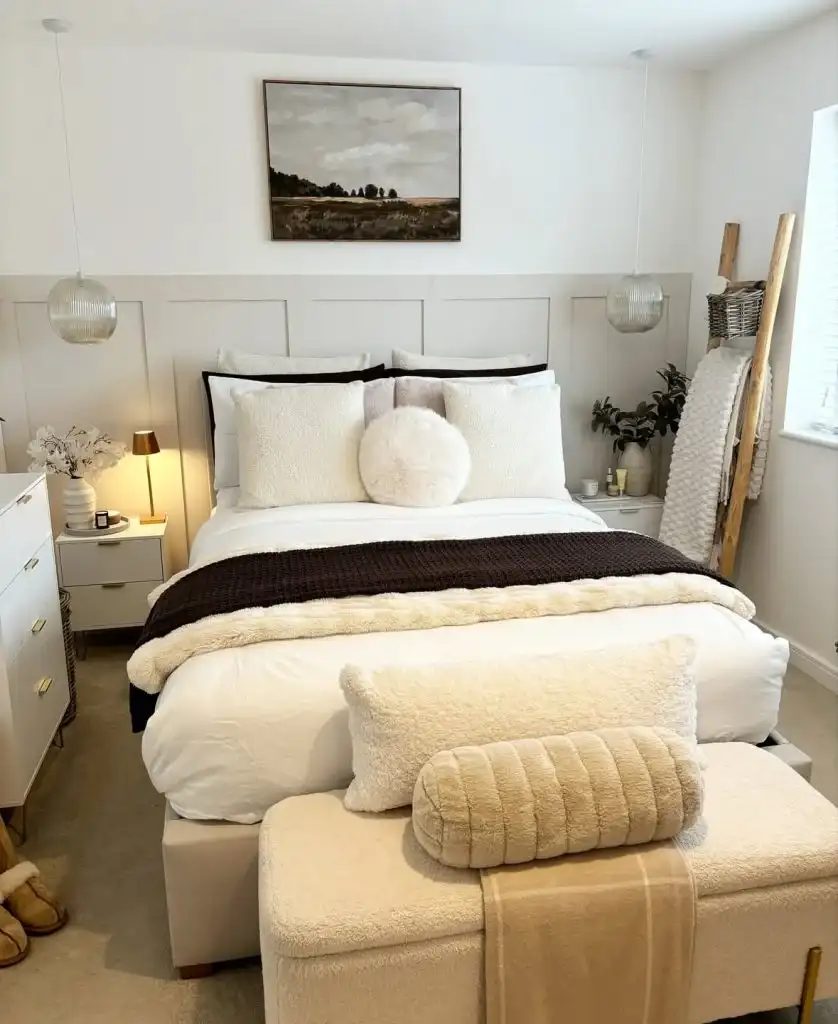
Layered Neutrals In A Small Space
A small bedroom can still feel incredibly cozy when you use layers of texture and warm neutral colors. This setup combines wall paneling, soft bedding, pillows, throws, and artwork to create a comfortable little retreat.
The blanket ladder is especially useful because it adds character while also providing a practical place to keep extra blankets. Hanging lights and a carefully chosen landscape print complete the cozy atmosphere without taking up much floor space.
Green Accent Wall With Scandinavian Lines
This room combines Scandinavian simplicity with the warmth of an earthy green bedroom. The deep green paneled wall creates a strong focal point, while the pale wood furniture keeps the room feeling bright and balanced.
A woven pendant light and natural window shades introduce additional texture. The patterned rug also helps soften the clean lines and makes the bedroom feel more welcoming.
Modern Desert-Inspired Primary
Warm desert tones and midcentury-inspired details give this bedroom a stylish yet comfortable personality. Caramel leather, warm wood, woven shades, and muted blue and tan accents work together to create a naturally balanced palette.
The combination of textures keeps the room from feeling too minimal, while the artwork adds a subtle statement above the bed. It is a great example of how earthy decorating can include stronger colors without overwhelming the room.
Arched Niche With Soft Color Hits
The arched wall niche creates an eye-catching backdrop and gives this bedroom a relaxed bohemian character. Neutral quilted bedding keeps the foundation calm, while moss green and terracotta pillows add small touches of nature-inspired color.
Rounded furniture pieces and woven accessories soften the overall design. The result is a cozy bedroom that feels thoughtfully decorated without looking overly formal.
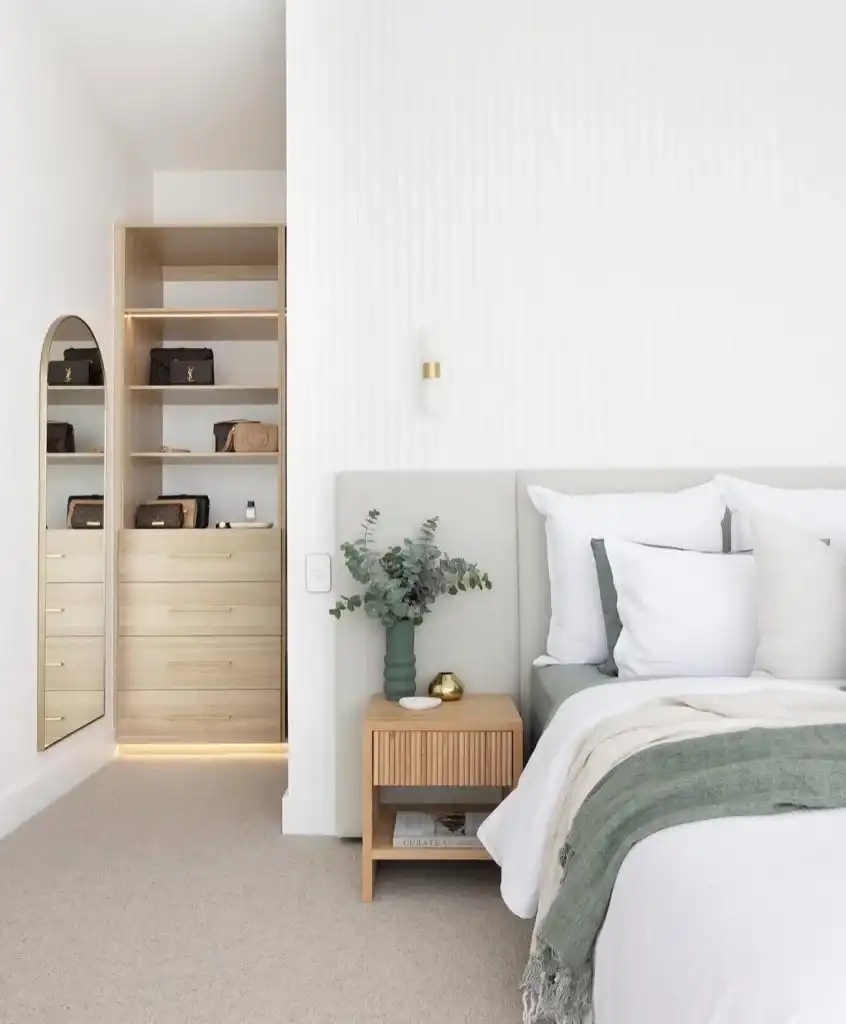
Minimal Built-In Sanctuary
Minimal decorating does not have to mean cold or empty. This bedroom uses warm materials, soft colors, and natural details to create a simple but welcoming retreat.
The pale upholstered headboard blends beautifully with the surrounding walls, while the wood slat nightstand adds subtle texture. Sage bedding and eucalyptus stems introduce gentle natural color without taking attention away from the clean design.
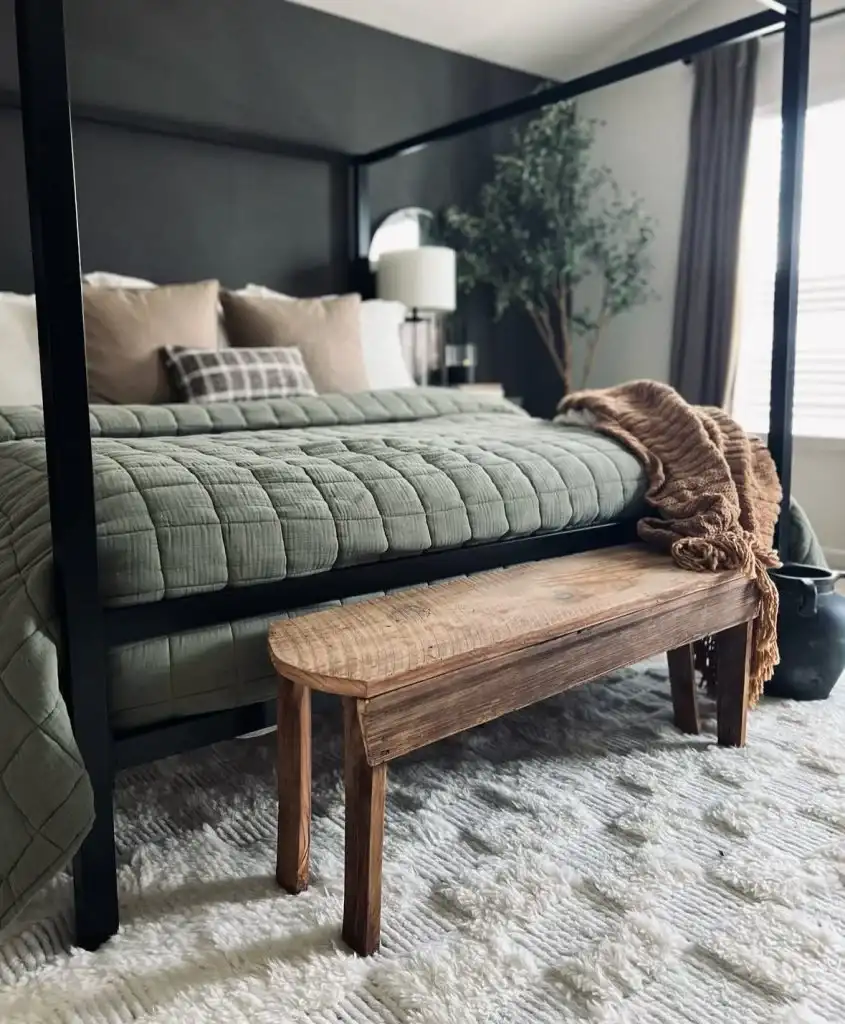
Moody Canopy Sanctuary
Charcoal walls and a black canopy bed give this bedroom a cozy cocoon-like atmosphere. Rather than making the room feel heavy, natural materials and softer colors balance the darker palette.
A sage quilt, tan pillows, wood bench, textured rug, and leafy tree add warmth and contrast. Together, these details create the feeling of a modern cabin retreat with a sophisticated edge.
Soft Sand & Blush Retreat
Soft sandy neutrals create the foundation for this calm and comfortable bedroom. Blush-colored pillows add a delicate touch of warmth without taking the room away from its earthy palette.
A chunky knitted throw gives the bed extra texture, while a simple green branch introduces a natural element. The result is understated, cozy, and easy to recreate.
Easygoing Shelfie Bedroom
This bedroom proves that a relaxed space can still have plenty of personality. Crisp white bedding creates a fresh base, while the rust-colored throw and patterned rug bring warmth and visual interest.
The wooden shelf above the bed provides an easy way to display artwork, photographs, and small decorative pieces. Because the accessories can be changed easily, this approach is also perfect for refreshing the room throughout the year.
Panelled Nook With Vintage Touches
Taupe wall paneling gives this bedroom nook a warm, timeless character. The slim ledge provides space for pottery, candles, and other small decorative accents, making the wall feel intentionally styled.
Layered pillows and a slightly rumpled duvet add a relaxed feeling to the bed. Artwork and a decorative wreath above the headboard complete the cozy country-inspired look.
Airy Striped Minimalist
This design keeps things simple with a combination of stripes, light wood, and woven materials. The neutral color palette makes the bedroom feel open and peaceful, while the natural textures prevent it from looking plain.
The slatted headboard adds subtle architectural interest without making the room feel crowded. It is a great choice for anyone who prefers a clean and uncluttered earthy bedroom.
Sunlit Classic Comfort
This bedroom has the polished appearance of a boutique hotel while still feeling warm and approachable. The tall upholstered headboard creates a strong focal point, while matching nightstands and a channel-tufted bench provide symmetry.
Soft bedding, a sheepskin accent, and a woven stool introduce plenty of texture. These details make the sophisticated design feel comfortable rather than overly formal.
Farmhouse Frame With Modern Edges
Traditional farmhouse elements meet modern styling in this inviting bedroom. The metal bed and chunky wooden beams provide classic character, while olive and charcoal accents give the room a more contemporary feel.
Layered rugs add warmth underfoot, and the benches at the end of the bed provide both seating and decorative appeal. The result is a farmhouse bedroom that feels relaxed, updated, and lived in.
Boho Terracotta Nest
Warm terracotta bedding gives this bedroom its signature earthy personality. A cane headboard, hanging plants, natural textures, and a large knitted throw create an effortlessly cozy boho atmosphere.
The slightly imperfect layering makes the room feel relaxed instead of overly styled. It is a great example of how just a few natural materials and warm colors can transform a simple bedroom.
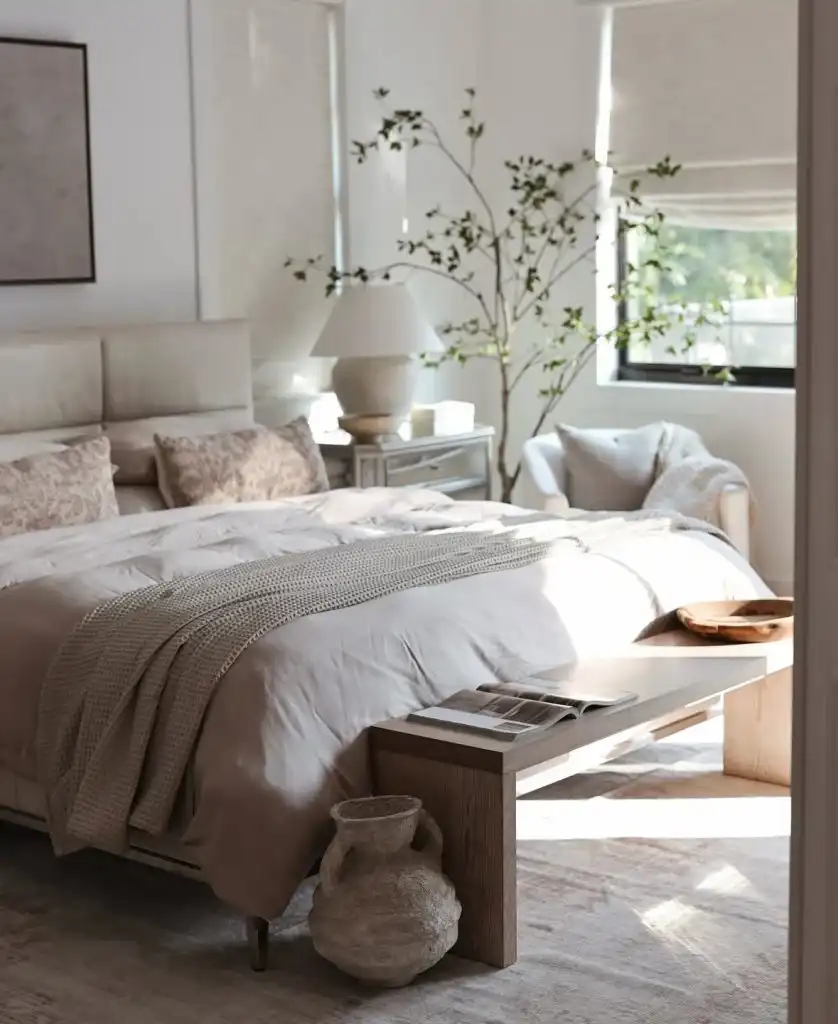
Soft Luxe Tree-Filled Suite
This bedroom combines soft luxury with natural elements for a calm and sophisticated look. Pale upholstery and thick blankets create a comfortable foundation, while the large tree in the corner adds movement and a fresh organic touch.
A large ceramic vessel, layered rug, and understated accessories keep the room from feeling too polished. Everything feels thoughtfully selected while still maintaining a relaxed atmosphere.
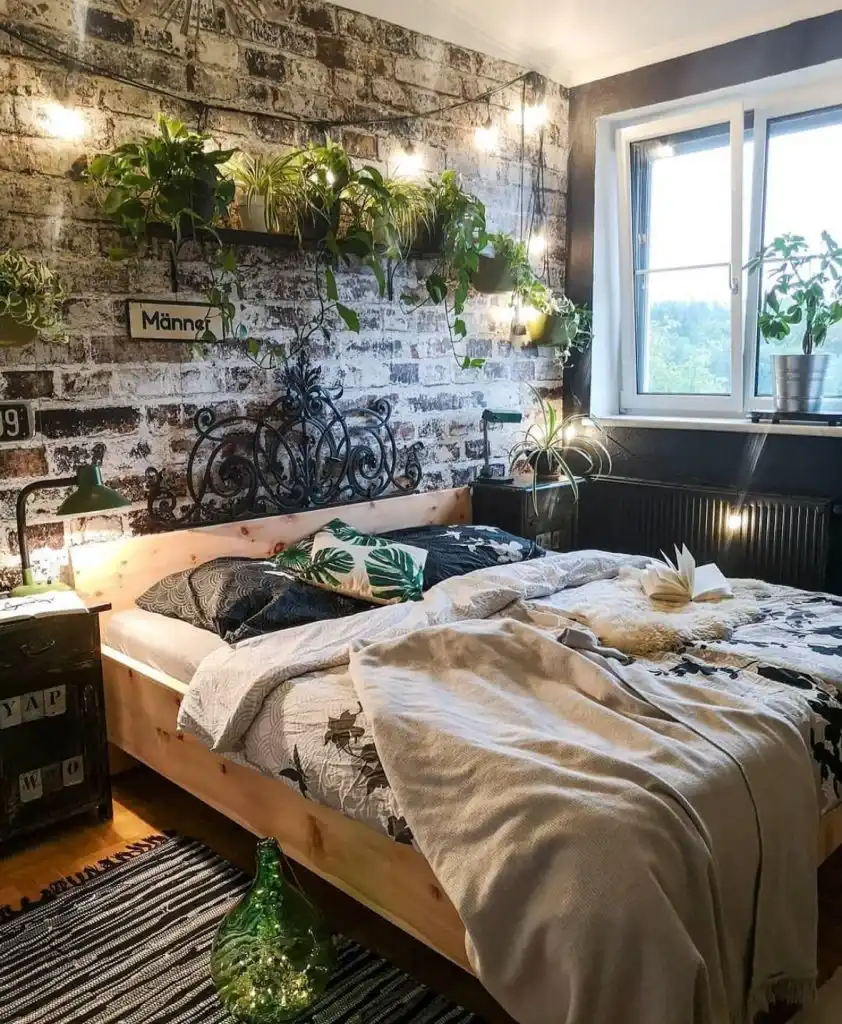
Brick Wall Urban Jungle
An exposed brick wall provides a dramatic foundation for this plant-filled bedroom. The combination of greenery, string lights, textured bedding, and natural accessories creates the feeling of a cozy urban jungle.
Plants are used throughout the space to soften the harder brick surface and add plenty of life. The layered look feels creative, warm, and perfect for anyone who loves bringing the outdoors indoors.
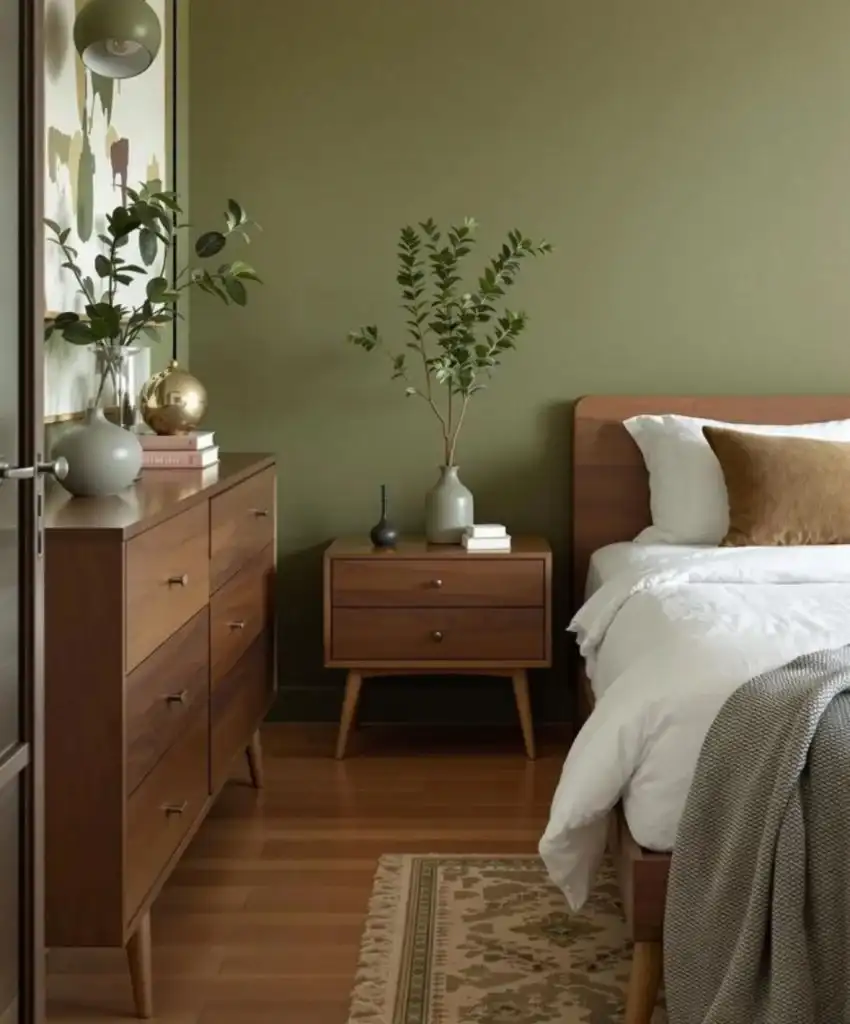
Olive & Walnut Midcentury Calm
An olive-colored wall paired with rich walnut furniture creates a warm and relaxing midcentury-inspired bedroom. The darker green tone gives the room depth, while crisp white bedding prevents the palette from becoming too heavy.
Simple vases and leafy stems add understated decoration, while a caramel pillow and patterned rug introduce just enough warmth. The overall result is clean, balanced, and peaceful.
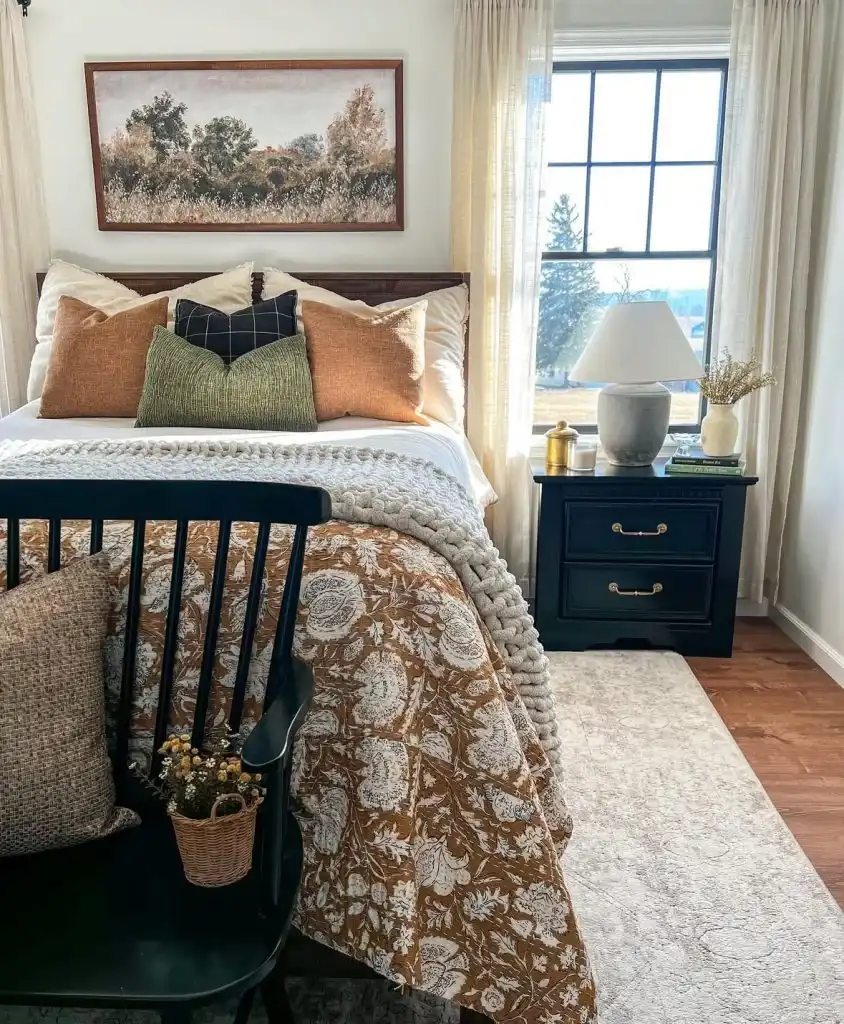
Harvest-Toned Cottage Corner
Deep rust and warm harvest colors give this bedroom a charming cottage feel. The floral quilt, layered pillows, and chunky knitted blanket make the bed look especially inviting.
A black chair and matching nightstand provide contrast and keep the room from becoming overly soft. This is a lovely approach for creating a cozy bedroom that feels seasonal without relying on obvious fall decorations.
Botanical Triptych Retreat
Nature-inspired artwork takes center stage in this peaceful bedroom. Three botanical prints above the tufted headboard establish a natural theme that continues through the greenery and patterned accessories.
Creamy bedding keeps the room soft and bright, while warm brass lighting adds a subtle glow. The combination of botanical artwork, natural colors, and gentle textures creates a relaxing atmosphere.
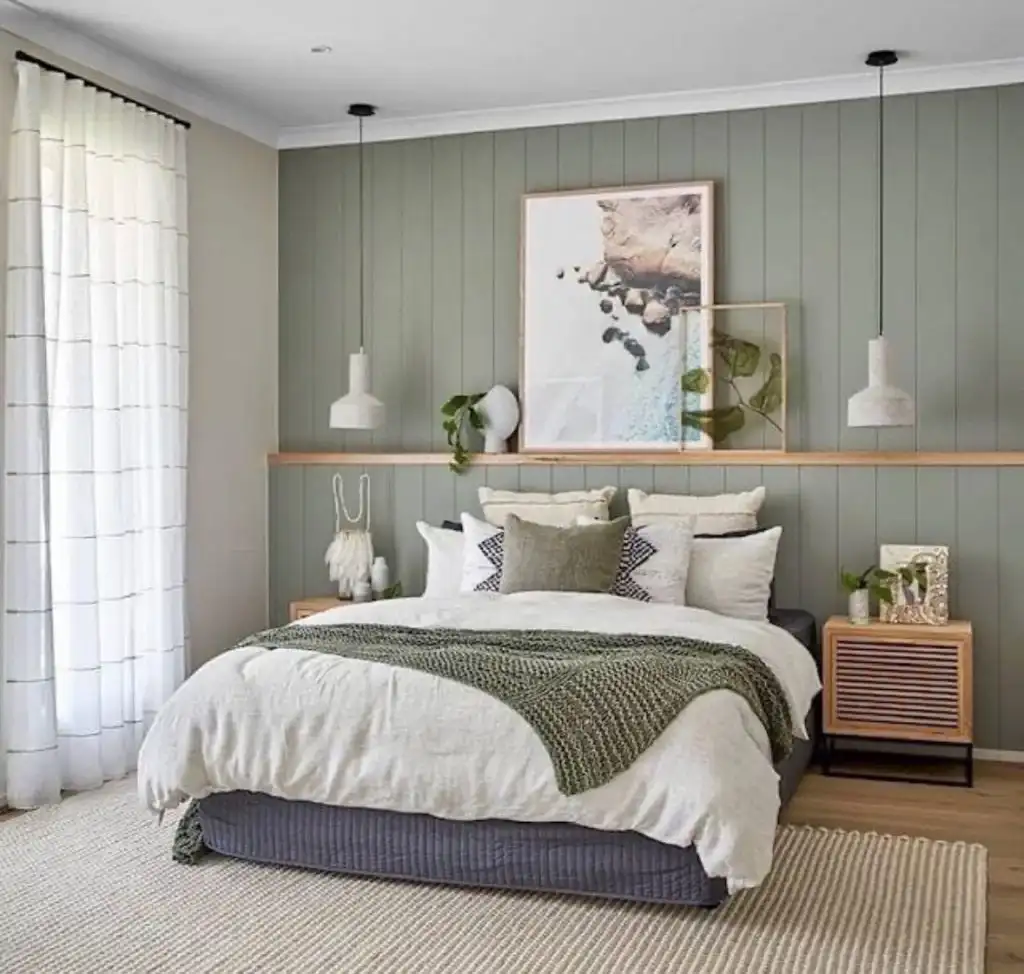
Soft Sage Panel Wall
A muted sage wall instantly gives this bedroom a calm, nature-inspired character. Vertical paneling adds architectural detail and creates an elegant backdrop behind the bed.
The picture ledge is another practical decorating idea because it provides space for artwork, plants, and small accessories without requiring additional furniture. It can also be updated whenever you want to give the bedroom a fresh look.
Golden Hour Green & Terracotta
Warm lighting, olive bedding, terracotta accents, and natural textures give this bedroom the feeling of a permanent golden hour. The combination of earthy colors creates a cozy atmosphere while keeping the room visually interesting.
Several plants add different levels of greenery, while the jute rug brings natural texture underfoot. A vintage-inspired wardrobe and carefully selected artwork finish the room with a relaxed, slightly cinematic character.
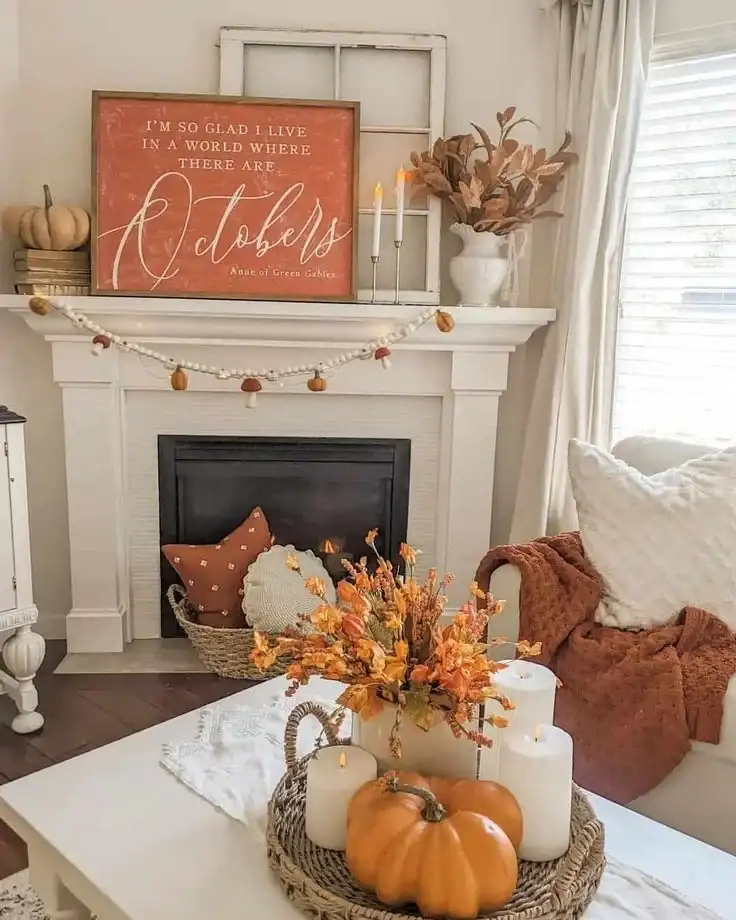
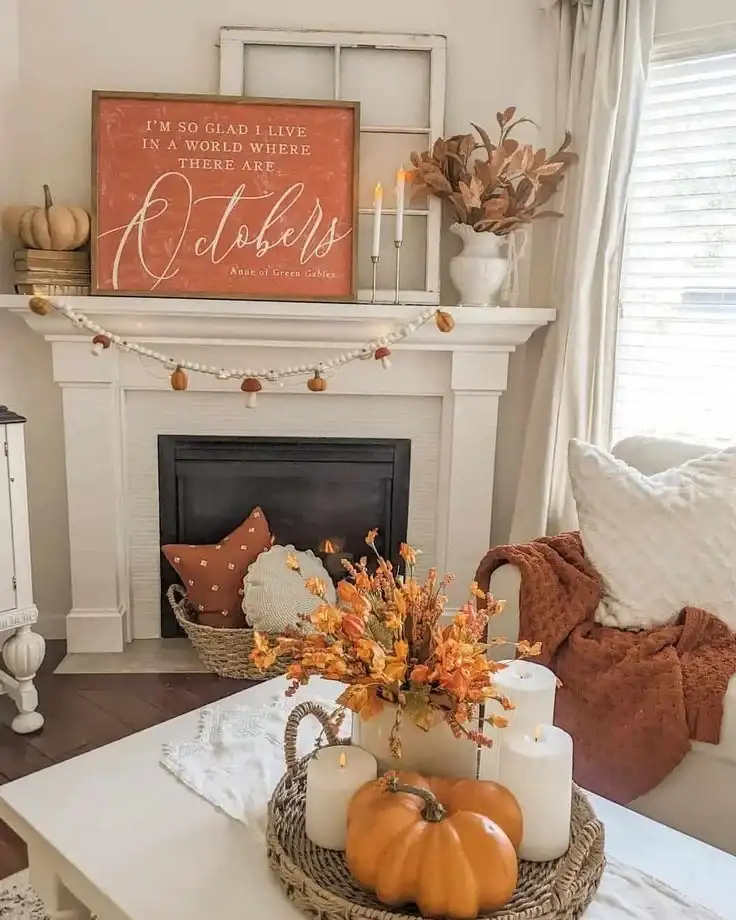
Ready to turn your home into a cozy autumn retreat? These fall mantel decor ideas can help you transform your fireplace into a warm and inviting focal point. From simple rustic arrangements to elegant displays, there are plenty of ways to bring seasonal charm into your living space.
As the crisp air arrives and leaves begin to change, it is the perfect time to replace summer decor with pumpkins, foliage, candles, and rich autumn colors. Whether you prefer farmhouse charm, modern elegance, vintage details, or natural textures, these ideas offer inspiration for creating a beautiful fall mantel.
Hearth-Style Shelf
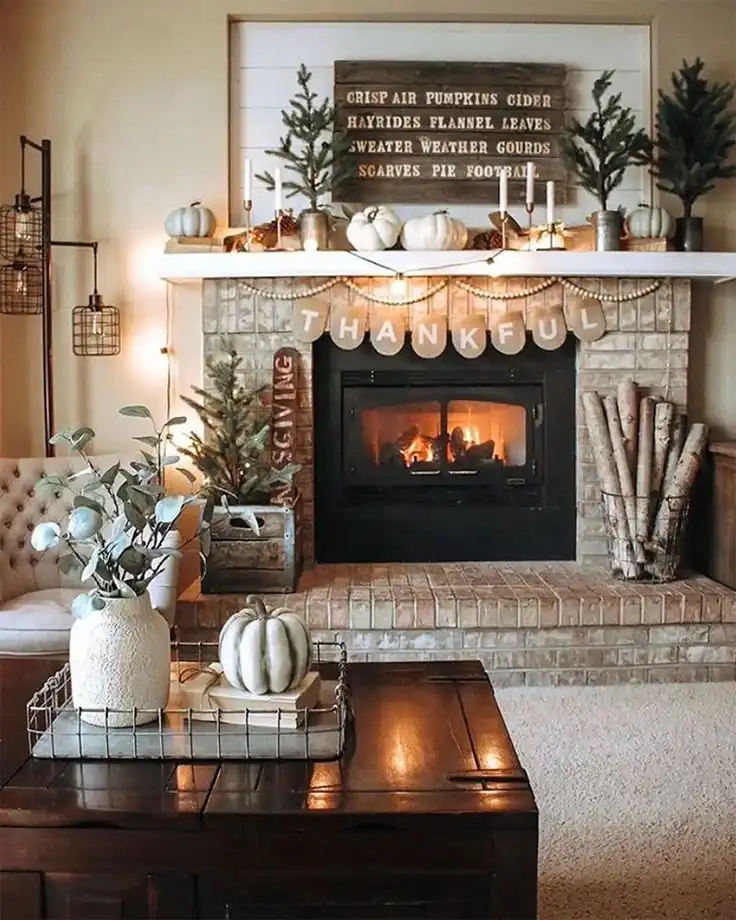
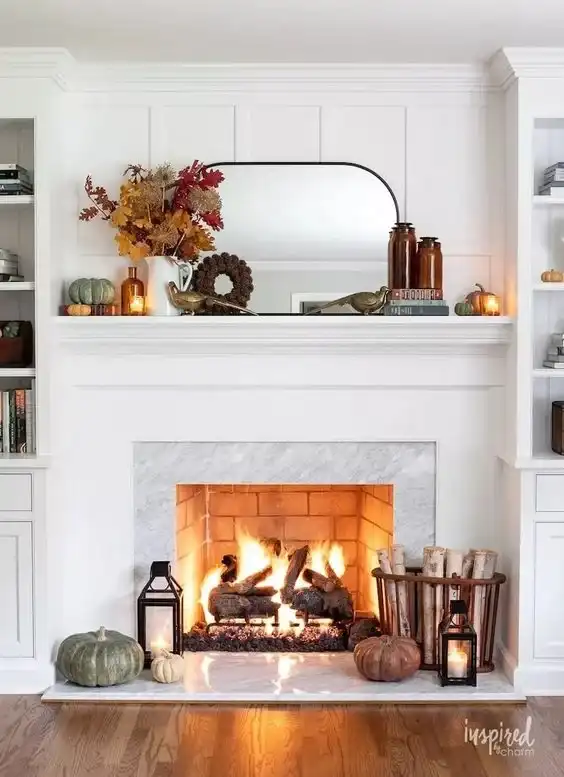
Create a simple and tidy fall display with lanterns, pumpkins, pinecones, and a few decorative accents. Place a diffuser or small centerpiece in the middle to create balance, while a mirror behind the arrangement can reflect light and make the display feel brighter.
Color Palette Choices
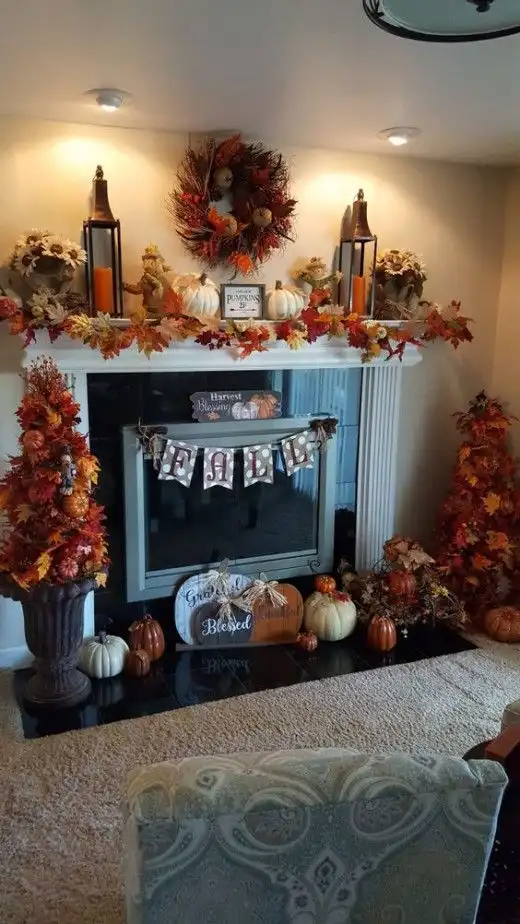
The colors you choose can set the mood for your entire mantel. Classic fall shades such as burnt orange, deep red, mustard yellow, cream, and brown create a traditional autumn atmosphere.
For something more dramatic, add jewel tones such as emerald green or sapphire blue. Neutral colors can also provide a soft foundation while allowing brighter seasonal accents to stand out.
Related posts: 28 Fall Centerpiece Ideas to Make Your Table Instagram-Worthy
Nature in Your Decor
Bring the beauty of the outdoors inside by adding pinecones, fall leaves, acorns, dried branches, and small pumpkins. These natural elements instantly create a seasonal atmosphere without requiring complicated decorations.
Candles can add even more warmth. Choose autumn-inspired scents such as cinnamon, apple, or vanilla to make the space feel cozy and inviting.
Layering Basics for Depth
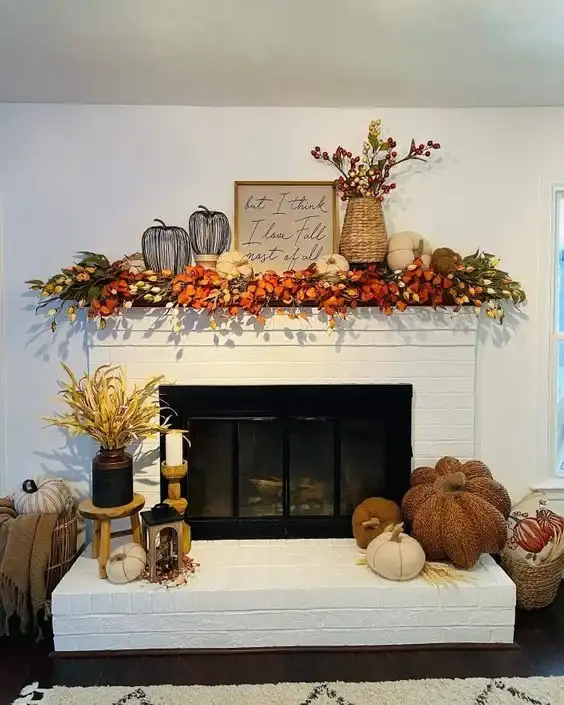
Layering different decorations gives your mantel more depth and visual interest. Begin with a garland, runner, or other simple base, then add larger decorative pieces before filling the spaces with smaller accents.
Place a larger item such as a sign, mirror, or pumpkin in the center and surround it with candles, gourds, figurines, or foliage. Varying the sizes and positions keeps the arrangement from looking flat.
Lighting and Ambiance
Lighting can completely change the appearance of your fall mantel. Candles, fairy lights, and lanterns create a soft glow that works beautifully with autumn decorations.
Battery-operated candles inside lanterns are a practical option because they provide a warm flickering effect without an open flame. Fairy lights can also be tucked into garlands or arranged around decorative pieces.
Rustic Charm
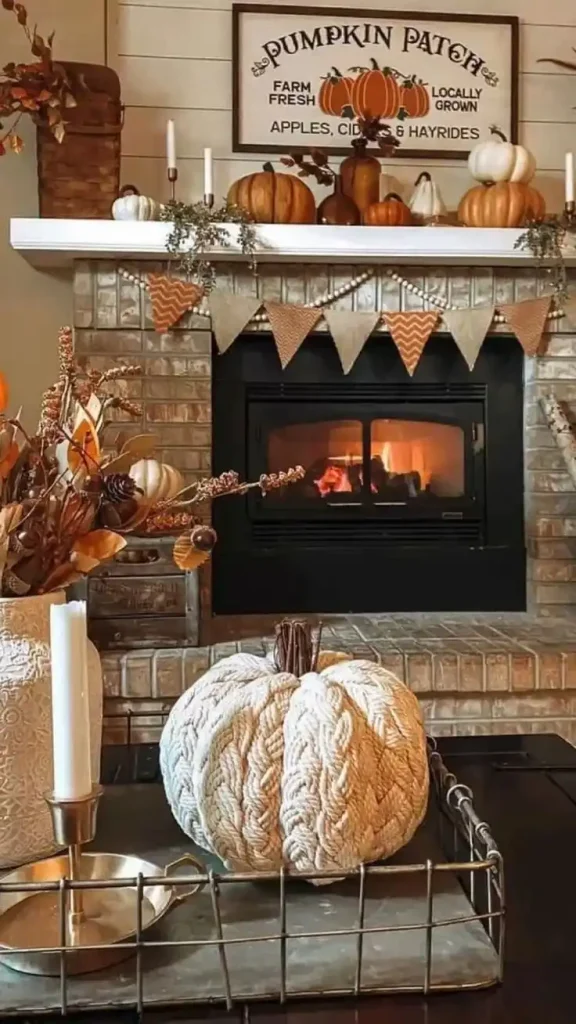
Rustic fall decor works especially well with natural materials and warm textures. Weathered wood, burlap, dried leaves, pumpkins, lanterns, and twine-wrapped candles can create a cozy farmhouse-inspired display.
Add wooden crates, metal pitchers filled with fall foliage, or a plaid blanket for extra character. The goal is to create a relaxed look that feels warm and welcoming.
Modern Elegance
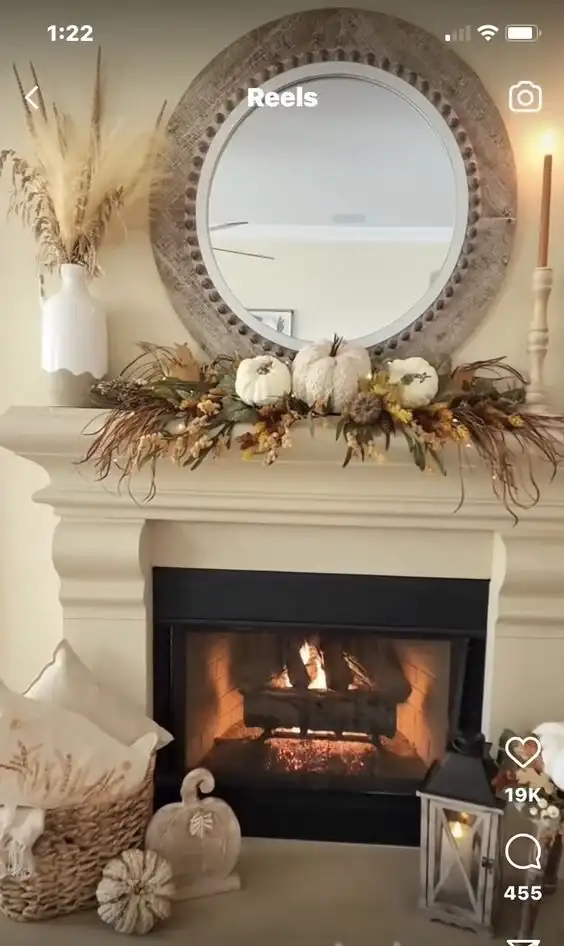
For a sleek and sophisticated mantel, choose clean lines, neutral colors, glass, and metallic accents. White pumpkins displayed in glass vases can create an elegant seasonal arrangement.
A large mirror with a simple frame can serve as the focal point, while streamlined candleholders and subtle LED fairy lights add warmth without making the display feel crowded.
Related posts: 34 Fall Decor Ideas You Will Absolutely Love: Spice Up Your Space with Seasonal Sass!
Farmhouse Coziness
Farmhouse decor is all about creating a comfortable and lived-in feeling. Distressed wood signs, mason jars, white pumpkins, beige accents, and galvanized metal containers work beautifully together.
Add greenery, gourds, or seasonal foliage to wooden boxes or metal buckets. A simple DIY farmhouse sign can also become the main focal point of the display.
Vintage Vibes
Create a nostalgic fall mantel with antique clocks, old books, brass candlesticks, vintage picture frames, and distressed decorative pieces.
Artificial fall garlands combined with fairy lights can add warmth, while small vintage accessories such as keys or decorative watches can give the display a timeless character.
Crafting with Pumpkins
Pumpkins are one of the easiest ways to bring fall into your mantel decor. You can use real pumpkins, foam pumpkins, painted pumpkins, or decorative designs to match your preferred style.
Materials needed:
Craft pumpkins
Acrylic paint
Paintbrushes
Stencils, if desired
Paint pumpkins in solid colors or experiment with stripes, dots, floral patterns, or other designs. For carved pumpkins, use LED candles to create a warm glow.
Homemade Wreath Tutorials
A fall wreath can become a beautiful focal point above your fireplace. Choose a grapevine base and decorate it with faux leaves, mini pumpkins, pinecones, berries, and other seasonal accents.
Materials needed:
Grapevine wreath base
Faux fall leaves
Mini pumpkins
Hot glue gun
Ribbon
Arrange and attach the leaves around the wreath, then add smaller seasonal decorations. Finish with a ribbon and hang the wreath above the mantel or on a nearby door.
Creative Use of Vases and Jars
Mason jars and decorative vases are simple ways to create attractive fall displays. Fill them with dried wheat, autumn flowers, branches, or seasonal foliage.
Wrap jars with burlap ribbon or add small fairy lights for extra warmth. You can also paint the containers in autumn colors or personalize them with simple stenciled designs.
Related posts: Cozy & Festive Small Apartment Christmas Decor Ideas
Choosing the Right Artwork
Artwork can determine the overall style of your mantel. Choose a bold statement piece such as an oversized painting, seasonal print, or decorative mirror to create a strong focal point.
If you enjoy changing your decor throughout the year, choose a versatile piece such as a farmhouse sign that can easily be updated for different seasons.
Using Texture and Patterns
Mixing textures adds depth and makes your mantel more interesting. Combine woven baskets, metal candleholders, ceramic pieces, wood, burlap, and soft textiles.
A chunky-knit throw can add a cozy touch, while a decorative tray can bring together smooth ceramics, rough fabrics, and polished wood. Patterned vases or frames can also add variety without overwhelming the display.
Displaying Collections Tastefully
If you enjoy collecting seasonal decorations, display them in a way that looks organized rather than cluttered. Choose a common theme, such as ceramic pumpkins, vintage candlesticks, or small autumn figurines.
Grouping similar pieces together on a tray can make the collection look intentional and polished. Leave some open space around the items to maintain a balanced appearance.
Balancing Heights and Sizes
Using different heights and sizes creates visual rhythm across your mantel. Start with a tall centerpiece such as a mirror, large vase, or decorative sign, then gradually add shorter pieces toward each side.
Combine tall candleholders with smaller pumpkins and other low-profile decorations. Step back occasionally while decorating so you can adjust the arrangement and maintain a balanced look.
Transitioning from Halloween to Thanksgiving
You can easily transition your mantel from Halloween to Thanksgiving without starting from scratch. Remove spooky decorations and replace them with pumpkins, gourds, foliage, and warm seasonal colors.
Deep reds, oranges, earthy browns, rustic materials, and candles can create a welcoming Thanksgiving atmosphere while keeping the overall fall theme intact.
Prepping for Christmas Early
Fall decor can transition naturally into early Christmas decorating. Add subtle metallic ornaments, warm string lights, pinecones, or other accents that complement your existing autumn display.
There is no need to add full Christmas decorations immediately. Small touches can introduce a festive feeling while still maintaining the warmth of your fall mantel.
Adding Metallic and Glass Elements
Metallic and glass accents can give fall mantel decor an elegant finish. Gold, copper, and silver candleholders, picture frames, and vases can add subtle sparkle.
Fill glass vases with dried wheat or autumn leaves, or add glass pumpkins and metallic decorations for a more sophisticated look. Metallic spray paint can also refresh ordinary decorative pieces.
Related posts: White Christmas Decor Ideas for Neutral Lovers: Exciting & Chic Inspirations!
Organic and Natural Finishes
Natural materials are perfect for creating a warm autumn display. Dried wheat, birch logs, twine, dried flowers, pinecones, and wooden accents can add organic texture.
Arrange birch logs beneath or beside the mantel and use small dried flower arrangements to soften the overall look. These simple elements work particularly well with rustic and farmhouse styles.
Making a Statement with Scale
Large decorative pieces can make your mantel stand out. Oversized pumpkins, chunky candles, large wooden signs, metallic vases, or a large fall-themed painting can become dramatic focal points.
Balance larger items with smaller decorations so the display does not feel overwhelming. If you have a smaller fireplace, use medium-sized pieces to maintain the right proportions.
Books and Magazines for Reference
Books and magazines can provide plenty of inspiration when planning your seasonal decor. Better Homes & Gardens and Good Housekeeping often feature ideas for seasonal decorating and home styling.
Books such as Homebody by Joanna Gaines, The Inspired Room by Melissa Michaels, and Flea Market Style can also provide practical ideas for creating cozy, vintage, and personalized fall mantel displays.
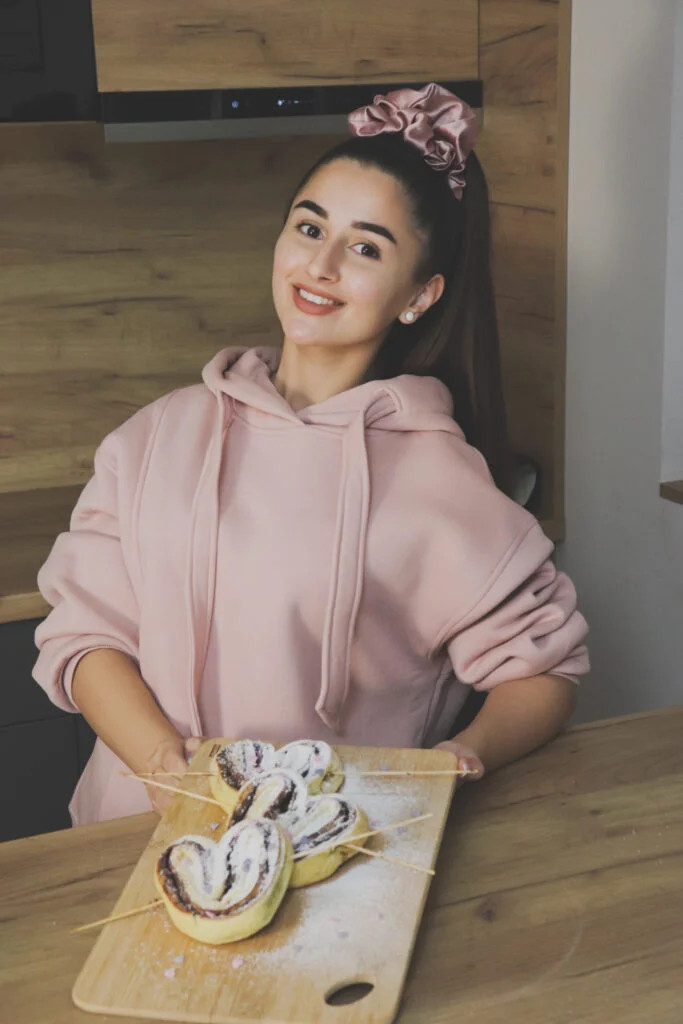
Valentine’s Day is a wonderful time to surprise your loved ones with something sweet, and these charming pastry hearts are a perfect choice. With their flaky, golden layers and delicious sweet filling, they look beautiful on a dessert table and add a lovely romantic touch to your celebration.
These Pastry Hearts with Skewers are filled with creamy Nutella and finished with powdered sugar and festive decorations. They’re simple to prepare, fun to serve, and make an adorable homemade treat for Valentine’s Day.
Prepare the Puff Pastry
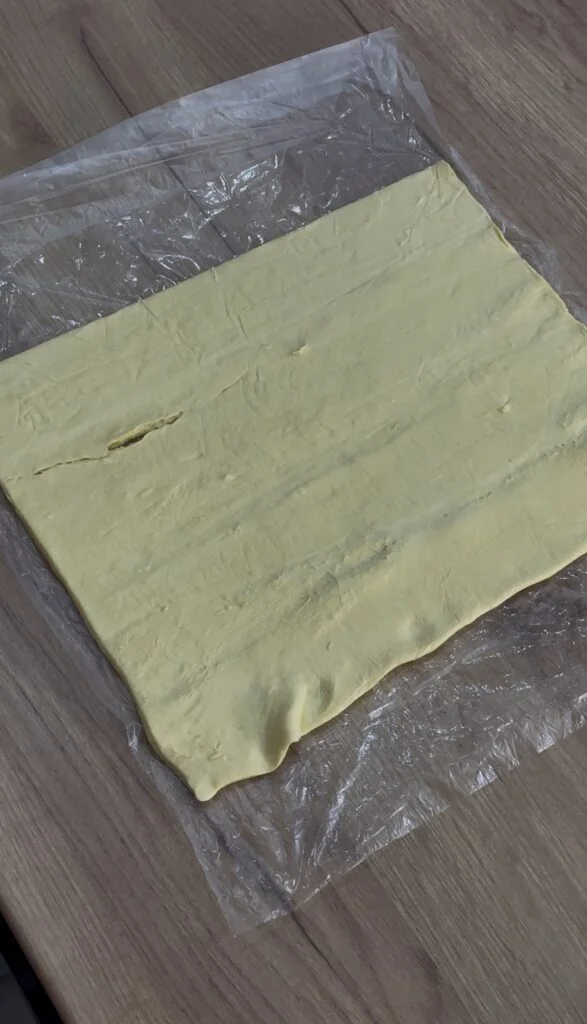
On a lightly floured surface, gently roll out the thawed puff pastry sheets. This helps smooth out any creases that may have formed while thawing and creates an even surface for making the pastry hearts.
Rolling the pastry evenly is important because it helps the hearts bake consistently and gives them a neat, flaky texture once they are finished.
Prepare the Puff Pastry
On a lightly floured surface, gently roll out the thawed puff pastry sheets. This helps smooth out any creases that may have formed while thawing and creates an even surface for making the pastry hearts.
Rolling the pastry evenly is important because it helps the hearts bake consistently and gives them a neat, flaky texture once they are finished
Spread the Nutella
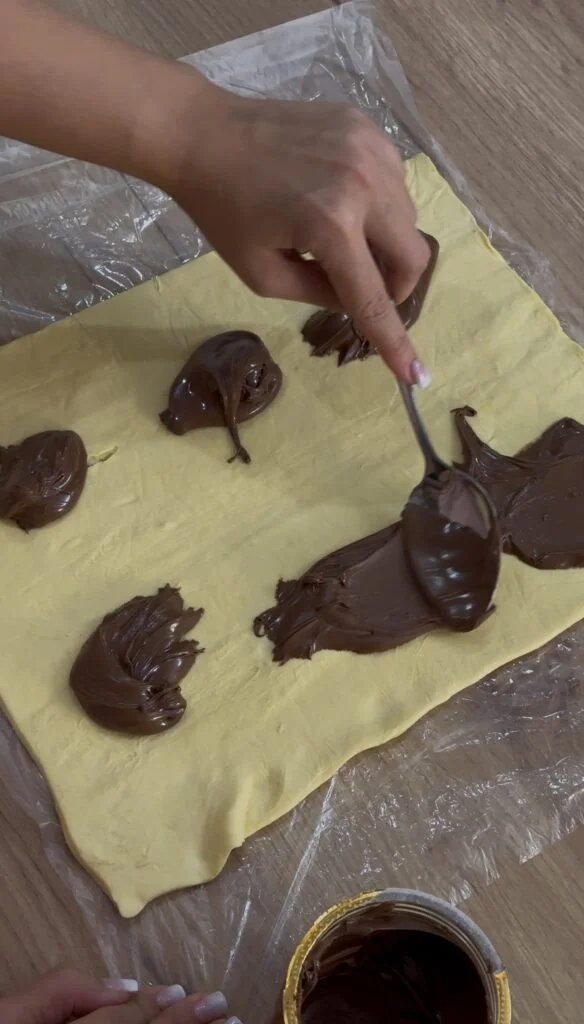
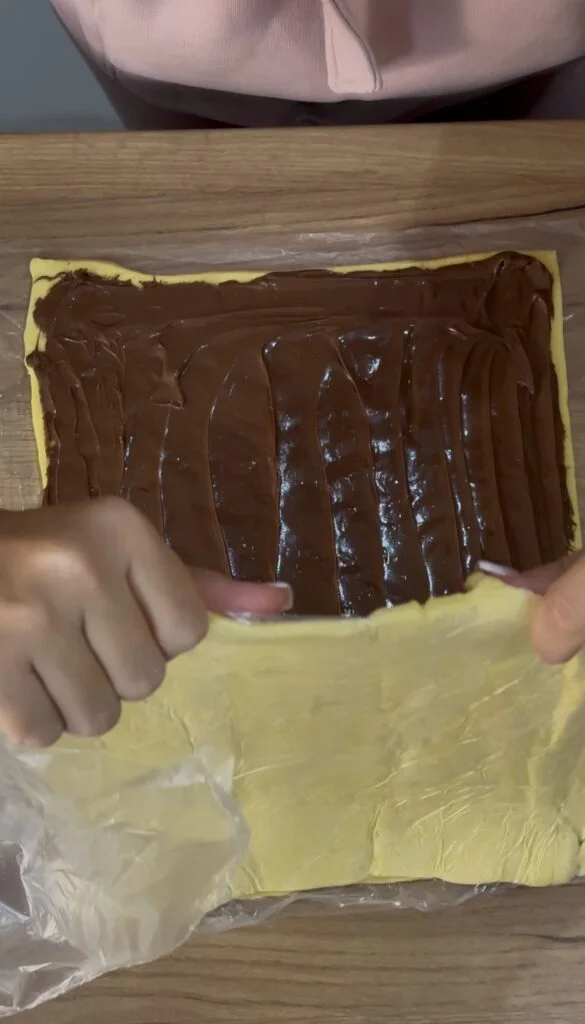
Once the puff pastry is ready, spread a generous, even layer of Nutella over one sheet. Make sure the filling reaches most of the surface without spreading it too thickly around the edges.
The creamy Nutella adds a rich chocolate flavor that pairs beautifully with the light, flaky puff pastry.
Layer the Puff Pastry
Carefully place the second puff pastry sheet over the Nutella-covered sheet. Gently press the layers together so they stick without flattening the pastry too much.
You should now have two layers of puff pastry with a delicious Nutella filling in between, ready to be shaped into hearts.
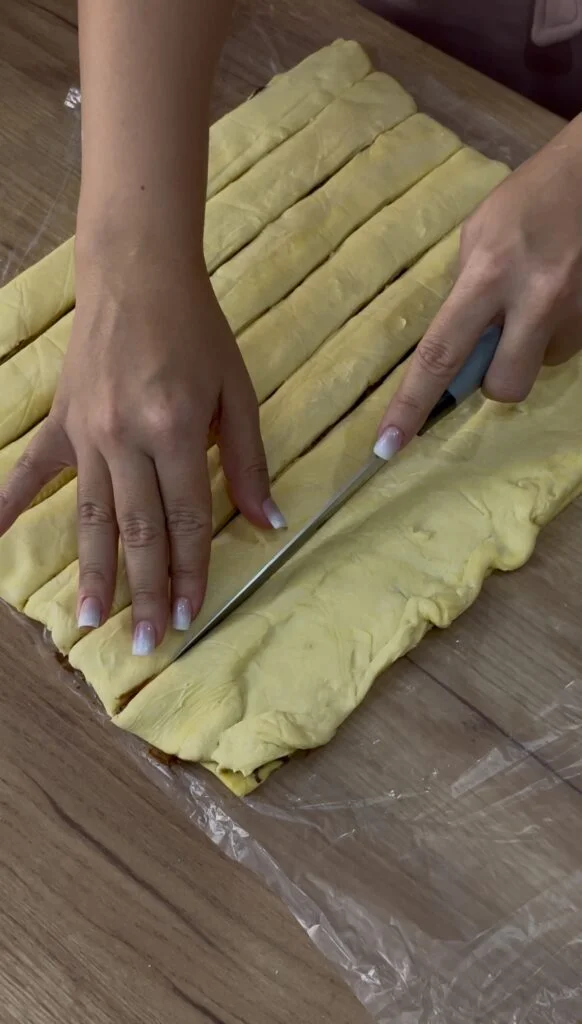
Cut into Strips
Use a sharp knife or pizza cutter to slice the layered pastry into strips about 1 inch wide. Try to keep the strips as even as possible so the finished hearts have a similar size and shape.
Keeping the strips uniform also makes the pastry easier to fold and helps everything bake evenly.
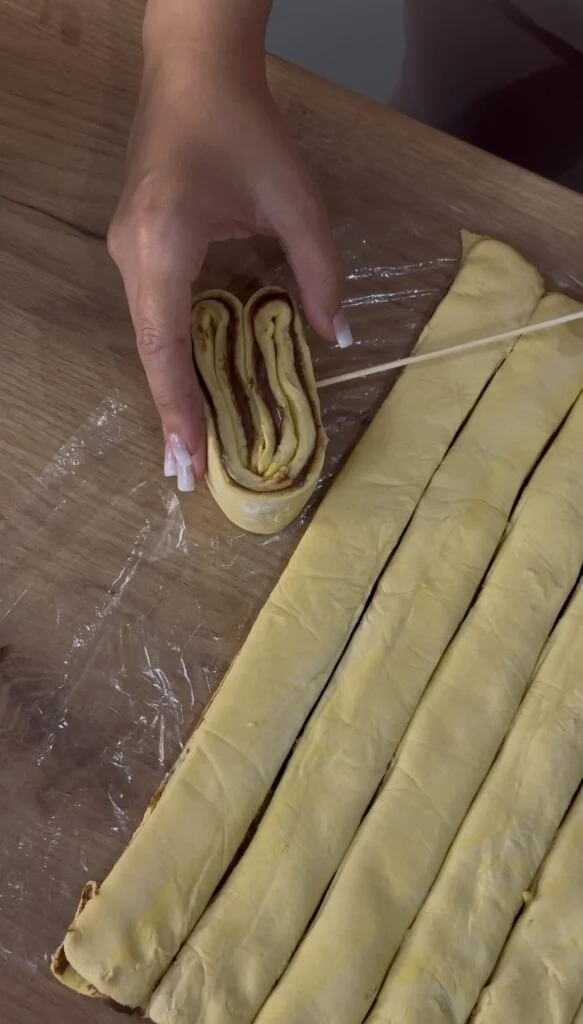
Form the Hearts
Take each pastry strip and carefully fold both ends toward the center to create a heart shape. Adjust the top curves and bottom point with your fingers until the heart looks neat.
Insert a wooden skewer through the center of each heart to help hold its shape while baking. Be gentle so you do not press the pastry too firmly.
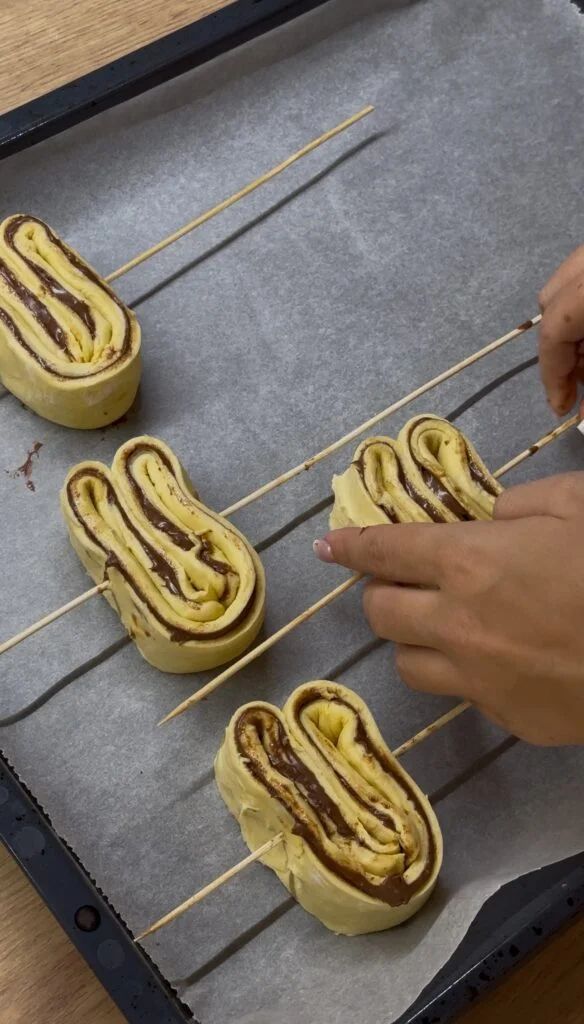
Arrange on the Baking Sheet
Place the shaped pastry hearts on a parchment-lined baking sheet, leaving a little space between each one. Puff pastry expands as it bakes, so giving the hearts enough room helps prevent them from sticking together.
Proper spacing also allows the hot air to circulate around each pastry, helping them bake evenly and develop a golden, flaky finish.
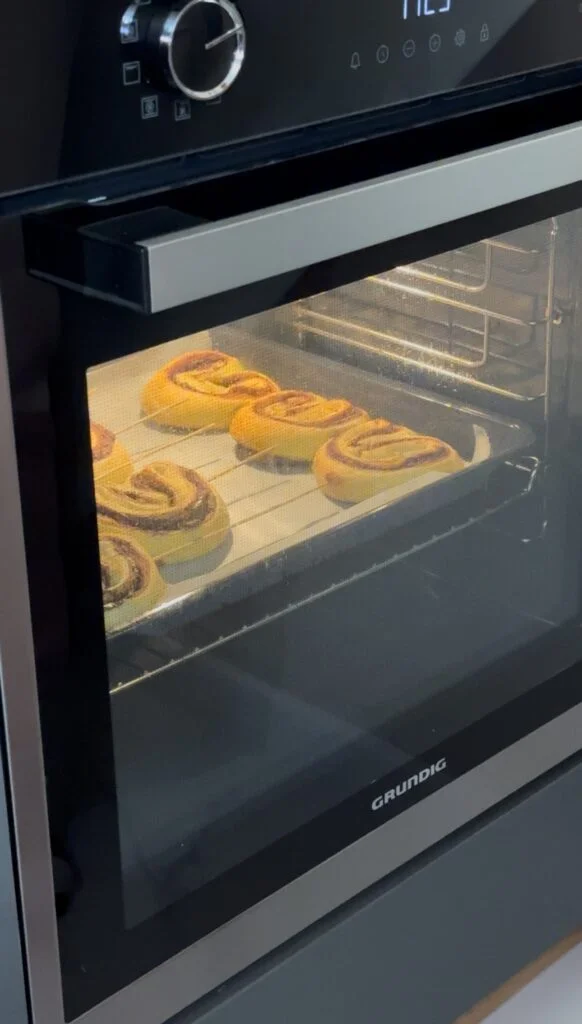
Bake the Pastry Hearts
Place the baking sheet in a preheated oven and bake the pastry hearts for about 15–20 minutes, depending on your oven. Keep an eye on them toward the end of the baking time so they do not become too dark.
The hearts are ready when the pastry has puffed up and turned beautifully golden brown. This is what gives them their light and crispy texture.
Cool the Pastry Hearts
Remove the baked hearts from the oven and let them rest on the baking sheet for a few minutes. This allows the pastry to firm up slightly before you move it.
Then transfer the hearts to a wire rack and let them cool completely. Cooling them on a rack helps prevent moisture from collecting underneath and keeps the pastry crisp.
Decorate the Pastry Hearts
Once the pastry hearts have cooled completely, it’s time for the fun part—decorating! Lightly dust them with powdered sugar for a simple, sweet finish.
For a more festive Valentine’s Day look, add colorful sprinkles, edible glitter, colored sugar, or other decorations you love. This is an easy way to make each pastry heart feel extra special.
Serve
Serve the finished Pastry Hearts on their skewers as a cute and festive Valentine’s Day dessert. They are easy to hold, fun to display, and perfect for sharing with family, friends, or someone special.
The combination of flaky puff pastry, creamy Nutella, and pretty decorations makes these treats a simple but impressive addition to any Valentine’s Day celebration.
Tips
Thawing Puff Pastry: Follow the package directions when thawing your puff pastry. It usually needs about 20–30 minutes at room temperature.
Sealing the Edges: Press the pastry layers together gently around the edges to help keep the Nutella from leaking during baking.
Alternative Fillings: You can replace Nutella with fruit preserves, cream cheese, or peanut butter. Choose a filling that is not too runny.
Storage: Keep the cooled pastry hearts in an airtight container at room temperature for up to one day. For longer storage, freeze them and reheat them in the oven.
Preventing Sogginess: Let the pastries cool completely on a wire rack before storing them. Avoid adding too much filling, as excess moisture can make the pastry soft.
Decorations: Try colored sugar, edible glitter, chocolate drizzle, sprinkles, or small candies to create a festive Valentine’s Day finish.
These Pastry Hearts with Skewers are a fun and easy treat to make for Valentine’s Day. They combine flaky puff pastry with creamy Nutella and pretty decorations, making them perfect for sharing with the people you love.
Valentine’s Day Pastry Hearts with Skewers 2026
These Pastry Hearts with Skewers are filled with creamy Nutella and decorated with powdered sugar and festive decorations. They’re easy to make, delicious, and perfect for adding a sweet touch to your Valentine’s Day celebration.
Ingredients
2 sheets of puff pastry, frozen and then thawed
1/2 cup Nutella or your favorite filling
Powdered sugar, for dusting
Festive decorations such as sprinkles or edible glitter, optional
Instructions
Preheat the oven to 400°F (200°C) and line a baking sheet with parchment paper. Roll out the thawed puff pastry sheets on a lightly floured surface to smooth out any creases.
Spread Nutella evenly over one sheet, then place the second pastry sheet on top. Gently press the layers together and cut the pastry into strips about 1 inch wide.
Fold each strip from both ends toward the center to create a heart shape, then insert a wooden skewer through the middle to secure it. Arrange the hearts on the prepared baking sheet, leaving space between them.
Bake for approximately 15–20 minutes, or until the pastry is puffed and golden brown. Let the hearts cool briefly on the baking sheet before transferring them to a wire rack.
Once completely cool, dust the pastry hearts with powdered sugar and add your favorite festive decorations. Serve them on the skewers for a fun and charming Valentine’s Day treat.
Notes
Thaw the puff pastry according to the package instructions, usually for about 20–30 minutes at room temperature.
Fruit preserves, cream cheese, and peanut butter can be used instead of Nutella.
Make sure alternative fillings are not too runny to reduce the chance of leaking.
Store the finished hearts in an airtight container at room temperature for up to one day.
For longer storage, freeze the pastries and reheat them in the oven before serving.
Allow the pastries to cool completely before storing to help maintain their crisp texture.
Use colored sugar, chocolate drizzle, sprinkles, edible glitter, or small candies for extra decoration.
Frequently Asked Questions
Can I use other fillings besides Nutella?
Yes! You can use fruit preserves, cream cheese, peanut butter, or another favorite filling. Just avoid fillings that are too runny because they may leak while the pastry bakes.
How far in advance can I make these pastry hearts?
You can prepare them up to a day ahead and keep them in an airtight container at room temperature. If you need to keep them longer, freezing them and reheating them in the oven is a better option.
Can I use homemade puff pastry?
Absolutely. Homemade puff pastry works well as long as it is rolled to a similar thickness as store-bought pastry. This helps the hearts bake evenly.
How can I prevent the pastries from becoming soggy?
Allow the pastry hearts to cool completely on a wire rack before storing them. Avoid using too much filling, and make sure excess moisture does not remain underneath the pastries.
What other decorations can I use besides powdered sugar?
There are plenty of options! Try colored sugar, edible glitter, chocolate drizzle, sprinkles, heart-shaped candies, or small festive decorations to give your pastry hearts a fun Valentine’s Day appearance.
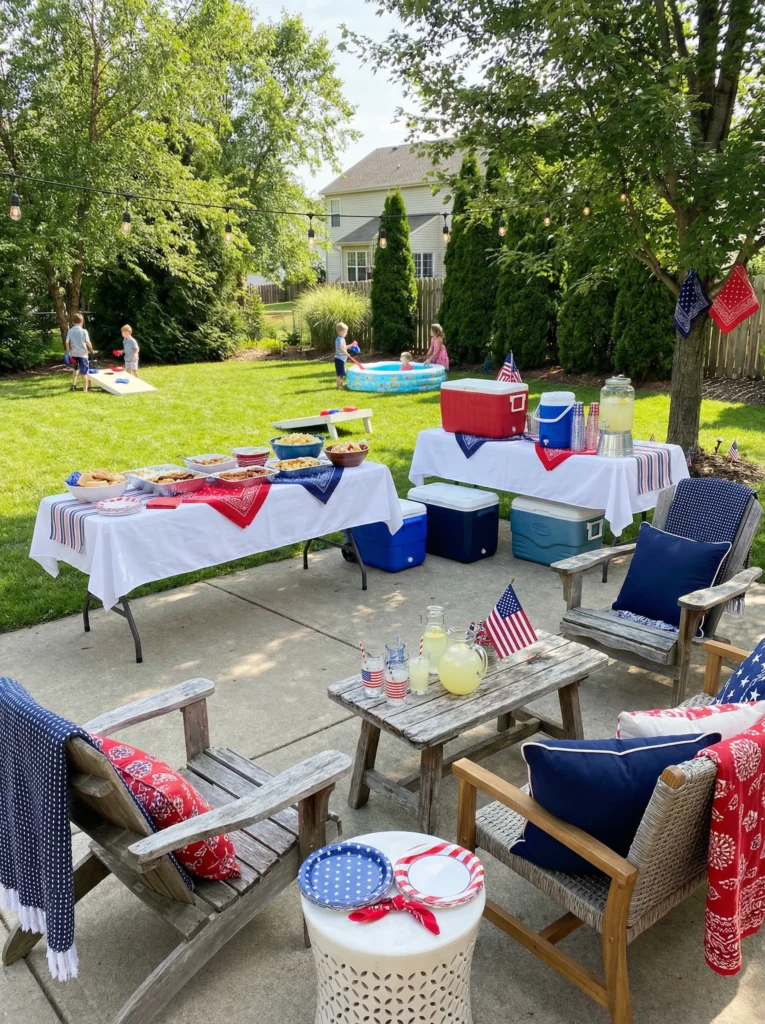
Now comes the fun part: putting these ideas into real-life outdoor Fourth of July setups that feel festive, comfortable, and easy to recreate. The goal is to create an outdoor space that looks thoughtfully decorated without feeling overly perfect or crowded. Think cozy seating, a few patriotic touches, and a setup that makes everyone want to sit down, grab a drink, and enjoy the day.
The best Fourth of July outdoor decorations don’t require dozens of accessories or a huge decorating budget. A simple plan, a few durable pieces, and some red, white, and blue accents can completely transform your outdoor space. Just remember that wind has a personality of its own, so secure lightweight decorations and expect the occasional tilted sign or runaway napkin. Keep it cute, practical, and easy to enjoy.
Patriotic Color Accents
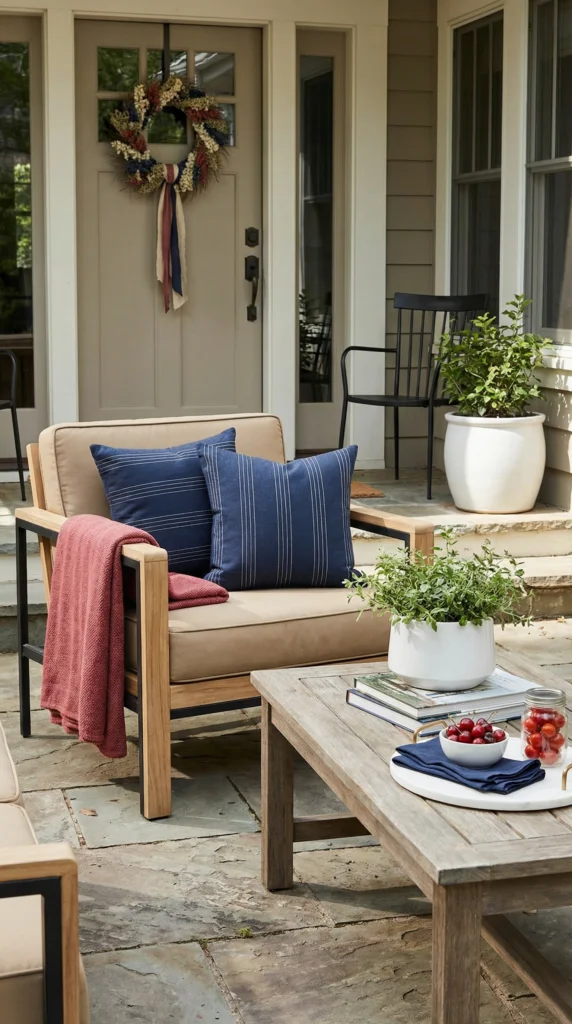
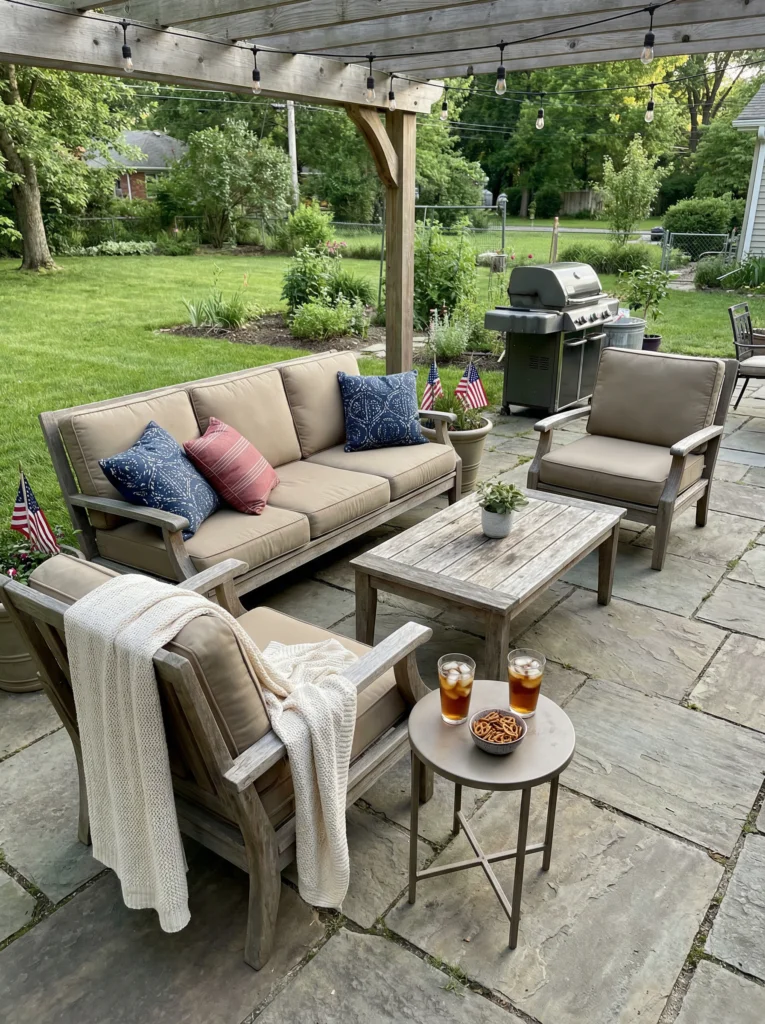
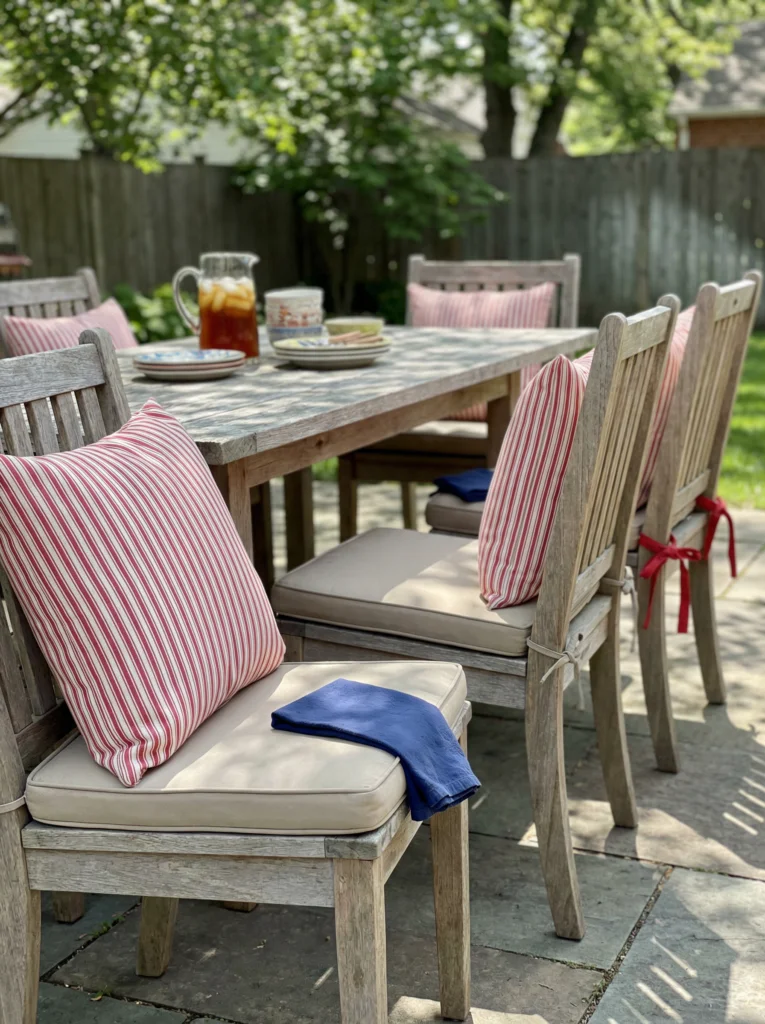
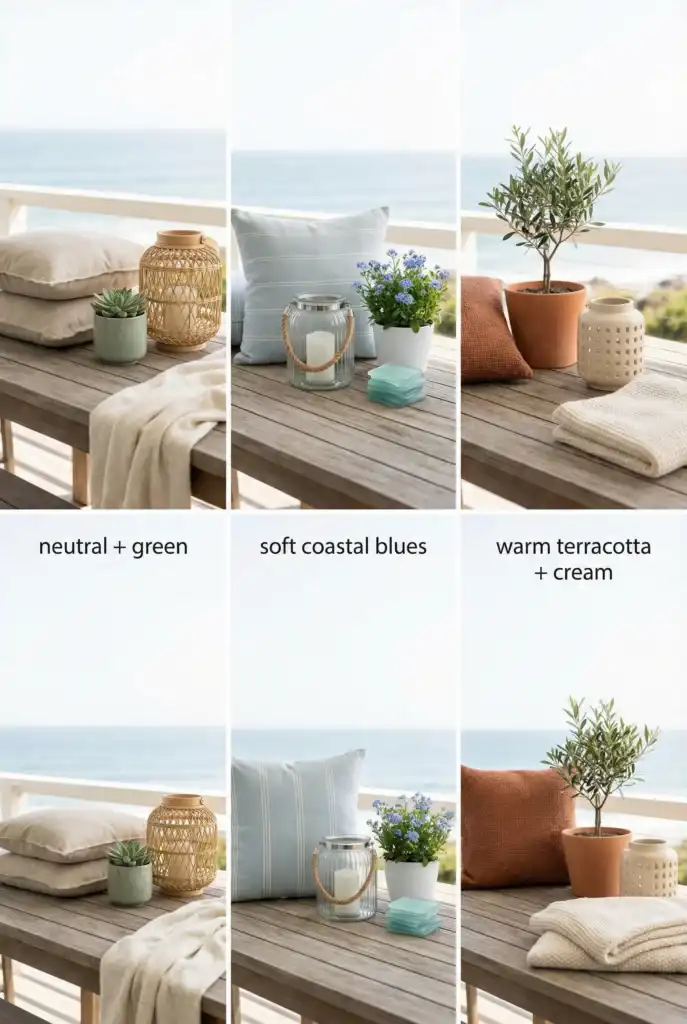
The easiest way to make your outdoor space feel ready for the Fourth of July is to choose a simple color palette and repeat it throughout the yard. Red, white, and blue work beautifully, but let one shade lead while the others act as smaller accents. Start with the neutral pieces you already own, such as wooden furniture, tan cushions, black metal, or white planters, and then add patriotic decor around the front door, seating area, and food table.
Pick one “anchor” color so the whole yard stops screaming
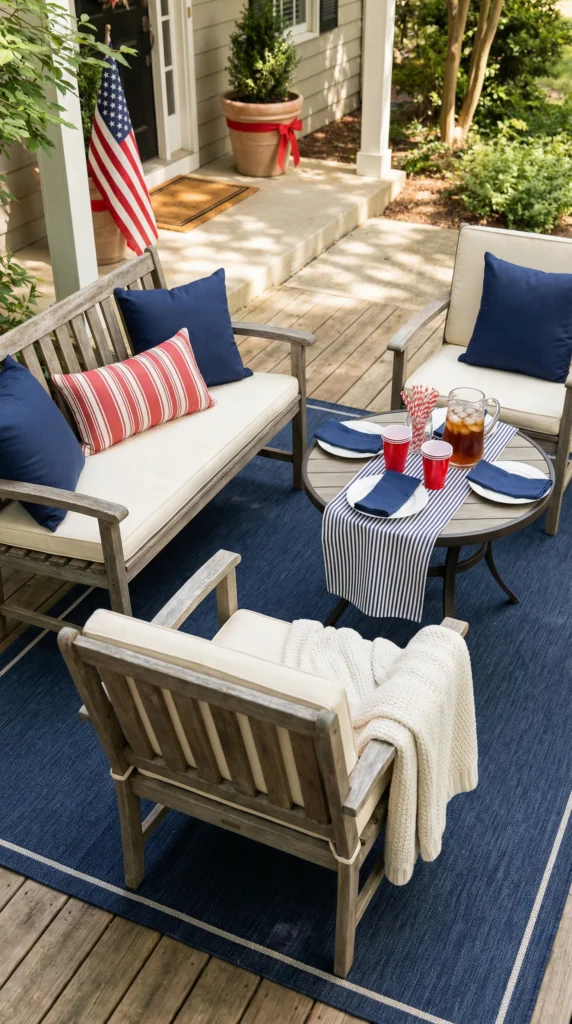
Blue makes an excellent anchor because it feels classic, calm, and slightly coastal. Add small touches of red through napkins, ribbons, planters, or tableware, while white creates breathing room and keeps the space from feeling overly themed. A simple approach is to use one larger blue textile, a few red accents, plenty of white space, and just one main pattern such as stripes or stars.
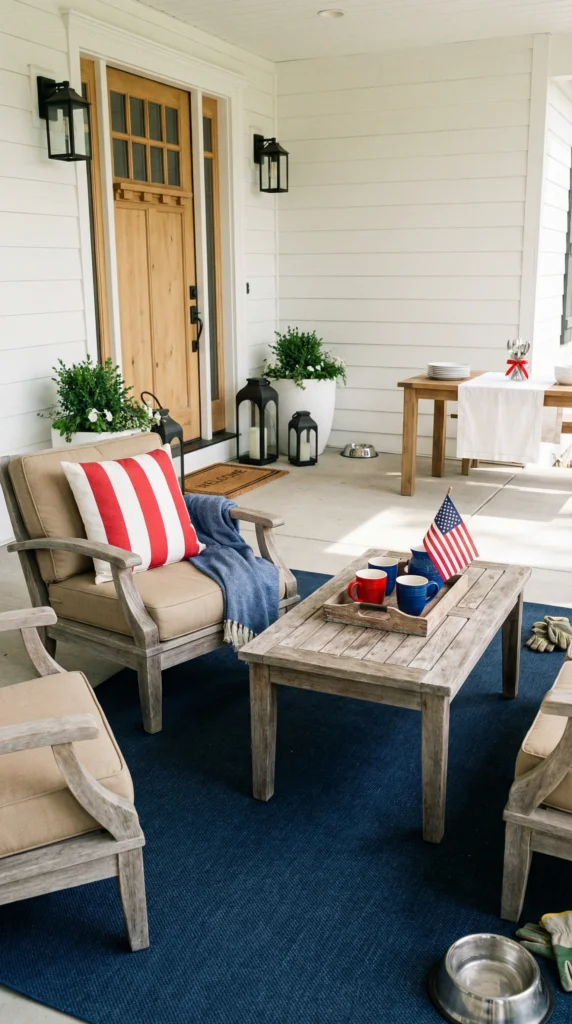
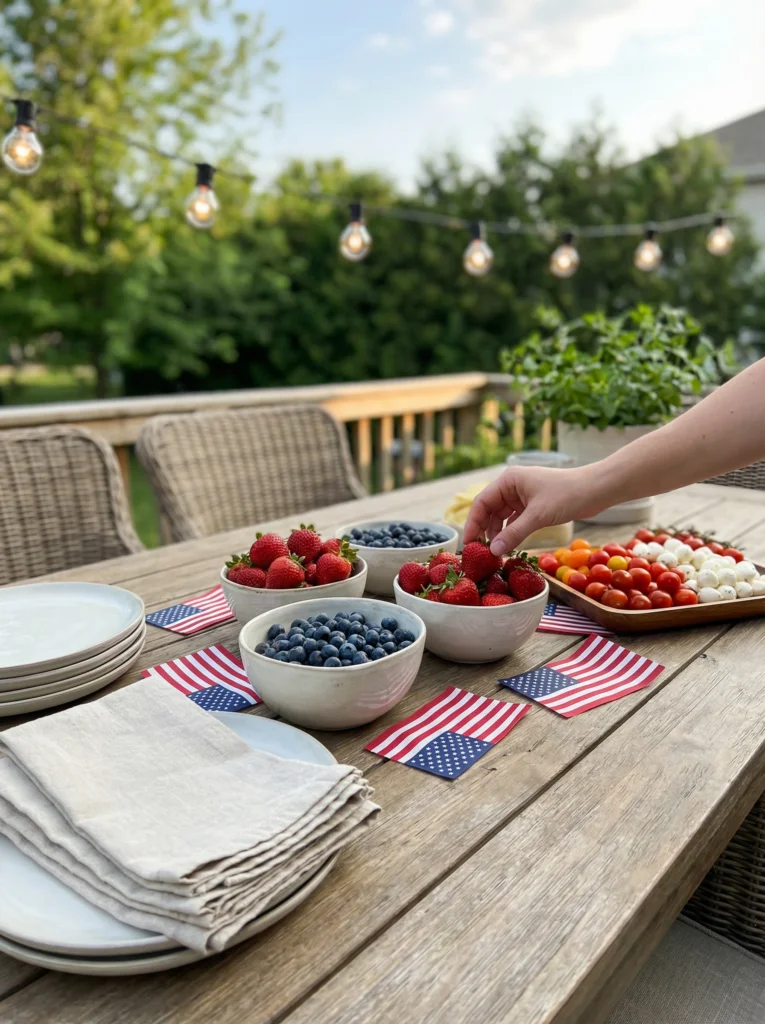
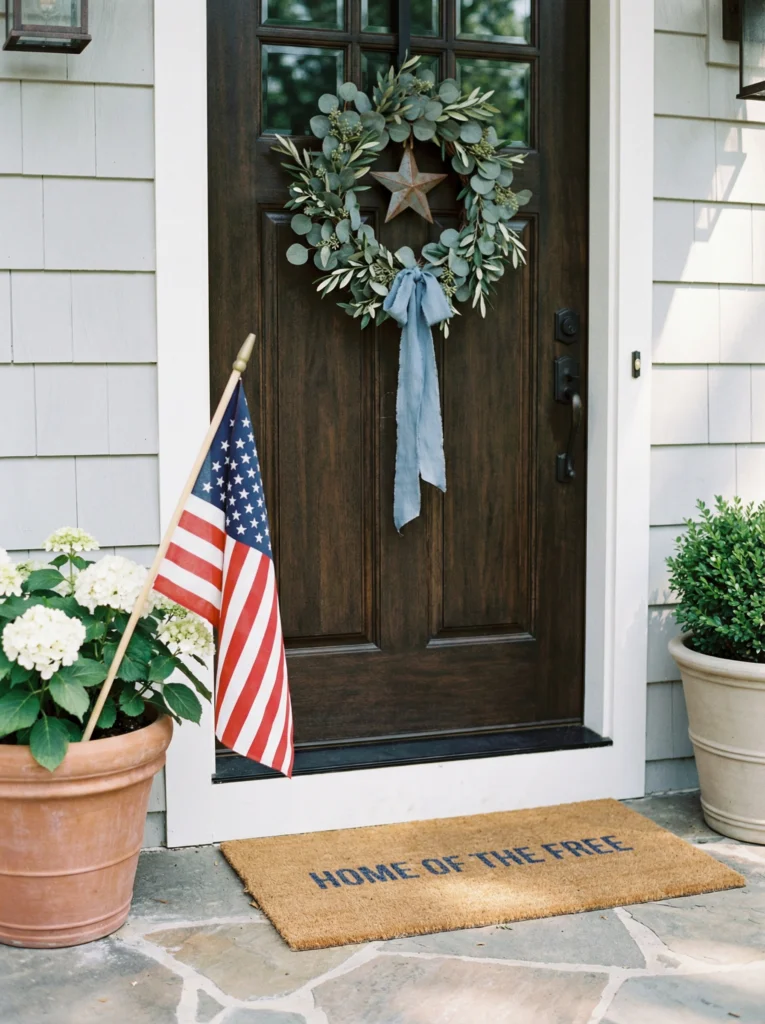
For the patio, try navy pillows with a red-striped lumbar pillow and a casual white throw. On the table, combine white plates, navy napkins, red cups or straws, and a simple striped runner. At the entrance, one large flag, a planter with a red ribbon, and a neutral doormat can create a polished look without making the porch feel overcrowded.
Buy Fewer Pieces, but Make them Tougher
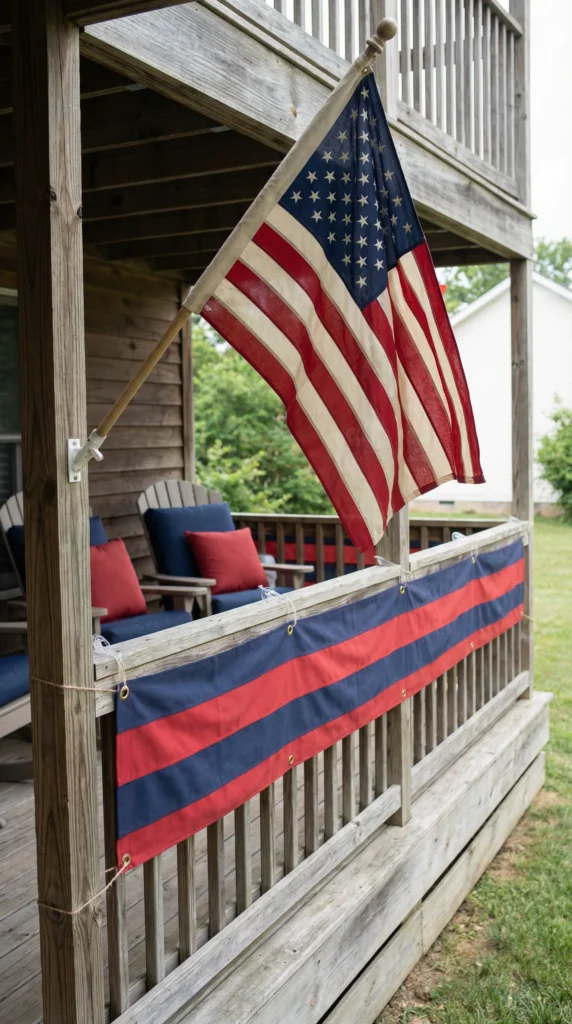
Outdoor decor has to deal with sun, wind, rain, and plenty of wear, so durability matters. Choose outdoor-rated fabrics, sturdy banners, reinforced corners, and pieces that are designed to stay outside. Look for durable fabric banners and outdoor pillows that can be reused instead of buying decorations that fall apart after one weekend.
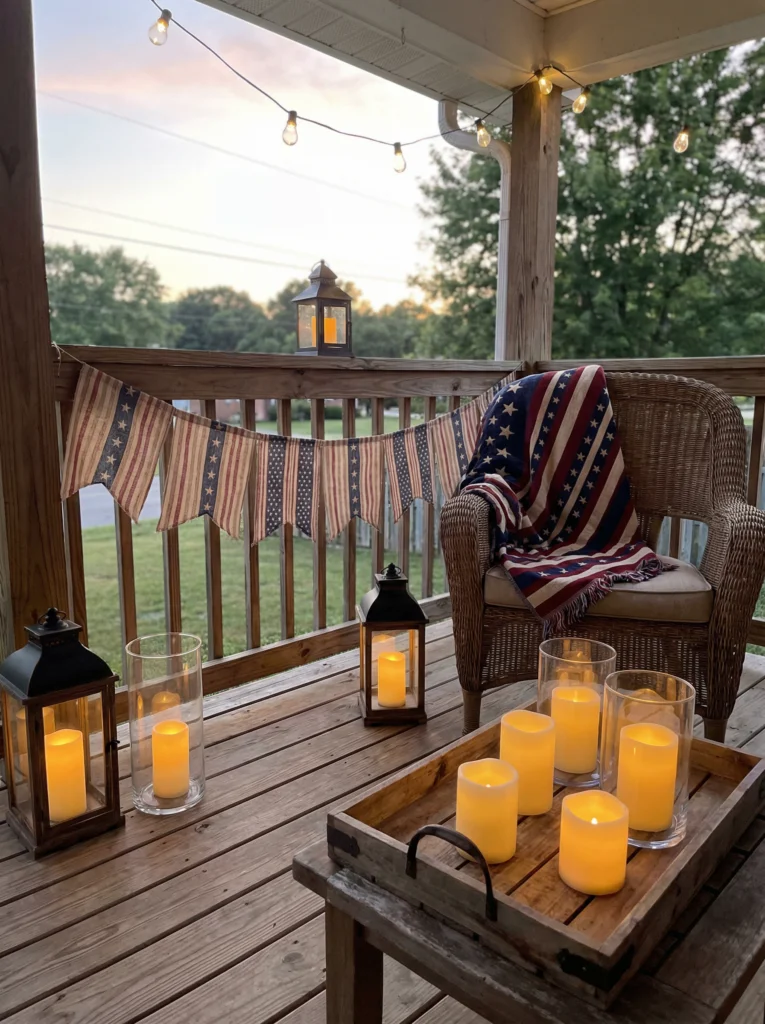
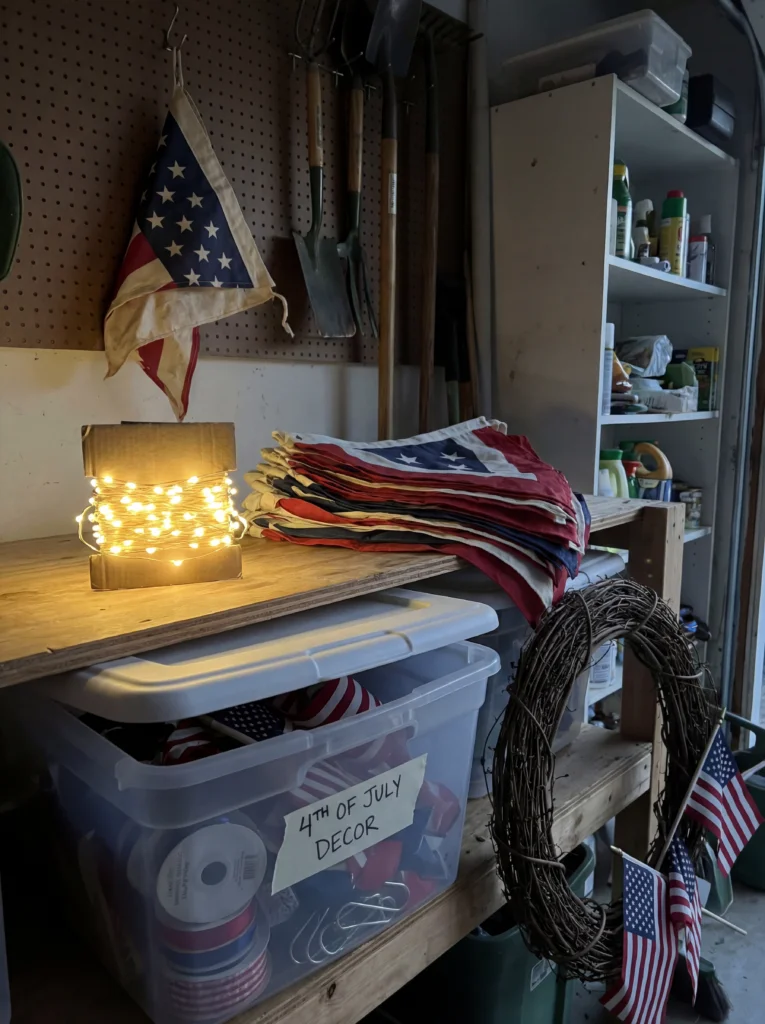
A quality fabric bunting, a sturdy American flag, and a few reusable outdoor pillow covers can do most of the decorating work. You can always add inexpensive seasonal details, but investing in the pieces that stay outside will save money and frustration over time.
One Big Flag Moment Beats Twelve Tiny Flags
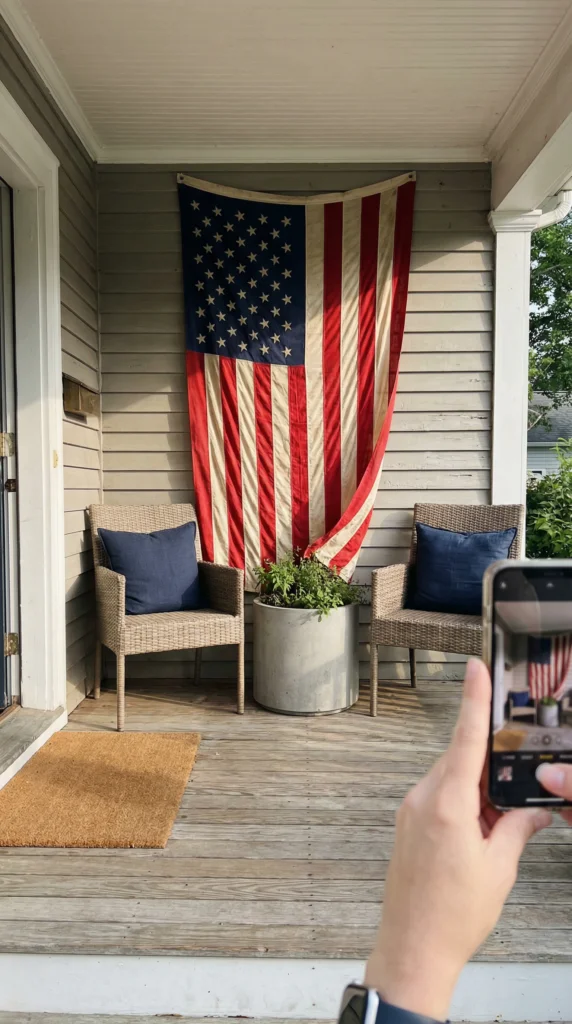
One strong stars-and-stripes display usually looks more intentional than dozens of small flags scattered around the yard. Give your main flag a noticeable spot and let the rest of your decorations support it rather than compete with it.
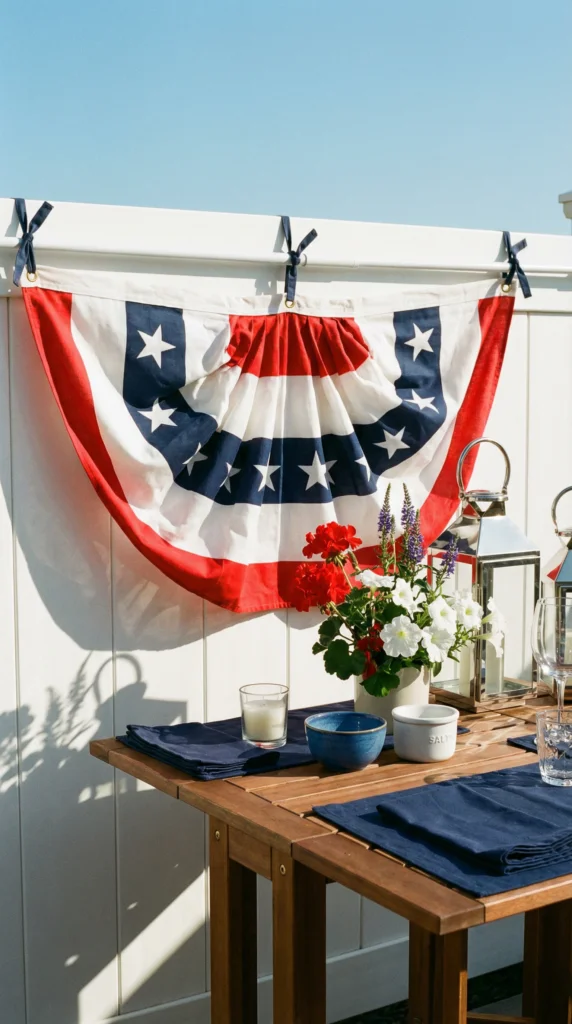
Hang a flag near the porch seating area, place an American flag banner behind the food table, or use a flagpole near the entrance if you do not have suitable wall space. Keeping the surrounding decor simple allows the main patriotic element to stand out.
Make the Wind Your Design Partner (not your enemy)
Wind can quickly turn beautiful outdoor decorations into a mess, so choose pieces that are easy to secure. Weighted planters, heavier lanterns, and sturdy outdoor banners are much easier to manage than lightweight decorations that can blow across the yard.
If something is attached to a railing, secure it at several points rather than relying on one or two ties. A little extra preparation can prevent banners, napkins, and table decorations from becoming unexpected flying objects.
Hanging things without turning it into a full sport
Removable outdoor hooks and tension rods can make decorating much easier without requiring permanent holes. Clean the surface before attaching anything, and always give banners extra support when they are exposed to wind.
Secure banners at both corners and add another tie in the middle when necessary. You can also weigh down napkins and placemats with small bowls, votives, or other useful table pieces. Keep centerpieces low, and avoid using delicate paper decorations in completely exposed areas.
Make bright color feel intentional, not scattered
If you love bright, vibrant colors, group them together instead of placing them randomly around the yard. Choose one main area, such as the front door, dining table, or seating area, and make that your hero spot.
Bring your strongest red and blue accents together there, then repeat those colors more subtly throughout the rest of the space. This simple trick makes your decorations feel coordinated without requiring more purchases.
Festive Table and Seating Styling
An outdoor Fourth of July table should look festive while remaining practical enough for real meals, drinks, and guests. Start with a runner or tablecloth, add neutral dishes, and finish with a few small patriotic details that can handle a little breeze.
The goal is more like a relaxed summer dinner party than a themed buffet. Keep enough open space on the table for food and drinks, and choose pieces that are easy to clean and comfortable to use.
The Table Formula that Rarely Fails
Begin with a washable runner or tablecloth, then add sturdy neutral plates and heavier napkins. Finish with a low centerpiece that will not easily tip over when someone reaches across the table.
For quick shopping, seasonal aisles are useful for 4th of July decorations, while dollar stores can provide inexpensive party supplies for last-minute details. You can also look around your own kitchen first because simple white plates and serving pieces can instantly make colorful decorations feel more balanced.
Plan for sliding, spilling, and snack-grabbing hands
Outdoor tables need to be prepared for wind, spills, and guests constantly reaching for food. Choose wipeable pieces and use small weights to keep lightweight items from moving around.
Place napkins beneath a small serving bowl, use a low tray to keep smaller decorations together, and keep paper towels somewhere everyone can easily reach. These little details can make the whole setup much easier to manage.
Seating is where people decide to stay
Comfortable seating encourages guests to settle in and enjoy the evening. Add a few decorative pillows, keep a lightweight throw nearby for cooler weather, and make sure there is enough room for everyone to sit comfortably.
Solid outdoor cushions can provide a neutral foundation, while red and blue pillow covers can bring in the holiday colors. This gives you an easy seasonal update without having to replace your entire patio furniture set.
Table decor that doubles as food (yes, really)
Edible table decor is one of the easiest ways to make an outdoor table look beautiful without buying extra decorations. Bowls filled with strawberries, blueberries, and other colorful fruit can double as attractive centerpieces while giving guests something to snack on.
A tray filled with cherry tomatoes or seasonal fruit can create the same effect. It looks intentional, adds color, and serves a useful purpose once everyone starts eating.
Keep the centerpiece low so humans can see each other
Low centerpieces are ideal for outdoor gatherings because they keep conversations easy and are less likely to blow over. Try three small jars filled with grocery-store flowers, a shallow tray of fruit and berries, or a cluster of lanterns with LED candles.
Avoid tall arrangements that block faces or become unstable in the wind. A simple five-minute arrangement can look just as attractive while being much easier to manage.
Candles, but make them safe
Outdoor breezes can make traditional candles difficult to manage, especially around tablecloths and fabric decorations. LED candles provide a warm glow without requiring anyone to watch an open flame.
They are also easy to store and reuse throughout summer, making them a practical choice for outdoor entertaining beyond the Fourth of July.
The Sneaky “chair styling” Trick
A single striped pillow placed on every other chair can make the seating area look thoughtfully styled without becoming too coordinated. You can also repeat one small detail, such as matching napkins or a red ribbon on just a few chair backs.
The goal is to create a relaxed, lived-in look rather than making every seat appear identical. A little repetition goes a long way.
Do the boring safety part first (future you will be grateful)
Before adding outdoor lighting, figure out where your outlets and power sources are located. Keep cords away from walkways and make sure outdoor connections are protected and positioned safely.
Test your lights during the day, decide when you want them to turn on, and consider using a timer or smart plug. Layering overhead string lights with table or step lanterns can create a warm and inviting atmosphere once the sun goes down.
The Front Door Moment
The front door is one of the quickest places to create a festive first impression. A wreath, simple doormat, and small porch sign can instantly make the house feel ready for the holiday.
Choose weather-friendly decorations that can handle direct sunlight, sprinklers, and changing conditions. Delicate paper pieces may look great indoors but usually will not hold up well outside.
Keep the Entry Simple so it Feels Elevated
A simple Fourth of July wreath can instantly signal the holiday without overwhelming the entrance. Add an Independence Day doormat if you want a little more personality, but you do not need to decorate every available surface.
A hanging American flag can also work beautifully near the entrance. It frames the doorway and creates a strong patriotic focal point while keeping the rest of the porch relatively calm.
Scale matters more than people admit
The size of your decorations should match the space. A tiny wreath can disappear on a large door, while a properly sized wreath with some open space around it feels much more intentional.
The same applies to porch signs and planters. Choose pieces that are large enough to be noticeable but never block the door or interfere with its movement. Functionality should always be part of the design.
Hanging and securing things without rage
Outdoor hanging can be tricky because of heat, wind, dust, and uneven surfaces. Outdoor adhesive hooks can help when you do not want to drill holes, but make sure surfaces are clean before attaching anything.
For banners on porch railings, secure the upper and lower corners and add another tie point in the middle if needed. A few extra minutes of securing everything can prevent decorations from falling down later.
Make the entryway walkable (and not a trip hazard)
Keep the entrance clear and easy to walk through. Avoid overly thick doormats or too many layers that could cause someone to trip while carrying food or drinks.
A simple, flat, attractive setup is usually the best choice. Keeping the entry practical makes it easier for guests to enjoy the decorations without worrying about where they step.
Backyard Zones for the Party
Instead of decorating the entire backyard at once, divide it into useful zones. A seating area, food and drink station, and play area can make the space feel more organized while also helping guests know where everything belongs.
Repeat a few decorative details throughout the zones to connect them visually. You can use the same red napkins, blue pillows, or stripe pattern in different areas without making every section look identical.
The Zone Plan that Makes Everything Feel Intentional
A simple zone plan can make the whole party easier to manage. Keep the seating area comfortable with pillows, throws, and nearby lighting. The food zone should have a clean surface, accessible napkins, and a nearby trash option.
For drinks, set up a cooler or drink tub with cups and something to catch spills. If children are attending, create a play zone with durable decorations and avoid anything sharp, fragile, or breakable.
The boring stuff that makes the party feel smooth
The small practical details often make the biggest difference during an outdoor gathering. Place trash bins, towels, napkins, and paper towels where guests can easily find them instead of making everyone search for supplies.
A small trash bin near the food table and a basket of napkins can save you from constantly running inside. Good organization keeps the celebration moving and lets you enjoy your own party.
A quick chaos break (because reality exists)
Outdoor parties are never completely perfect. There may be bugs, spilled drinks, a wobbly chair, or a decoration that refuses to stay straight. That is completely normal.
The goal is not perfection. Create a space that feels welcoming and works well when real life happens. Music can also make a big difference when the yard feels too quiet, but if you have close neighbors, keep the volume at a respectful level.
Imperfect But Happy
Outdoor decorating does not have to look perfect to feel beautiful. Wind can move things around, lighting changes after sunset, and decorations may look slightly different once everyone starts using the space.
Focus your budget on quality pieces that will stay outside, such as durable flags, outdoor cushions, and string lights. Then use inexpensive seasonal accents for the fun details. The best value-for-money decorations are the ones you can bring back out year after year.
The unresolved annoyance: Storing Outdoor Decor is Annoying
Storing outdoor decorations can be almost as frustrating as putting them up. Banners tangle, lights become knots, and wreaths can easily get crushed.
Make storage easier by wrapping lights around cardboard, keeping sturdy banners flat when possible, and placing smaller items inside labeled bins. You will thank yourself when the next holiday arrives and everything is easy to find.
And if your porch sign ends up slightly crooked, let it go. Guests are far more likely to remember the warm lights, good food, laughter, and time spent together than whether every decoration was perfectly straight.
FAQ
How to decorate outside for the 4th of July?
Choose a simple red, white, and blue color palette and focus on a few high-impact areas, such as the front door, seating area, and outdoor table. Use weather-resistant pillows, fabric banners, flags, and string lights, and secure lightweight decorations so they can handle the wind.
How early should 4th of July decorations be put up?
You can put your decorations up a week or two before the Fourth of July if you want to enjoy the festive look throughout the season. For a more subtle approach, decorating a few days before the holiday is more than enough.
Does Dollar Tree have 4th of July decorations?
Yes, Dollar Tree can be a useful option for inexpensive seasonal accents and party supplies. For better durability, combine those budget-friendly pieces with a few quality outdoor decorations, such as sturdy banners, flags, and outdoor lighting.
A short conclusion, because you deserve a tidy ending
When the lights are glowing, the seating is comfortable, and the table has a few cheerful details, your backyard can instantly feel ready for a celebration. You do not need an elaborate setup or dozens of decorations to create that festive atmosphere.
Keep the design simple, practical, and reusable, and let a few patriotic accents bring everything together. The result should feel like a place where you genuinely want to celebrate Independence Day, relax with your guests, and enjoy the summer evening.
If you’re wondering how to decorate a small balcony, you’re definitely not alone. Even a tiny small apartment balcony can become a cozy outdoor space, whether you’re renting, working with a limited budget, or currently using it to store random household items. The key is to make the space feel intentional, comfortable, and useful rather than crowded.
Start by taking a few measurements and deciding how you want to use the balcony. From there, choose furniture that fits without blocking the doorway, add plants without sacrificing your walkway, and bring in simple touches like cushions, lighting, and a small rug. You’ll also want to consider practical details such as wind, shade, rain, and where to store cushions when the weather changes. The goal isn’t perfection—it’s creating a cute, comfortable, and workable balcony that feels like an extension of your home.
Quick Win Box: The Small Balcony Rules (Read This First)
Door swing first: Keep the door and main walkway completely clear.
Choose one main purpose: Decide whether the balcony is mainly for dining, lounging, or gardening.
Go vertical: Use walls, railings, and hanging planters instead of filling the floor with pots.
Choose one hero piece: One strong furniture piece usually works better than several small items.
Repeat accents: Use one accent color in three places to create a coordinated look.
Make everything wind-safe: Secure lightweight decor and avoid unstable, top-heavy planters.
Use the three-layer cozy formula: Combine flooring, lighting, and textiles to make the balcony feel like an outdoor room.
Plan for storage: Every item should have a designated place so clutter does not take over.
Step 0: Before You Start: Measure + Pick Your Balcony Purpose (10 Minutes)
Before buying anything, measure your balcony and decide how you want to use it. This simple step prevents you from choosing furniture that looks great online but leaves no room to move. Start by checking the door swing and your natural step-out path, then measure the balcony’s width, depth, and railing height. Also pay attention to sunlight, shade, and wind because these details will affect your furniture, plants, and privacy choices.
Use painter’s tape to mark the approximate footprint of furniture on the floor. This gives you an instant idea of whether everything will actually fit. Check the width and depth, door clearance, railing height, sun direction, wind direction, and any building rules about drilling, screens, grills, or drainage. Taking an overhead photo from inside the doorway with your tape markings can also make planning much easier.
What Kind of Balcony Are You Decorating?
Your balcony shape determines which furniture and layouts will work best. A Juliet balcony is mostly about plants and railing decor, while a narrow walkway balcony needs careful planning to preserve the path. A square or box-style balcony gives you more flexibility and can often accommodate a small dining or lounge area.
Juliet balcony: Best for plants, railing decor, and a small perch.
Narrow walkway balcony: Works well with slim seating or a compact coffee setup.
Square or box balcony: Ideal for a bistro table, lounge corner, or layered styling.
Your balcony is not difficult to decorate—you simply need to work with its shape instead of against it.
“Choose Your Purpose” Mini Menu (Pick One)
Choose one main purpose before adding furniture or decor. A clear purpose helps the balcony feel organized instead of crowded and makes it easier to decide what belongs there.
Coffee and laptop corner
Reading nook
Balcony garden
Mini dining setup
Pet zone
When you cannot decide, ask yourself what would make you want to step outside tomorrow. Start with that function and build the rest of the design around it.
Step 1: How to Decorate a Small Balcony: Choose a Space-Saving Layout (3 Proven Layout Recipes)
A smart layout can make even a tiny balcony feel intentional and comfortable. Before shopping for plants, rugs, or accessories, decide where your main furniture will go and make sure the doorway and walking path stay open. Small balconies can quickly feel crowded, so it is better to choose one layout and work within it than to collect random pieces.
Pick the layout that matches your balcony shape and main purpose. Once the basic arrangement is set, choosing the right hero furniture piece becomes much easier.
30-Second Layout Selector (Pick Your Best Fit)
Choose the option that best matches your space and lifestyle.
Very narrow balcony: Green Wall + Perch
Dining for two: Bistro Corner
Lounging most days: Lounge Strip
Plants plus privacy: Green Wall + Perch
Tight door swing: Rail table or one chair
Layout A: Bistro Corner (Best for 2-Person Dining)
A bistro corner is perfect for morning coffee, casual meals, or enjoying a quiet evening outside. Place a small table toward the far end of the balcony, away from the door, and tuck the chairs toward the railing. This keeps the entrance open while giving you a dedicated dining zone.
A round table can work especially well because it avoids sharp corners in tight areas. Choose slim chairs and avoid deep seating. If two chairs make the space too crowded, use one chair with a railing perch instead.
Place the table in the far corner
Tuck chairs toward the railing
Keep the doorway and walkway open
Add a small plant or lantern to finish the corner
Layout B: Lounge Strip (Best for Long, Narrow Balconies)
For a long, narrow balcony, place a slim bench or compact lounge chair along the longest wall. Add a small side table that is easy to reach without blocking the walkway. The goal is to create a comfortable seating zone while leaving enough open floor to move around.
Whenever possible, choose furniture that performs more than one job. A storage bench can provide seating and hide cushions or outdoor accessories at the same time. Keep most of the styling toward one end so the entrance remains open.
Use slim seating along the wall
Add a compact side table
Choose storage seating when possible
Keep most of the floor open
Layout C: Green Wall + Perch (Best for Plant Lovers)
If plants are your priority, use the walls or railing instead of filling the floor with pots. Create one strong vertical plant zone and add a single chair, stool, or rail table as your perch. This gives you greenery and privacy without turning the balcony into an obstacle course.
Layer plants at different heights to make the setup look intentional. Combine one tall plant, a medium-sized cluster, and a trailing variety to create a natural green backdrop.
Create one vertical plant zone
Add one small perch
Keep the center walkway clear
Let plants provide most of the decoration
Quick win: Choose one layout and commit to it before buying anything.
Step 2: Buy the Right-Sized Furniture (Foldable > Bulky)
Oversized furniture is one of the quickest ways to make a small balcony feel cramped. Instead, look for slim, lightweight, and flexible pieces that are easy to move or fold away. Open legs and narrow frames also help maintain a visual connection with the floor, making the balcony appear more spacious.
Foldable balcony furniture is especially useful because you can clear the space whenever you need it. Choose one main or “hero” piece and let the other furniture support it rather than competing for space. Most importantly, make sure your seating is actually comfortable enough to use.
Best Small Balcony Furniture Pieces (Renter-Friendly)
Consider flexible furniture that can serve different purposes and be moved when needed.
Folding bistro set
Stackable chairs
Slim storage bench
C-table that slides beneath seating
Rail-mounted bar table
Always measure before buying. Deep lounge chairs may look comfortable, but they can quickly consume most of a narrow balcony.
Size Rules (So It Doesn’t Feel Crowded)
Start with door clearance and protect one clear walking path. Armless chairs, slim frames, and open legs usually work better than bulky furniture with heavy bases. Before purchasing anything large, use painter’s tape to mark its footprint on the floor and walk around it to make sure the layout still works.
Product Examples Grouped for Real Use
For an ultra-tight balcony, consider rail tables, folding stools, and slim side tables. For lounging, a narrow bench, folding chair, or compact floor cushion setup can add comfort without taking over the space. If storage is limited, use a small deck box, storage bench, or railing baskets for everyday outdoor items.
Quick win: Choose your main furniture piece first, place it, and only then decide what else the balcony actually needs.
Flooring can instantly make a balcony feel more like a real outdoor room. You do not need a permanent renovation; a simple rug, runner, or removable deck tile can define the space and soften hard surfaces. For renters, removable flooring options are often the easiest choice.
Interlocking deck tiles can create a finished appearance while remaining relatively easy to install and remove. Outdoor rugs are another simple option, but make sure they can dry properly after rain. Moisture trapped underneath can lead to unpleasant odors or damage over time.
Balcony Flooring Options (Renter-Safe)
Interlocking wood or composite deck tiles
Outdoor turf tiles where drainage allows
Removable outdoor flooring where permitted
Outdoor Rugs on a Balcony (Yes/No + How)
Yes, an outdoor rug can work beautifully on a balcony. Choose one designed for outdoor conditions and allow air to circulate underneath it. Lift the rug occasionally, especially after rain, so the surface underneath can dry properly.
For inspiration and searches, use the phrase outdoor rugs balcony. Even a simple runner can make the space feel warmer and more finished.
Quick win: Add one floor layer, even if it is just a small outdoor runner.
Step 4: Go Vertical with Plants (No Floor Space Needed)
Plants bring life and personality to a balcony, but too many floor pots can quickly make the area feel crowded. Instead, create a dedicated plant zone and use vertical space wherever possible. Hanging planters, railing boxes, hooks, and trellises can give you plenty of greenery without sacrificing valuable floor space.
Start with one area rather than scattering plants everywhere. Combine tall, medium, and trailing plants to create different height levels. If you rent, use removable hooks, clamps, or freestanding supports where building rules allow.
Hanging Options (Ceiling, Railing, Wall)
Hanging planters are excellent space savers, but they need to be securely attached. Wind can easily move lightweight baskets, so use sturdy hooks and suitable attachments for your balcony.
Railing planters, rail hooks, lightweight trellises, and freestanding plant supports can all help you build upward. Always check your building rules before attaching anything permanently.
Plant Picks by Sun Level
Full sun: Herbs, geraniums, and hardy flowering plants
Part shade: Begonias, coleus, and many trailing varieties
Shade: Ferns and other low-light leafy plants
If your balcony receives little sunlight, choose shade-loving plants rather than trying to force sun-loving varieties to survive.
The Styling Formula (Rule of 3 + Height Layers)
Use three levels—tall, medium, and trailing—to create a balanced plant display. Grouping plants in small clusters usually looks more intentional than spreading individual pots across the entire balcony.
Quick win: Create one plant zone with three different heights before buying additional pots.
Step 5: Add Privacy Without Drilling (Screens + Greenery)
A little privacy can make a balcony feel much more comfortable and inviting. You do not always need to drill into walls to create it. Depending on your building rules, railing screens, outdoor curtains, trellises, and plants can provide coverage while adding style.
Start with the side that feels most exposed and add greenery as a softer second layer. Combining a privacy screen with plants can make the space feel cozy instead of closed off.
Screen Options That Stay Put
Bamboo or reed screens can work well when securely attached at several points. Outdoor curtains can add softness but should be properly secured, especially in windy areas. Trellis panels with climbing plants or planters can also combine privacy and greenery.
Quick win: Cover the most exposed side first and see whether you actually need additional screening.
Shade and Weather Solutions
Shade can make the difference between a balcony that looks good and one you actually enjoy using. If your space receives strong sunlight, a compact shade solution can make seating much more comfortable. Half parasols are particularly useful for narrow balconies because they can sit closer to a wall.
For balconies with more space, a side parasol may provide shade without placing a pole in the center of the seating area. Smaller shade sails or awning-style solutions may also work, depending on your building rules and the available attachment points.
Shade options to shop similar for:
Half parasol for wall-side shade
Compact side parasol with a stable base
Small shade sail where permitted
Weather backup plan
Prepare for wind and rain before they become a problem. Keep cushions and textiles in a storage box, secure lightweight decor, and choose planters with stable or wide bases. Make sure rugs and flooring still allow water to drain properly.
Quick win: Create a simple system that lets you pack away cushions and textiles in about two minutes.
Step 6: Lighting for a Glowy Night Balcony (3-Layer Lighting)
Good lighting can turn a basic balcony into a cozy evening retreat. Instead of relying on one bright light, use several smaller sources to create a softer atmosphere. A combination of overhead or railing lights, a table lantern, and a small accent light near plants can make the space feel warm and inviting.
For renters, battery-powered and solar lights are convenient because they avoid complicated wiring. If you use plug-in lights, choose outdoor-rated products and keep cords and connections protected.
Use the search phrase string lights balcony when looking for inspiration.
The Glow Rule for Small Spaces
Overhead or railing light
Table-level lantern
Accent light near plants or a corner
Quick win: Add one lantern and one strand of lights to create an instant evening glow.
Step 7: Style It Like a Tiny Outdoor Room (Color + Texture)
This is where the balcony begins to feel personal. Keep the styling simple by choosing one main palette and repeating an accent color a few times. Instead of adding lots of accessories, focus on texture through cushions, throws, rugs, plants, and one or two decorative pieces.
Choose colors that connect with your indoor space so the balcony feels like an extension of your home. For example, repeat one accent color through a cushion, planter, and lantern. A lightweight piece of balcony wall decor can also add personality without using floor space.
Three Easy Palettes
Neutral plus green
Soft coastal blues
Warm terracotta plus cream
Accessories That Make the Biggest Impact
A few carefully chosen accessories can make a bigger difference than a collection of small decorations. Start with cushions, a throw, one tray, and a compact side table, then stop before the space becomes cluttered.
Quick win: Repeat one accent color three times and keep the remaining decor simple.
Step 8: Storage Solutions (So It Stays Cute)
Good storage keeps your balcony looking organized instead of turning it into a place for random household items. Whenever possible, choose one larger storage solution rather than filling the space with several small containers.
A deck box or storage bench can hide cushions, watering supplies, and outdoor accessories. For very narrow balconies, use vertical cabinets, under-seat bins, or railing baskets to make use of unused areas.
Use the search phrase balcony storage solutions when looking for ideas.
Storage bench or deck box
Vertical cabinet where space allows
Under-seat storage bins
Railing hooks for small tools
Quick win: Give every loose item a designated home, even if that home is just one storage bin.
Safety + Building Rules (Read Before You Hang Anything)
Balcony safety should always come before decorating. Secure lightweight items, avoid unstable or top-heavy planters, and be careful with anything attached to railings. Do not overload the railing or block drainage areas. Rugs and deck tiles should allow water to drain properly, while grills, heaters, flames, and permanent fixtures should only be used if your building and local rules allow them.
The Weekend Plan (So You Don’t Get Overwhelmed)
You do not have to transform the entire balcony in one day. Start with one finished area and build from there. A small amount of progress can make the whole space feel noticeably better.
1-hour quick win
Add lighting, one plant arrangement, and one textile. These three changes can quickly make the balcony feel warmer and more inviting.
Half-day upgrade
Add your main seating, define the floor with a rug or tiles, and create privacy on one exposed side. This gives you the biggest visual improvement without making the project complicated.
Full weekend makeover
Start with flooring, then add plants, lighting, and storage. Finishing with storage helps keep everything organized once the makeover is complete.
DIY Balcony Projects (Fast Weekend Upgrades)
These DIY balcony projects are simple enough to complete over a weekend without turning the space into a major renovation.
DIY privacy screen: Secure a reed screen to the railing at several points and add appropriate weight or support at the bottom.
Painted pots: Paint three pots in the same color palette, seal them for outdoor use, and repeat the color through another accessory.
Leaning plant shelf: Use a small sealed wood shelf, position it against a wall, and secure it properly so it cannot tip.
Jar lantern cluster: Add pebbles for weight, place battery-powered tea lights inside, and group the jars together in one corner.
Simple cushion covers: Make envelope-style covers from suitable outdoor fabric and add ties to keep them secure.
Rail herb bar: Use small railing planters to create a compact herb garden without taking up floor space.
These projects can also work as simple balcony decor ideas because they add personality without making a small space feel crowded. If you want small balcony ideas that are realistic and easy to finish, these are a great place to start.
Small Balcony Mistakes to Avoid (So It Doesn’t Feel Cramped)
Avoid filling the balcony with too many small decorative items, choosing furniture that is too deep, or keeping everything on the floor. Skipping lighting can also make the space feel unfinished at night, while having no storage plan can quickly turn the balcony into a clutter zone. Stick with one clear layout, one hero furniture piece, open walking space, and defined storage areas to keep your small balcony comfortable and stylish.
I’ve rounded up small kitchen design ideas that do more than make your kitchen look pretty—they can actually help the space feel larger and more functional. From improving the layout to creating better flow, these ideas focus on practical changes that make everyday cooking and moving around easier.
You don’t need to knock down walls or start a major renovation to make a difference. With smarter storage, clearer walkways, and better use of your prep space, you can give your kitchen a more open and comfortable feel using simple updates you can tackle over a weekend.
Move the Space Bully Out of Your Aisle
What to do: Move the deepest table, shelf, or cart until your main walkway is around 90 cm wide.
Why it feels bigger: You can move comfortably without turning sideways, making the entire kitchen feel more open.
Best for: Galley and one-wall layouts.
If you rent: Turn the table so its narrow side faces the aisle or replace it with a slim secondhand piece.
Common mistake: Prioritizing dining space and forcing the cooking area into whatever space remains.
Measurement rule: Keep the narrowest part of the main walkway between 90 and 105 cm.
Booth Seating Storage Instead of Loose Chairs
What to do: Replace two individual chairs with a storage bench or built-in-style booth with lift-up seating.
Why it feels bigger: A bench takes up less visual and floor space while giving you hidden storage.
Best for: L-shaped kitchens and small peninsula layouts.
If you rent: Push the table against the wall and add one compact storage bench.
Common mistake: Trying to fit four chairs into a space that works better with two chairs and a bench.
Measurement rule: Leave approximately 90 cm between the table edge and nearby cabinets.
Put Trash Inside the Triangle
What to do: Position the trash bin beneath the sink or use a slim pullout near the main preparation area.
Why it feels bigger: You avoid carrying scraps and messy dishes across the kitchen.
Best for: All kitchen layouts.
If you rent: Use a narrow lidded bin tucked beside the sink cabinet.
Common mistake: Putting the trash can in the only open corner simply because it fits.
Measurement rule: Keep the trash within one easy step of the sink.
Fridge with a Real Landing Zone
What to do: Leave useful counter space beside the refrigerator, preferably on the handle side, for unloading groceries.
Why it feels bigger: You can put food down immediately instead of creating traffic around the kitchen.
Best for: Galley, L-shaped, and one-wall kitchens.
If you rent: Use a slim cart or narrow console beside the refrigerator to create a practical landing area.
Common mistake: Pushing the refrigerator tightly into a corner without any nearby counter.
Measurement rule: Aim for around 38 to 45 cm of clear counter space beside the fridge.
Keep Your Prep Strip Out of the Dark Corner
What to do: Choose a straight section between the sink and stove and make it your dedicated 60 to 90 cm preparation zone.
Why it feels bigger: Standing squarely at the counter gives you a better view of the room and makes cooking feel less cramped.
Best for: L-shaped and U-shaped kitchens.
If you rent: Keep the straight counter run clear and use corners for smaller appliances instead.
Common mistake: Moving the cutting board into the deepest corner simply because the space is available.
Measurement rule: Reserve at least 60 cm of straight, non-corner counter for everyday food preparation.
Light Colors and Reflective Finishes
Light colors and reflective finishes can help your eyes perceive the kitchen as more spacious. Simple palettes, vertical details, and carefully chosen reflective surfaces can visually stretch the room without making it feel bland or characterless.
You do not have to make everything white. Instead, choose one dominant light shade for the walls and, when possible, the upper cabinets. Then introduce one standout feature, such as floor-to-ceiling tile, a mirrored backsplash, or a patterned floor, while keeping the remaining finishes calm and coordinated.
One Dominant Light Color
What to do: Use one soft, light shade across the walls and, ideally, the upper cabinets.
Why it feels bigger: Fewer strong contrast lines allow the room to read as one continuous space.
Best for: Every kitchen layout.
If you rent: Paint only the walls and allow the existing cabinets to provide contrast.
Common mistake: Using several different wall colors in a very compact kitchen.
Measurement rule: Carry the dominant color across most walls from floor to ceiling.
Floor to Ceiling Tile on One Wall
What to do: Tile a short wall or the cooking wall from the countertop all the way to the ceiling.
Why it feels bigger: Vertical lines draw the eye upward and add visual height.
Best for: L-shaped and U-shaped kitchens with one clear feature wall.
If you rent: Try removable peel-and-stick tile in a subtle, low-contrast design.
Common mistake: Installing a short backsplash and then using a dark, dramatic color above it.
Measurement rule: Use at least 45 cm of backsplash height, or extend the tile to the ceiling on one focal wall.
Mirrored Backsplash for Extra Depth
What to do: Install a mirrored backsplash behind the sink or cooktop where it can reflect natural light.
Why it feels bigger: The reflective surface creates the impression of additional depth and brightness.
Best for: Narrow galley and one-wall kitchens.
If you rent: Consider a frameless mirror tile or removable reflective panel.
Common mistake: Positioning the mirror where it reflects clutter or the trash bin.
Measurement rule: Even a 30 x 60 cm reflective panel can noticeably increase the feeling of depth.
Statement Light Fixtures Instead of Tiny Ones
What to do: Choose one or two distinctive fixtures over the main work area or peninsula and keep the remaining lighting simple.
Why it feels bigger: A clear focal point helps visually organize the room.
Best for: One-wall and peninsula kitchens.
If you rent: Replace an existing shade with a larger, cleaner design.
Common mistake: Combining too many small pendants, recessed lights, and ceiling fixtures.
Measurement rule: Hang pendants approximately 70 to 85 cm above the counter.
Reflective Finishes That Bounce Light
What to do: Use glossy tile, polished metal, or glass near windows to reflect natural light around the room.
Why it feels bigger: Reflected light travels farther and helps soften dark shadows.
Best for: Kitchens with natural light from a window.
If you rent: Keep reflective surfaces clean, use sheer window coverings, and add one glossy decorative accent.
Common mistake: Using heavy curtains or dark accessories that block available daylight.
Measurement rule: Keep the upper portion of the window clear from tall shelves or bulky objects.
Do Not Do This: Finish Mix
Avoid combining a heavily patterned backsplash, patterned flooring, colorful appliances, and multiple metal finishes. Choose one feature that grabs attention and allow the remaining surfaces to stay quiet.
Compact Appliances
Compact appliances can prevent machines from taking over valuable floor and counter space. The goal is not to make your kitchen feel tiny—it is to choose appliances that match how you actually cook while leaving enough room to move and prepare food comfortably.
Every appliance should support your main work triangle and preparation zone. A shallower refrigerator can reduce aisle intrusion, while an appliance garage can keep smaller machines off the counter. You can still introduce colorful or eye-catching appliances; just use them intentionally rather than letting every surface become a display area.
Cabinet Depth Refrigerator as First Big Upgrade
What to do: Consider replacing a deep refrigerator with a cabinet-depth model when possible.
Why it feels bigger: The refrigerator sits closer to the cabinetry instead of projecting far into the walkway.
Best for: Galley and one-wall kitchens.
If you rent: Use a shallow console beside the existing refrigerator to make its depth feel less noticeable.
Common mistake: Buying the largest refrigerator simply because it is discounted.
Measurement rule: Aim for approximately 60 to 70 cm of depth instead of the 80 to 90 cm common with deeper models.
Compact Appliances That Match Your Life
What to do: Choose a 45 cm dishwasher or slimmer cooking range if you primarily cook for one or two people.
Why it feels bigger: A smaller appliance can give back valuable counter, cabinet, or drawer space.
Best for: Short L-shaped and U-shaped kitchens.
If you rent: A compact two-burner hob and smaller oven can be useful where appropriate.
Common mistake: Installing oversized, commercial-style appliances in a very small kitchen.
Measurement rule: Try to maintain at least 30 cm of landing counter on each side of a cooktop.
Appliance Garage vs Open Counter
What to do: Give your toaster, blender, coffee maker, and similar appliances a dedicated cabinet or cubby.
Why it feels bigger: Clear countertops appear larger and function better as preparation areas.
Best for: All layouts.
If you rent: Repurpose a wall cabinet and add a simple pull-out tray.
Common mistake: Keeping every appliance permanently lined up along the backsplash.
Measurement rule: Keep the appliance garage close to your main 60 cm preparation zone.
Hide Laundry Under the Counter
What to do: If the kitchen also contains laundry appliances, place the washer and dryer beneath the countertop or behind tall cabinet doors.
Why it feels bigger: Concealing the machines helps the kitchen read as one continuous area.
Best for: Apartments and one-wall layouts.
If you rent: A simple curtain panel can hide exposed machines.
Common mistake: Allowing laundry appliances to become the first visual feature of the kitchen.
Measurement rule: A standard counter height of around 90 cm can often accommodate under-counter machines.
Edit Prismatic and Colorful Appliances
What to do: Limit colorful or prismatic appliances to one or two standout pieces.
Why it feels bigger: A few coordinated accents look intentional rather than visually chaotic.
Best for: Small kitchens that need personality.
If you rent: Start with one colorful kettle, toaster, or coffee maker while keeping other appliances neutral.
Common mistake: Scattering brightly colored gadgets across every available surface.
Measurement rule: Group accent appliances within roughly 60 cm so they read as one styled area.
Do Not Do This: Appliance Sprawl
Avoid pairing an oversized refrigerator with an oversized range on a short wall while leaving every small gadget permanently on display. Exposed laundry appliances, refrigerators, and pantries all competing along one narrow line can make the kitchen feel crowded very quickly.
Vertical Storage
Vertical storage is where you use wall space and the ceiling line to create more storage without taking away valuable floor space. Since your floor area is fixed, additional cabinets, hooks, shelves, and slim storage units can help turn a cramped kitchen into a much more efficient space.
The goal is not to cover every wall with storage. Instead, move frequently used items upward while leaving enough empty space for the room to breathe. Extra cabinets can handle rarely used items, shallow open shelving can hold everyday dishes, and slim pullouts can make use of awkward gaps.
Extra Row Cabinets to the Ceiling
What to do: Extend upper cabinets toward the ceiling and move rarely used items into the highest sections.
Why it feels bigger: The cabinetry looks more custom while eliminating the awkward dusty gap above it.
Best for: One-wall and galley kitchens.
If you rent: Use matching baskets on top of existing cabinets to create the appearance of additional storage.
Common mistake: Filling the cabinet gap with random decor and unused containers.
Measurement rule: Leave only a minimal gap at the ceiling or eliminate it completely when possible.
Wall Hooks Kitchen Rail for Daily Tools
What to do: Install a simple rail with hooks for frequently used utensils, mugs, or small pans.
Why it feels bigger: Everyday tools move away from crowded counters and drawers.
Best for: All layouts, especially narrow galley kitchens.
If you rent: Adhesive hooks or a tension rod can provide a temporary alternative.
Common mistake: Hanging too many items and creating another source of visual clutter.
Measurement rule: Position the rail around 45 to 50 cm above the counter.
Shallow Open Shelving or Fold-Away Shelving
What to do: Install shallow shelves for everyday plates, glasses, or small kitchen essentials.
Why it feels bigger: Slim shelves provide useful storage without creating the visual weight of deep cabinets.
Best for: L-shaped kitchens and walls near windows.
If you rent: Use a narrow freestanding shelving unit that partly sits on the countertop.
Common mistake: Choosing deep bookcase-style shelves that quickly become cluttered.
Measurement rule: A depth of around 15 to 23 cm works well for plates and glasses.
Storage in Front Window Without Killing Light
What to do: Use narrow shelves or rails around the window while keeping the glass itself clear.
Why it feels bigger: You gain storage without sacrificing valuable natural light.
Best for: One-wall kitchens with the sink positioned beneath a window.
If you rent: Try removable suction shelves for lightweight items such as herbs or sponges.
Common mistake: Installing deep shelves or heavy curtains that block the window.
Measurement rule: Keep shelves shallow and avoid covering more than the lower portion of the window.
Slim Pullout Cabinet for Oils and Trays
What to do: Turn narrow spaces beside the refrigerator or stove into slim pullout storage.
Why it feels bigger: Awkward gaps become useful storage instead of collecting dust and clutter.
Best for: U-shaped and galley kitchens.
If you rent: Use a narrow rolling cart that can move with you.
Common mistake: Stuffing bags, cleaning tools, or random items into narrow gaps.
Measurement rule: Even 15 to 20 cm of width can provide useful storage for oils, spices, and baking trays.
Do Not Do This: Vertical Overkill
Avoid putting open shelves on every available wall or filling deep shelves with excessive decor. Your upper storage should serve a purpose, while everyday dishes and tools should have designated places rather than taking over the countertops.
Minimal Countertop Clutter
Countertop discipline is what helps all your other space-saving improvements work long term. You do not necessarily need more cabinets—you need a clear system for deciding what deserves to stay visible and what should have a permanent storage location.
The goal is not to turn the kitchen into a minimalist showroom. Keep a small coffee station, a tray of everyday cooking essentials, or perhaps one plant if you like. Everything else should have a home inside drawers, cabinets, an appliance garage, or vertical storage.
Three Item Counter Rule
What to do: Choose three categories that are allowed to remain on the countertop, such as coffee supplies, knives, and one decorative item.
Why it feels bigger: Longer stretches of visible counter make the kitchen appear more spacious.
Best for: Every small kitchen.
If you rent: Keep your chosen items together on one attractive tray.
Common mistake: Gradually adding more items until the rule disappears.
Measurement rule: Try to keep at least 60 to 90 cm of uninterrupted preparation space clear.
One Chic Cooking Station
What to do: Group everyday cooking essentials such as oil, salt, and utensils on a small board near the cooktop.
Why it feels bigger: Grouping several items makes them look like one intentional station rather than scattered clutter.
Best for: All layouts.
If you rent: Use a cutting board with a few simple glass containers.
Common mistake: Allowing bottles, packets, and containers to line the entire backsplash.
Measurement rule: Keep the complete cooking station within roughly 30 cm.
Compact Drying Gear
What to do: Replace a large permanent dish rack with a fold-away rack or over-sink drying mat.
Why it feels bigger: The counter beside the sink remains available for food preparation and other tasks.
Best for: Galley and one-wall kitchens.
If you rent: Choose a collapsible rack that can be stored beneath the sink when not needed.
Common mistake: Leaving a large drying rack permanently on the countertop and losing valuable worktop space.
Measurement rule: Aim to maintain around 30 to 45 cm of clear counter space beside the sink.